
Configuring Post Processing
Background
I ran into a challenging scenario with post processing during my day job as Technical Director at Double Loop Games. I needed more control over how post processing effects were applied to the screen. Specifically, I needed UI elements to be affected in some situations but not others.
Note I’ll be using Unity’s 2D Game Kit to recreate the situation. All the gameplay screenshots in this post are using 2D Game Kit assets, not from our game.
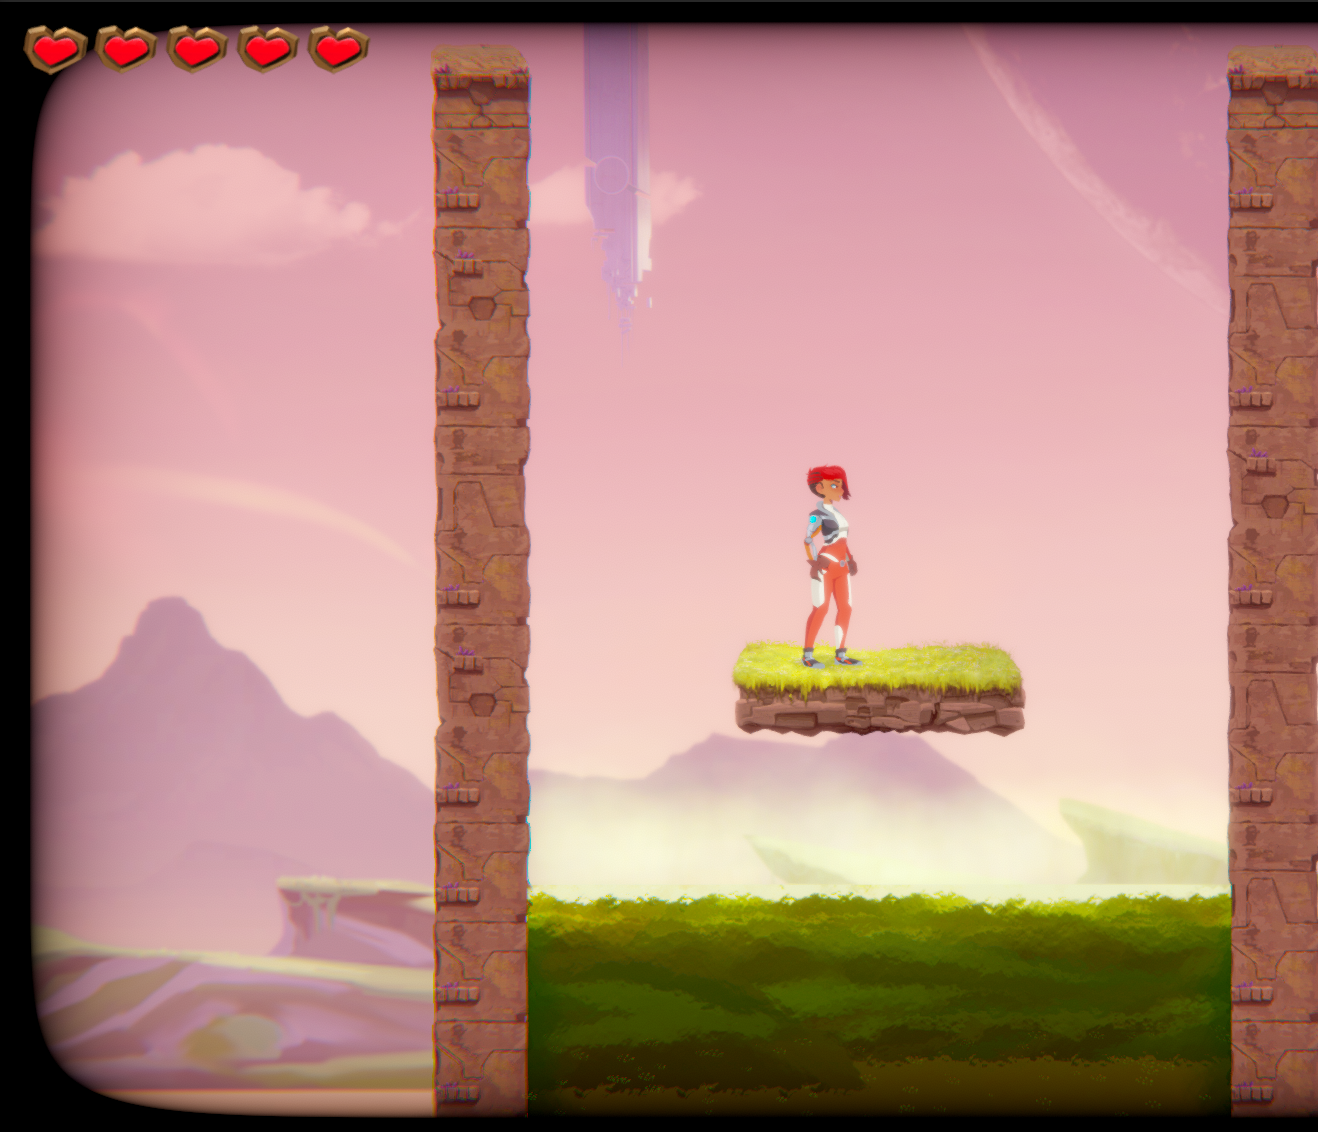
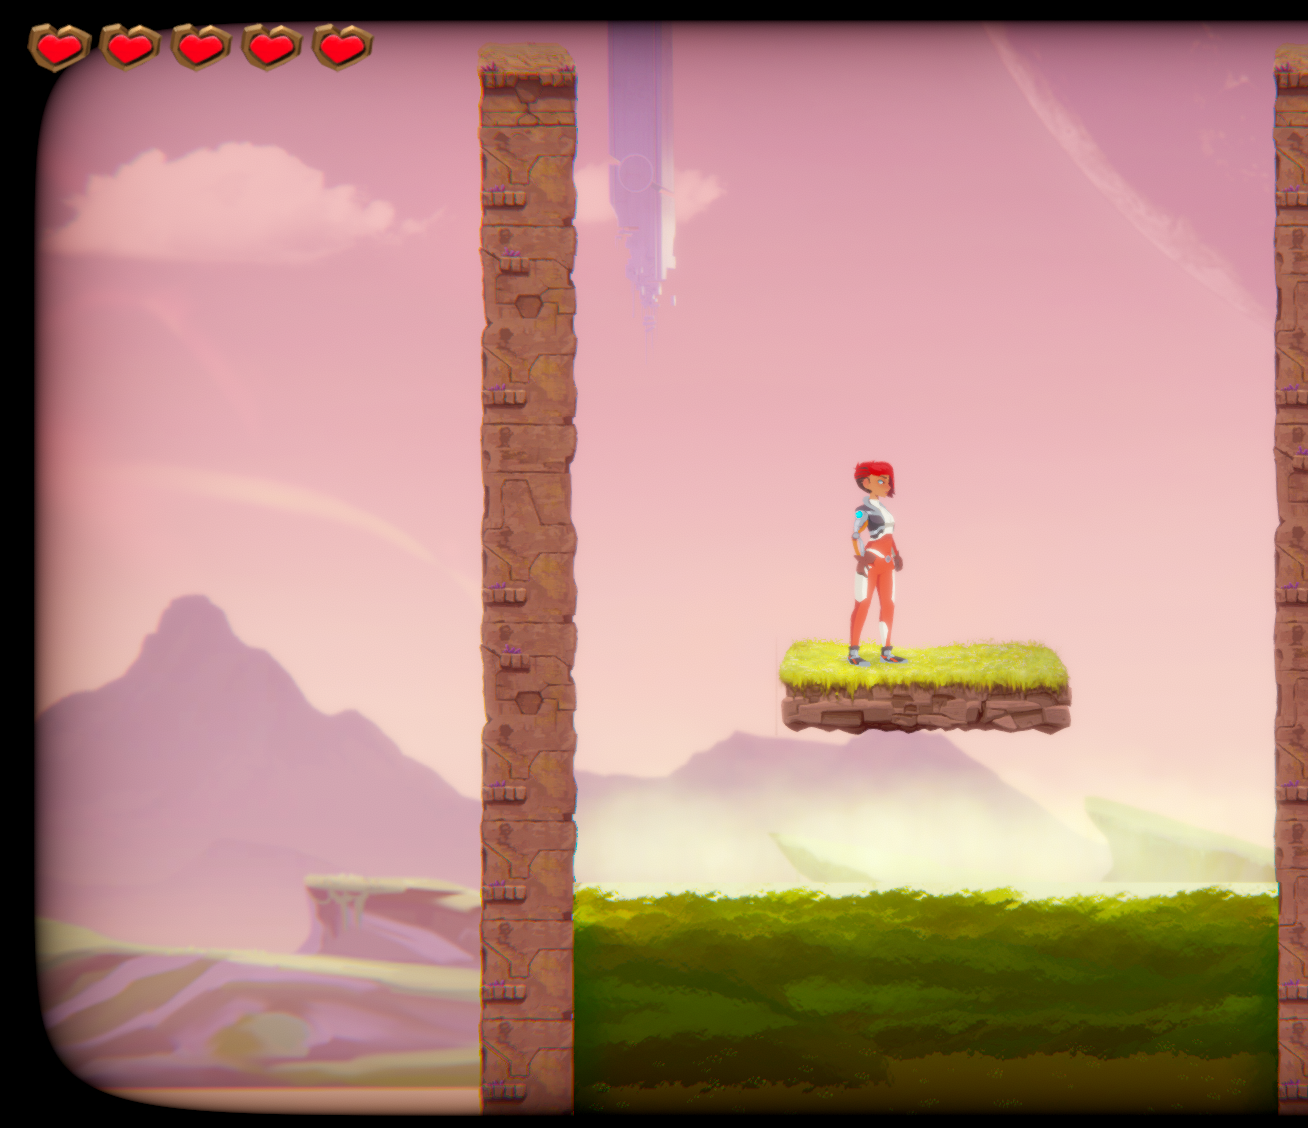
This first screenshot shows the default appearance of the game. Note the thin rectangular vignette around the border and the hearts in the top left corner on top of it. This is working correctly - the hearts are part of the HUD and purposely not affected by a stylistic representation of the world. So far so good.
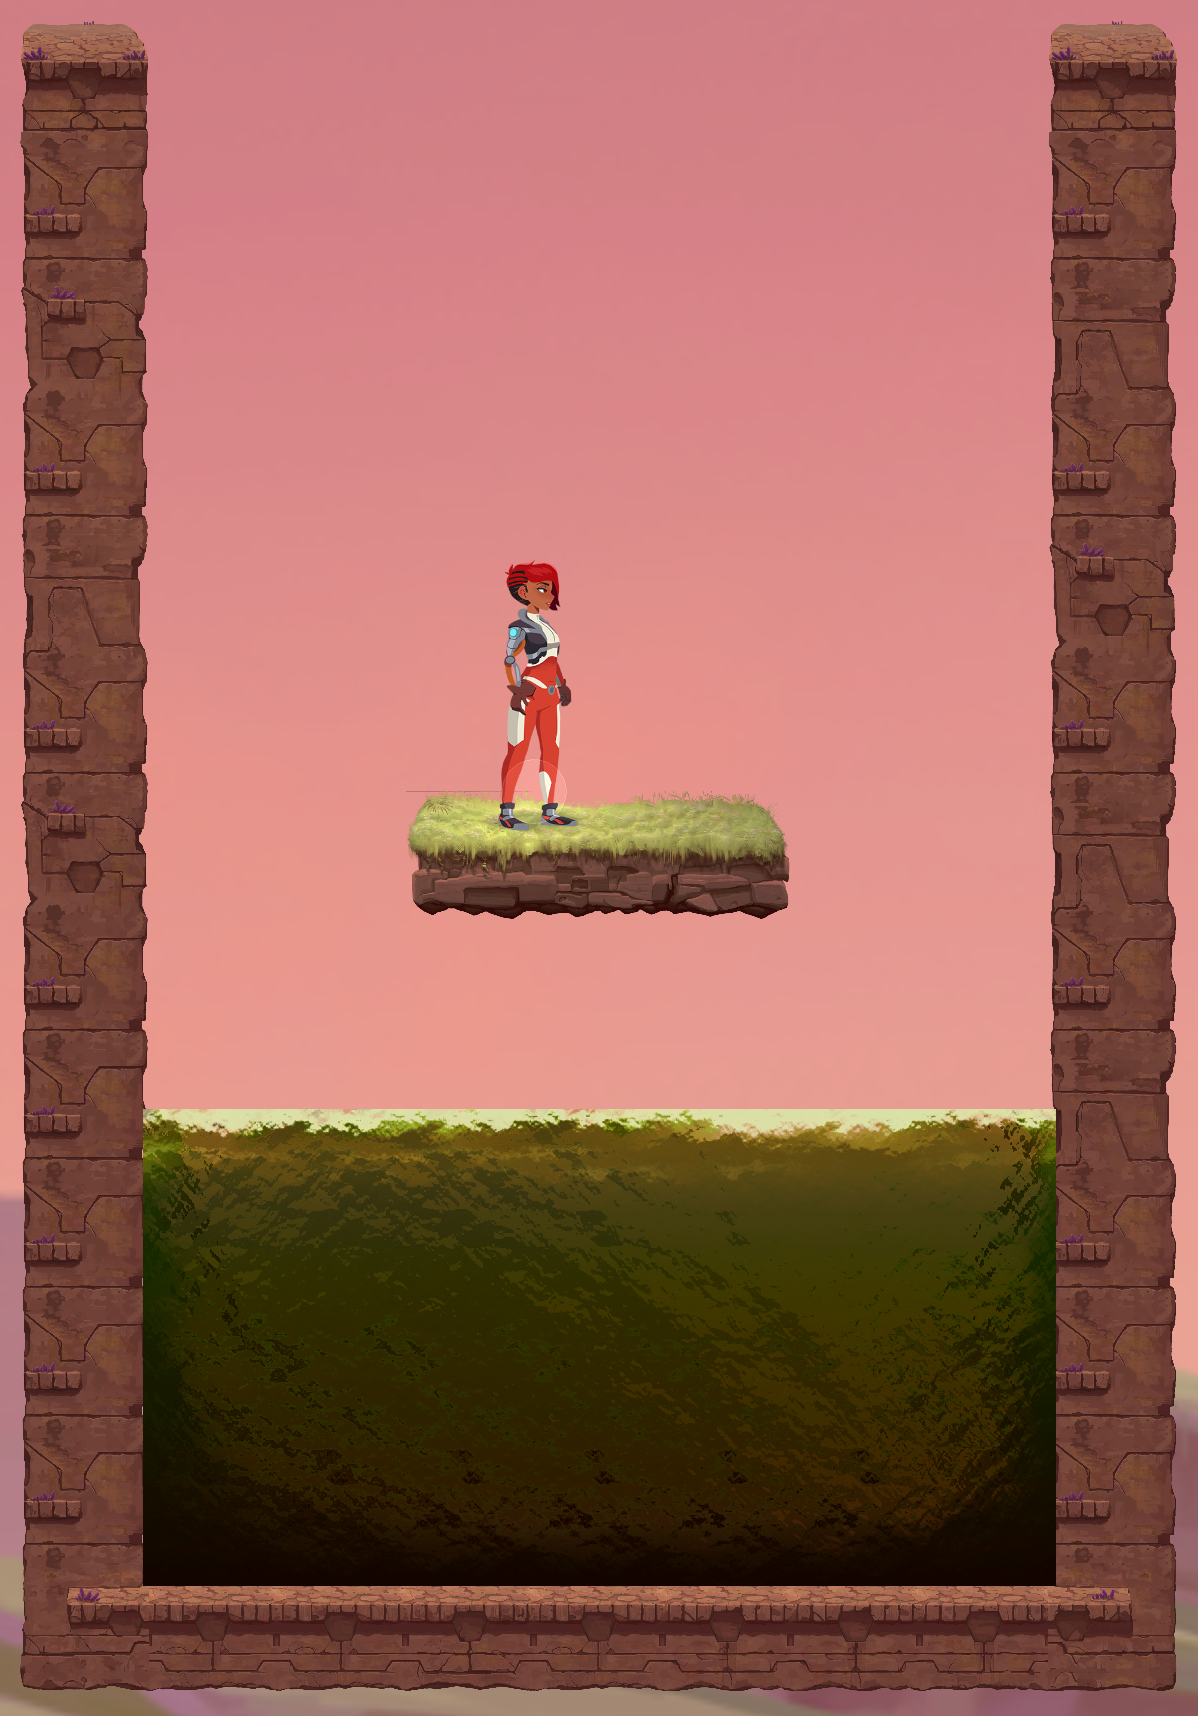
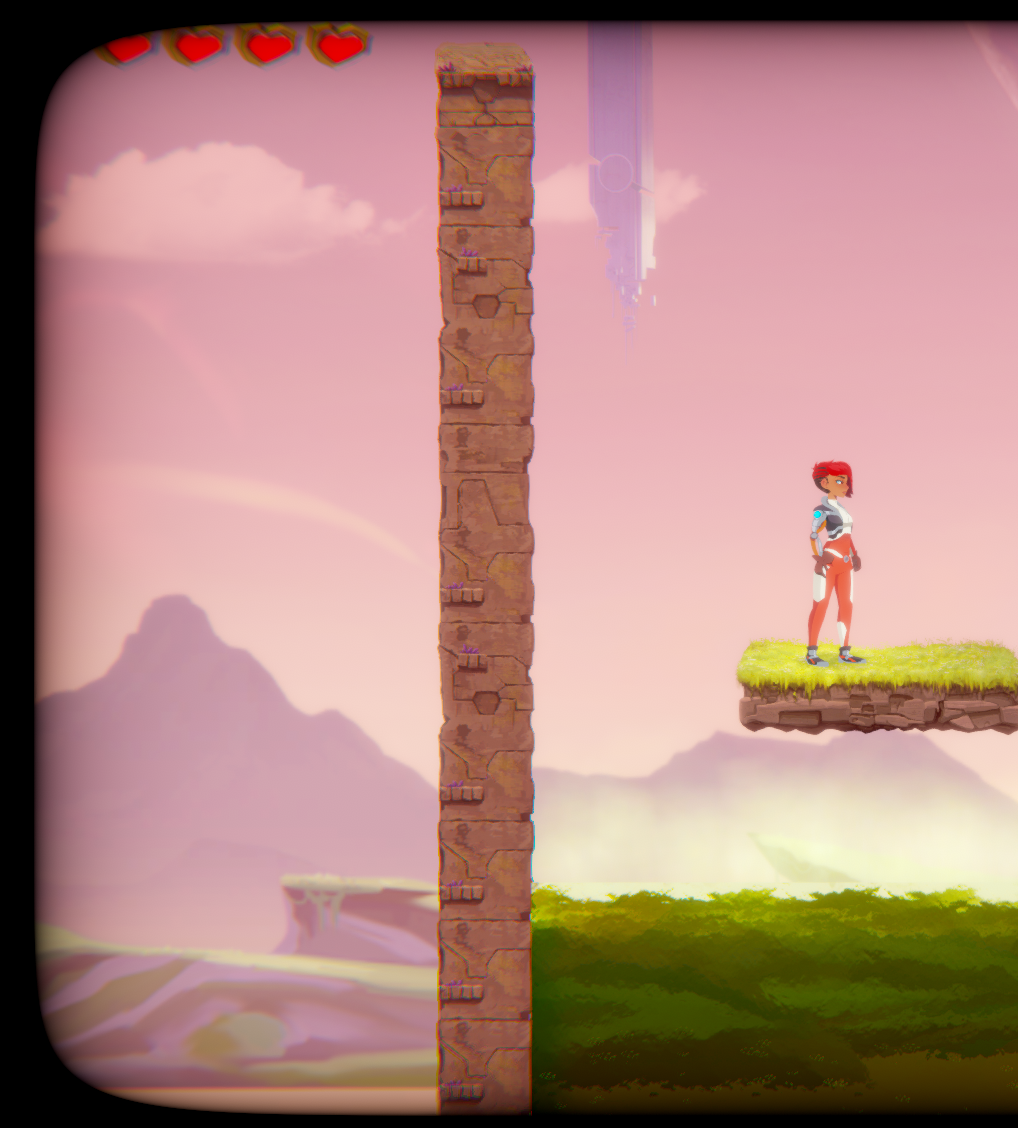
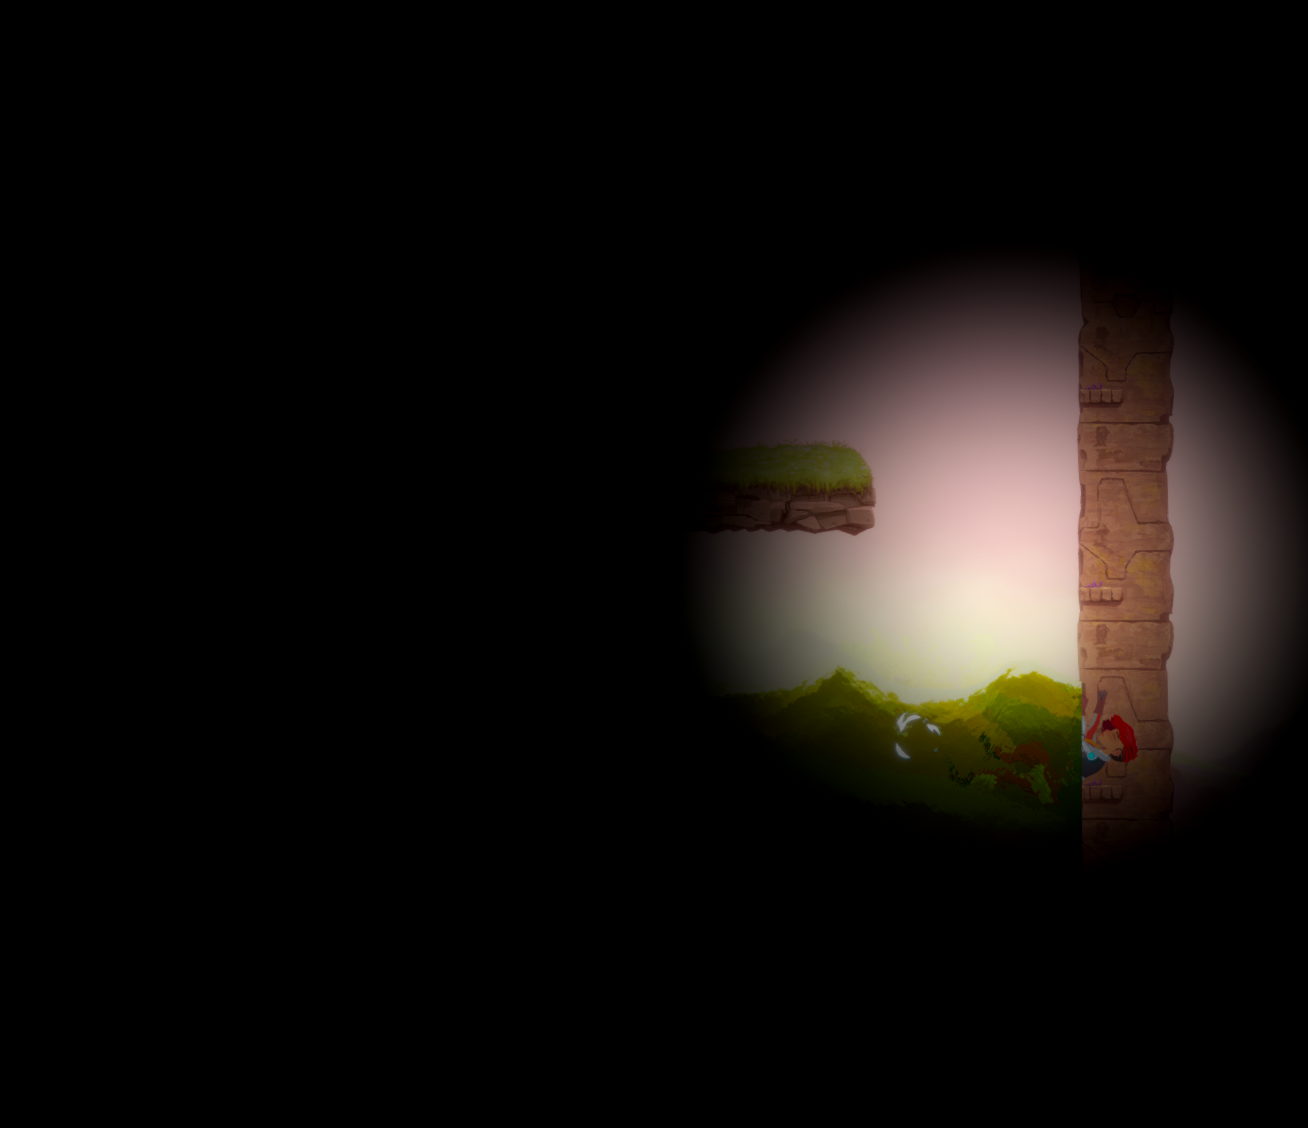
However, I needed those same hearts to be affected by a fullscreen effect in other circumstances - for example, we might want a circular vignette to focus on the character when they die. As you can see in the next screenshot, when I hooked up a separate vignette to do that, the hearts remain visible on top of the second much larger vignette. This just wouldn’t do. Although I’d worked with Unity’s post processing before, I hadn’t run into this specific situation. As far as I could see, all the literature decided to Unity’s post processing is limited to configuring it to begin with and trying to customize the rendering pipeline.

Since our project was using the built-in pipeline, customizing the pipeline wasn’t a palatable option. While we may convert it to the new Scriptable Render Pipeline (SRP) someday, I didn’t want to take the plunge for this specific task since I know the pipeline is still in a state of high flux. Therefore I was limited to using the Post Processing package which can be added to any project using the Package Manager. While it’s quite flexible, because it’s not built on the SRP, there are limitations about how far you can customize it - including the ability to determine where in the rendering pipeline it affects things.
Introduction to post processing
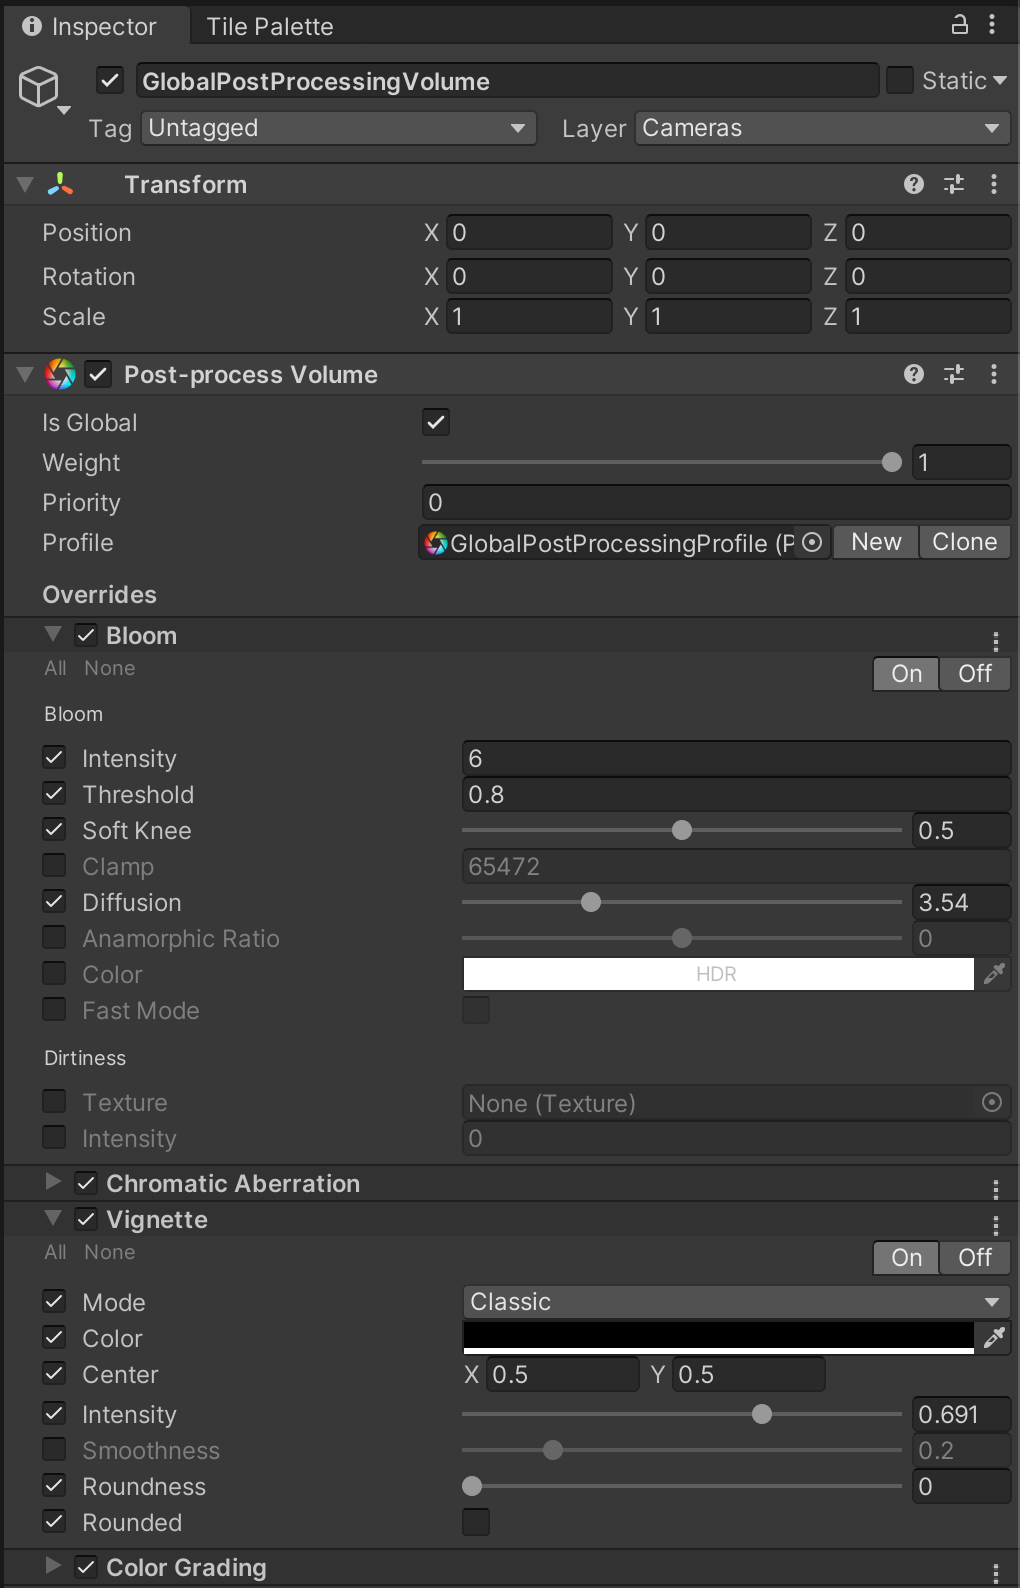
The Post Processing package utilizes one or more “Post-process Volume” components to arrive at a final look. It combines values from both global and nearby local volumes by weight and distance so that the post processing can change as you say go into/out of a building, etc. This lets you do things like automatically change the post processing as a player walks into or out of an area, or in my case have a regular vignette that can be overridden dynamically in response to changing gameplay conditions like the player dying.
The 2D Game Kit is already configured with a few volumes; one that’s global and attached to the camera and others that are positioned in specific locations within the scene-based levels in the project. You can just configure a single global volume if none of the effects need to be localized. You can create as many localized volumes as you desire - they can either share settings or each have unique settings. Just keep in mind that they will blend together based on proximity.
Setting the scene
The 2D Game Kit also makes it easy to make a new scene-based level - it includes a “Kit Tools” menu that you can use to create a scene with all the relevant game objects hooked up and a simple tilemap-based ground for the player to move on. To approximate the scenario I ran into, I created a simple level where the player could take environmental damage (from an acid pool) simply by walking off the starting platform (since the alternative was falling forever and not getting damaged).
I then created a separate post-process volume object that configured the second death vignette. It can go anywhere you want in the scene if it’s configured as global, otherwise it has to be close enough to the camera for it to influence it. I configured the player character to toggle the DeathVignette post-processing volume on. If this were a real game we’d want it to animate in & out and turn back off when the player is revived but I wanted to limit the scope of the example.
Note: while you will see both vignettes in the Game window, depending on how your Scene window is configured, you may or may not see the vignettes there. If you want to toggle Post Processing on or off in the Scene window, click on the effects toolbar button in the top left to display the toggle popup and adjust as you see fit. Personally I usually keep it off since I’ll end up moving the camera around quite a bit and it’s focused on different areas than the Game window to help debug things, but I can see that it might be useful if you want to dial in the look and can’t have the Game window visible at the same time.
While it might not have been noticeable that the original vignette wasn’t affecting the UI, it’s definitely noticeable now. Why is this happening and how can we fix it? To understand this, I’ll first explain a bit more about how the demo is configured.
Painting the canvas
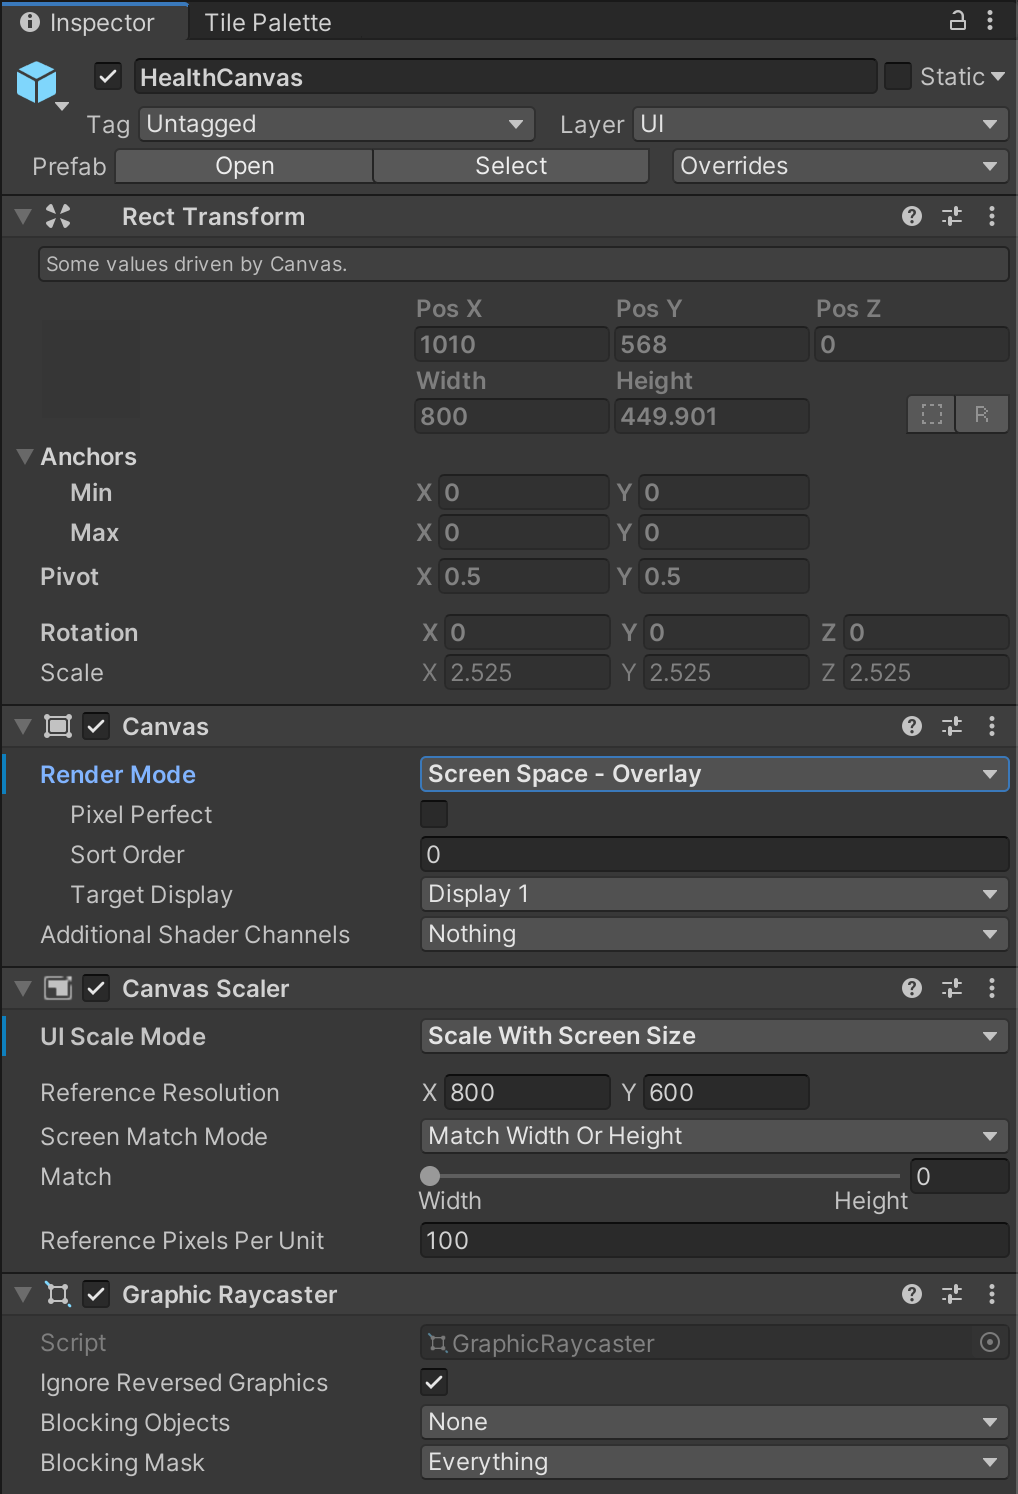
By default, the scene-based levels in the 2D Game Kit contain a top-level game object called HealthCanvas that displays the player’s life in the top left corner of the screen. Unity’s standard UI controls are contained within one or more canvases. Canvases speed up rendering the UI by drawing all UI controls it manages together. While you can adjust their relative sort order, you can’t make individual controls draw separately without splitting them into a different canvas.
The HealthCanvas is using a Screen Space - Overlay canvas. This means that it draws after everything else in the scene. I recommend using this type of canvas for menus and anything else that always needs to draw last and on top of everything, although it can prove trickier when processing events since there’s no camera associated with the canvas which might be helpful to perform conversions between canvas and screen space.
There’s a second type of canvas known as Screen Space - Camera which operates similarly but finishes rendering everything (including the contents of any canvases) before post processing applies. I recommend using this type of canvas when the content of the camera needs to be displayed on a screen in world on top of everything else the camera renders.
There’s also a third and final type of canvas known as a World Space canvas. Since the canvas is in the world, any cameras that can see the canvas will render it intermingled with other content in the scene. This canvas is best when UI is expected to be part of the game world itself - i.e. for health bars, floating combat text, etc.
Troubleshooting
As soon as I hooked up the death vignette, played the game, and took damage, I noticed the new vignette was still not affecting the HealthCanvas. As it turns out, Screen Space - Overlay canvases render after post processing. Screen Space - Camera and World Space canvases both render before. While this is probably sufficient for many use cases, many games have world-relative UI that should be affected by full screen effects like a vignette. I suspect this is one of many reasons that led to the creation of the SRP since it gives you much more fine grained control over the order of things. Alas, I couldn’t leverage that here.
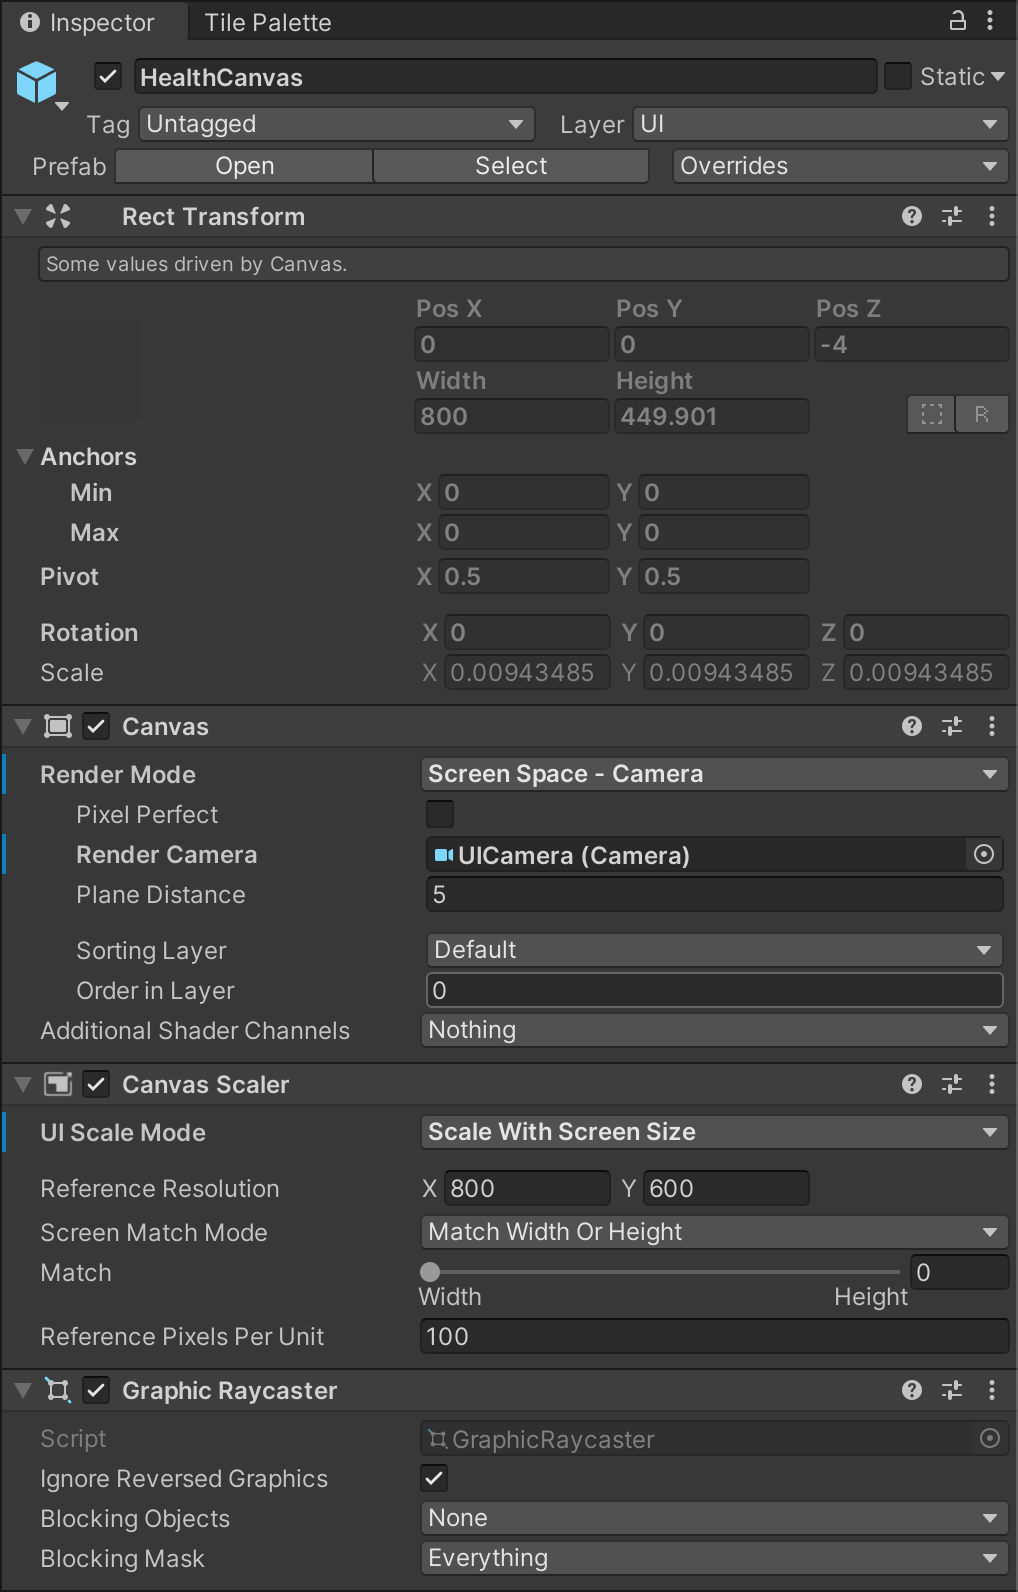
I needed to switch the canvas type to one of the other options (in this case Screen Space - Camera) to ensure that it renders before post processing. Unfortunately while it would render correctly with the death vignette, the original vignette would also render on top of the health canvas (you can see that below). While I could move it farther away from the corner, design & art might prefer it in the original location and expect you to make it ignore the original vignette.
Unmasking the solution
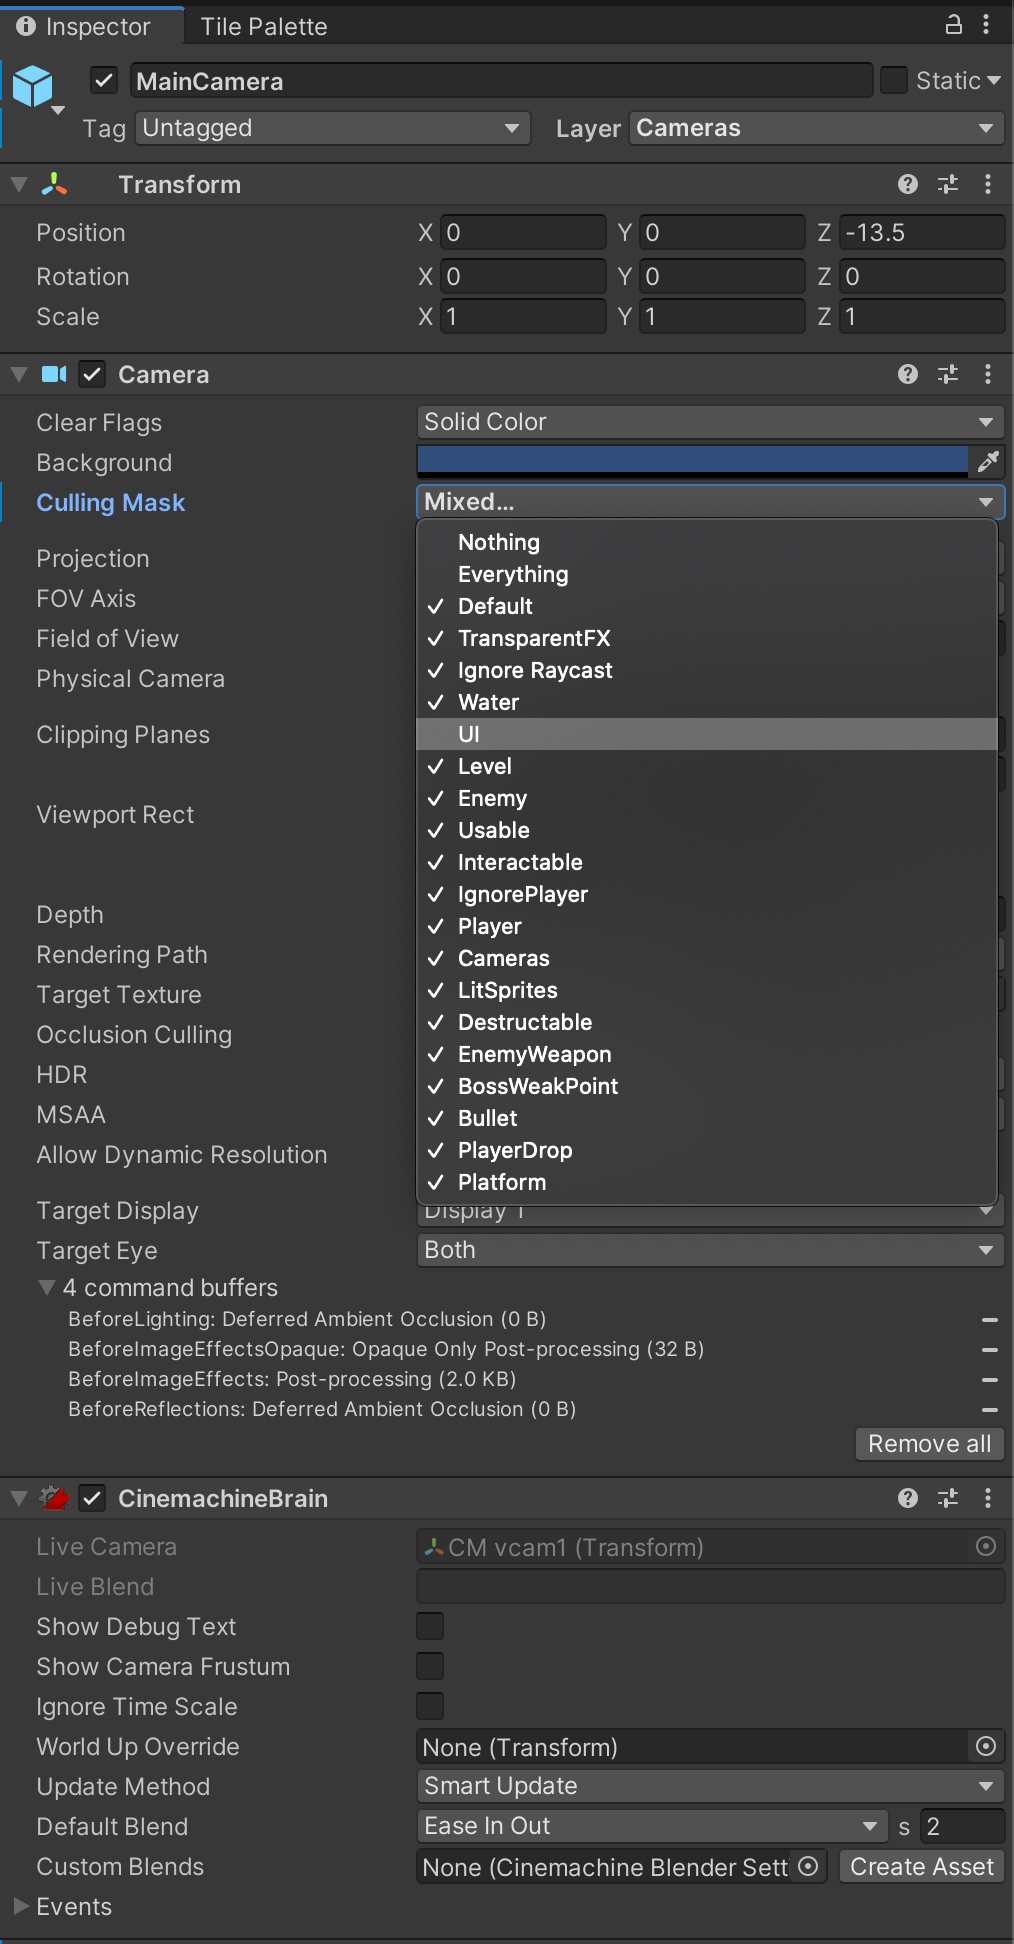
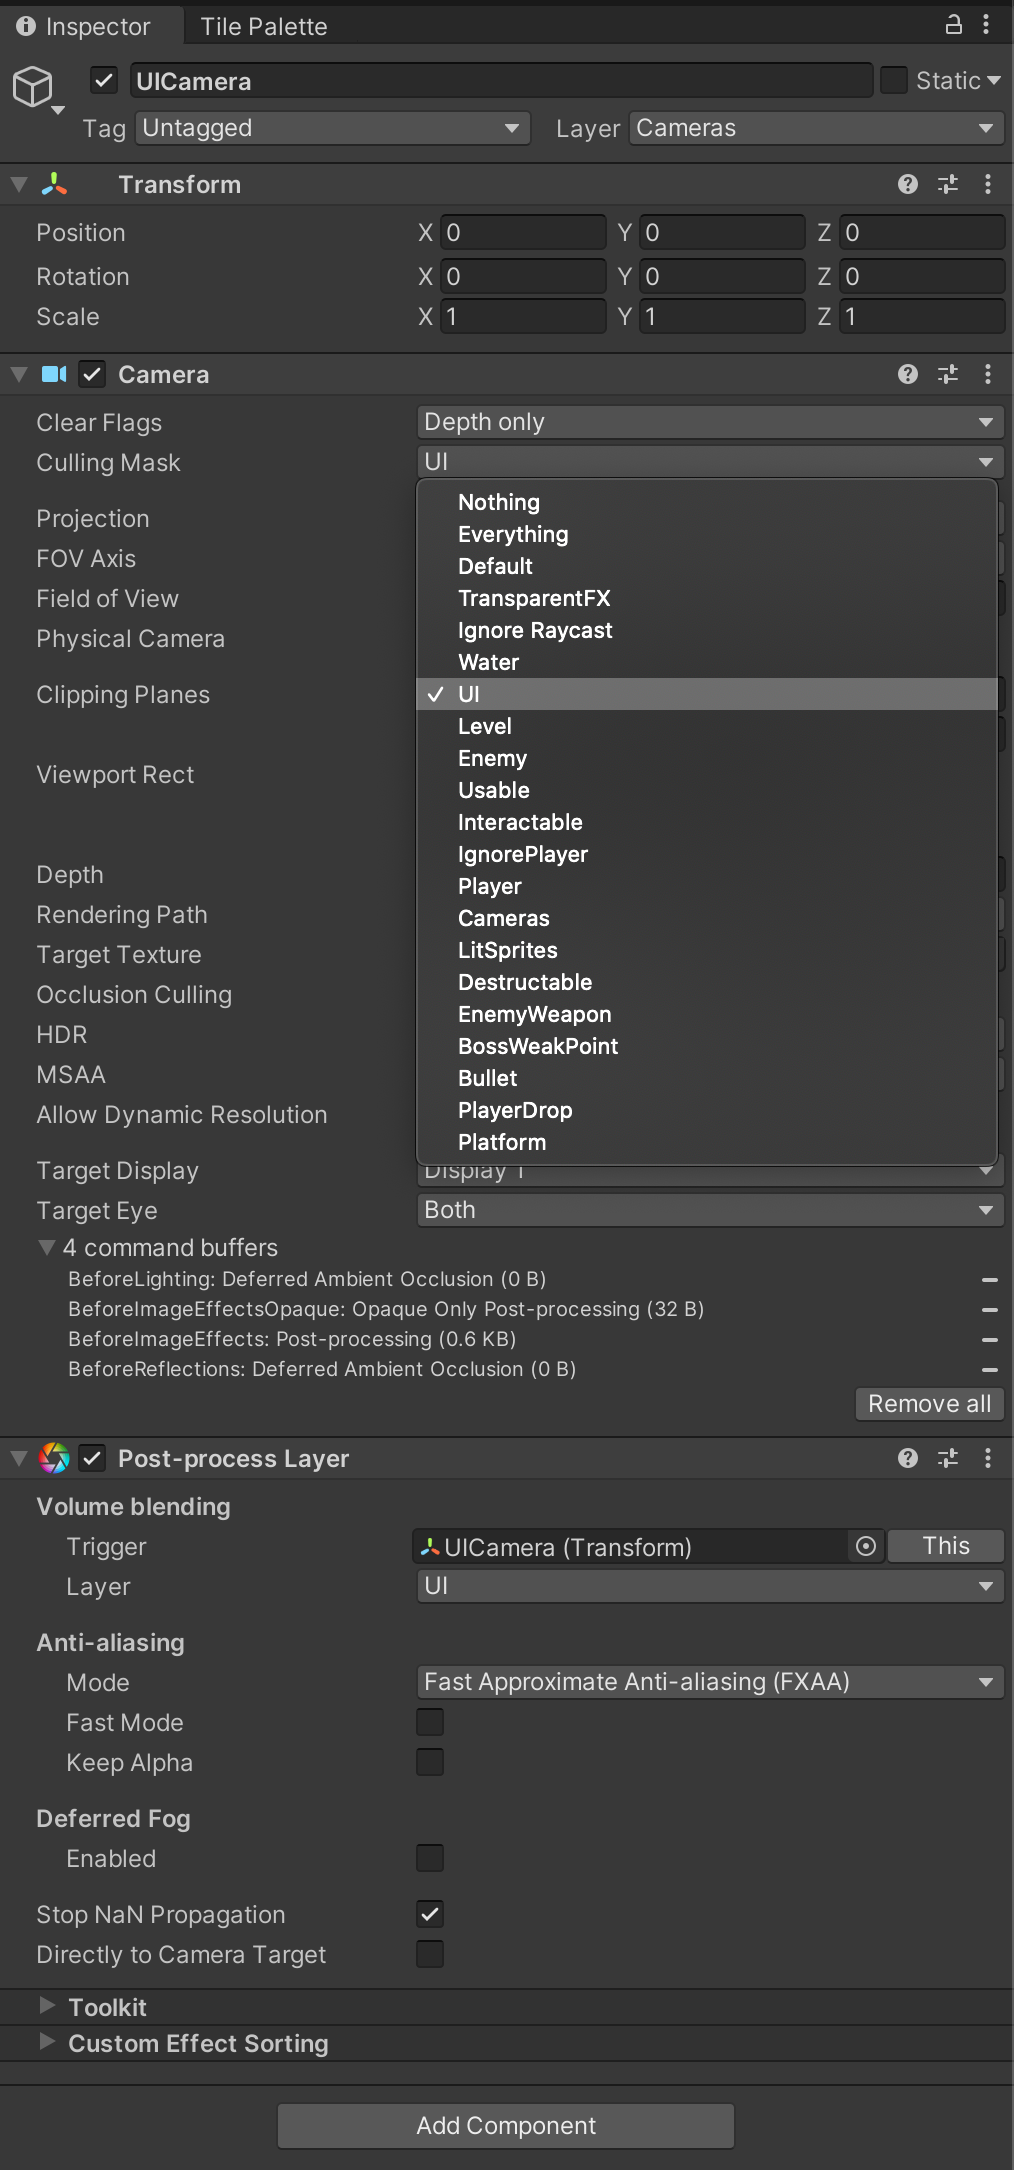
Essentially I wanted to mimic the control that the SRP allowed without actually converting to it so that I could ensure that the world rendered first (with the original vignette), the UI rendered next, then the death vignette, and then any remaining UI menus. As it turns out, cameras have a culling mask that determines which renderer components are drawn by the camera based on the layer each game object is assigned to. If we could move the HUD to a separate layer, then we could presumably draw individual elements of the scene separately in the right order.
By the way, as I mentioned above, canvases batch multiple objects together so the only layer that matters is the layer of the canvas object, not those of any controls or child canvases. This means that if you need to have some UI controls affected by post processing and others not be affected, they’ll need to be in unique canvas hierarchies. I tried to circumvent this by adding a “firebreak” game object (where I removed the RectTransform component leaving just a Transform) and then creating a new canvas as a child of that object, but that still didn’t work. There seems to be some innate functionality to search up the hierarchy for the topmost canvas even when the RectTransform hierarchy is broken.
Stacking things in our favor
I considered two ways of splitting up the rendering: using a render texture or a technique known as camera stacking. I didn’t want to go the render texture route since post processing already uses a render texture, so I’ll save digging into that approach for another time. Thankfully camera stacking solved the rendering issues very cleanly.
What is camera stacking, exactly? It involves the overlapped rendering of camera contents. To do this you need to configuring a camera to not clear the color buffer (whether you should clear the depth buffer depends on what you’re trying to do). Make sure that only the first camera in the stack clears the color buffer. You can do it with a single camera by dynamically changing the culling mask and rendering its contents in a camera rendering callback, but that can make it difficult to debug since you’ll only ever see the last settings each frame. Duplicating a camera object and making it the child of the original is pretty simple, although you’ll have to remember to keep relevant properties in sync (like anti-aliasing settings).
Closing thoughts
The camera stacking solution didn’t work in the SRP until very recently. Although the technique had been used for years with the built-in pipeline it wasn’t until recently that Unity added support to configure that, a little more explicitly now (cameras have an explicit stack section to configure). However, if you’re already using the SRP then you have enough control over the order post processing happens to not need to rely on camera stacking to solve this.
At the end of the day, using separate layers and cameras to get the HUD to not be affected by post-processing is a pretty simple solution that doesn’t require any custom scripting. Hopefully I’ll remember this solution again if something similar comes up. In the meantime, it seemed worth recording in case it saves anyone else time.
Since the 2D Game Kit is freely available from Unity’s Asset Store here and governed by a separate license, I can’t provide access to a full project. However, you can still check out my example project to see how the post processing volume & cameras are configured. In the meantime, I’ll ping Unity about turning the 2D Game Kit into a package so it can be shared more easily.
Please let me know what future topics you’d be interested in or what you thought of this post. Thanks for reading!