
Spectra Gadget
In this post I will demonstrate how to create a simple color filtering post processing effect for the Post Processing package. If you want to learn how to customize which game objects these effects are applied to, my first post discusses how to do that. Although Unity’s Scriptable Render Pipeline supports post processing, it doesn’t yet support creating custom effects so I’m going to remain focused on built-in pipeline support. The finished project, Spectra, is available as a Unity package that can be installed with the Package Manager. Note that the project supports more filters that I’ll describe in a future post. While you can already achieve the same results with the Color Grading effect in the Post Processing package, it doesn’t provide ready-to-use preset colors and it’s a useful simple example to start with.
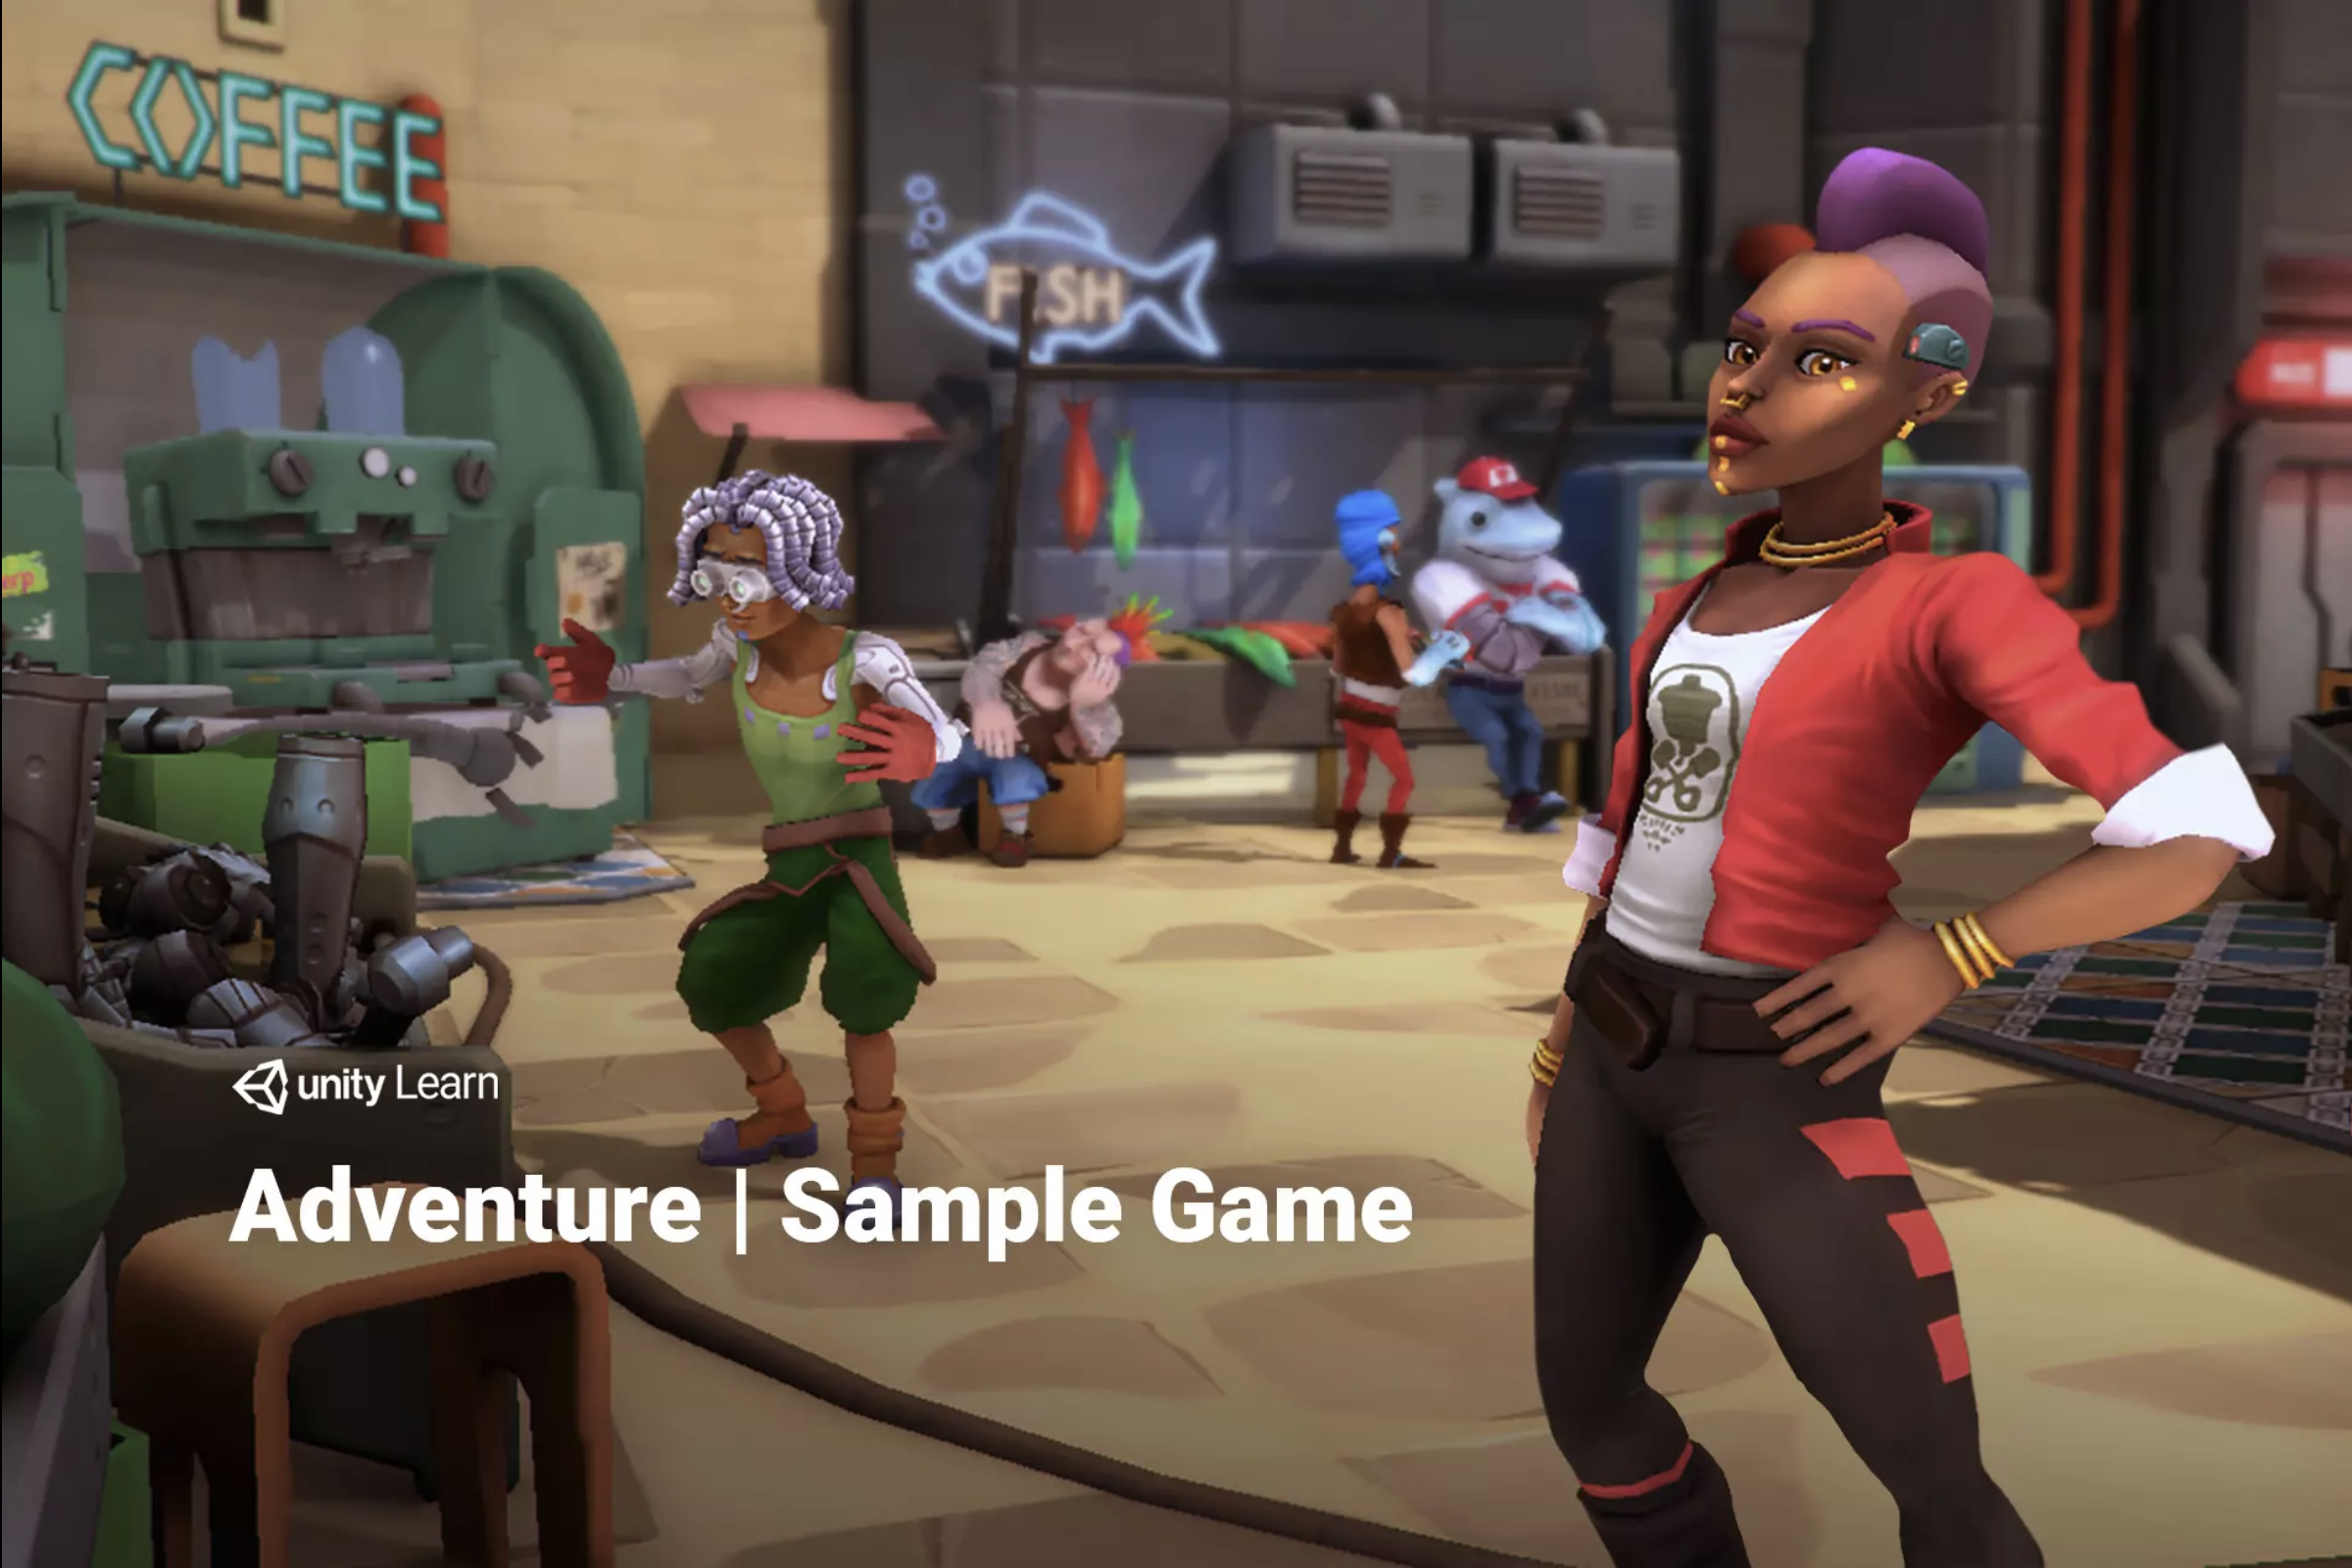 Note I’m using assets from Unity’s Adventure Sample Game to demonstrate the new effects.
All the gameplay screenshots in this post are using Adventure Sample Game assets, not from the unannounced Double Loop game.
Providing Options
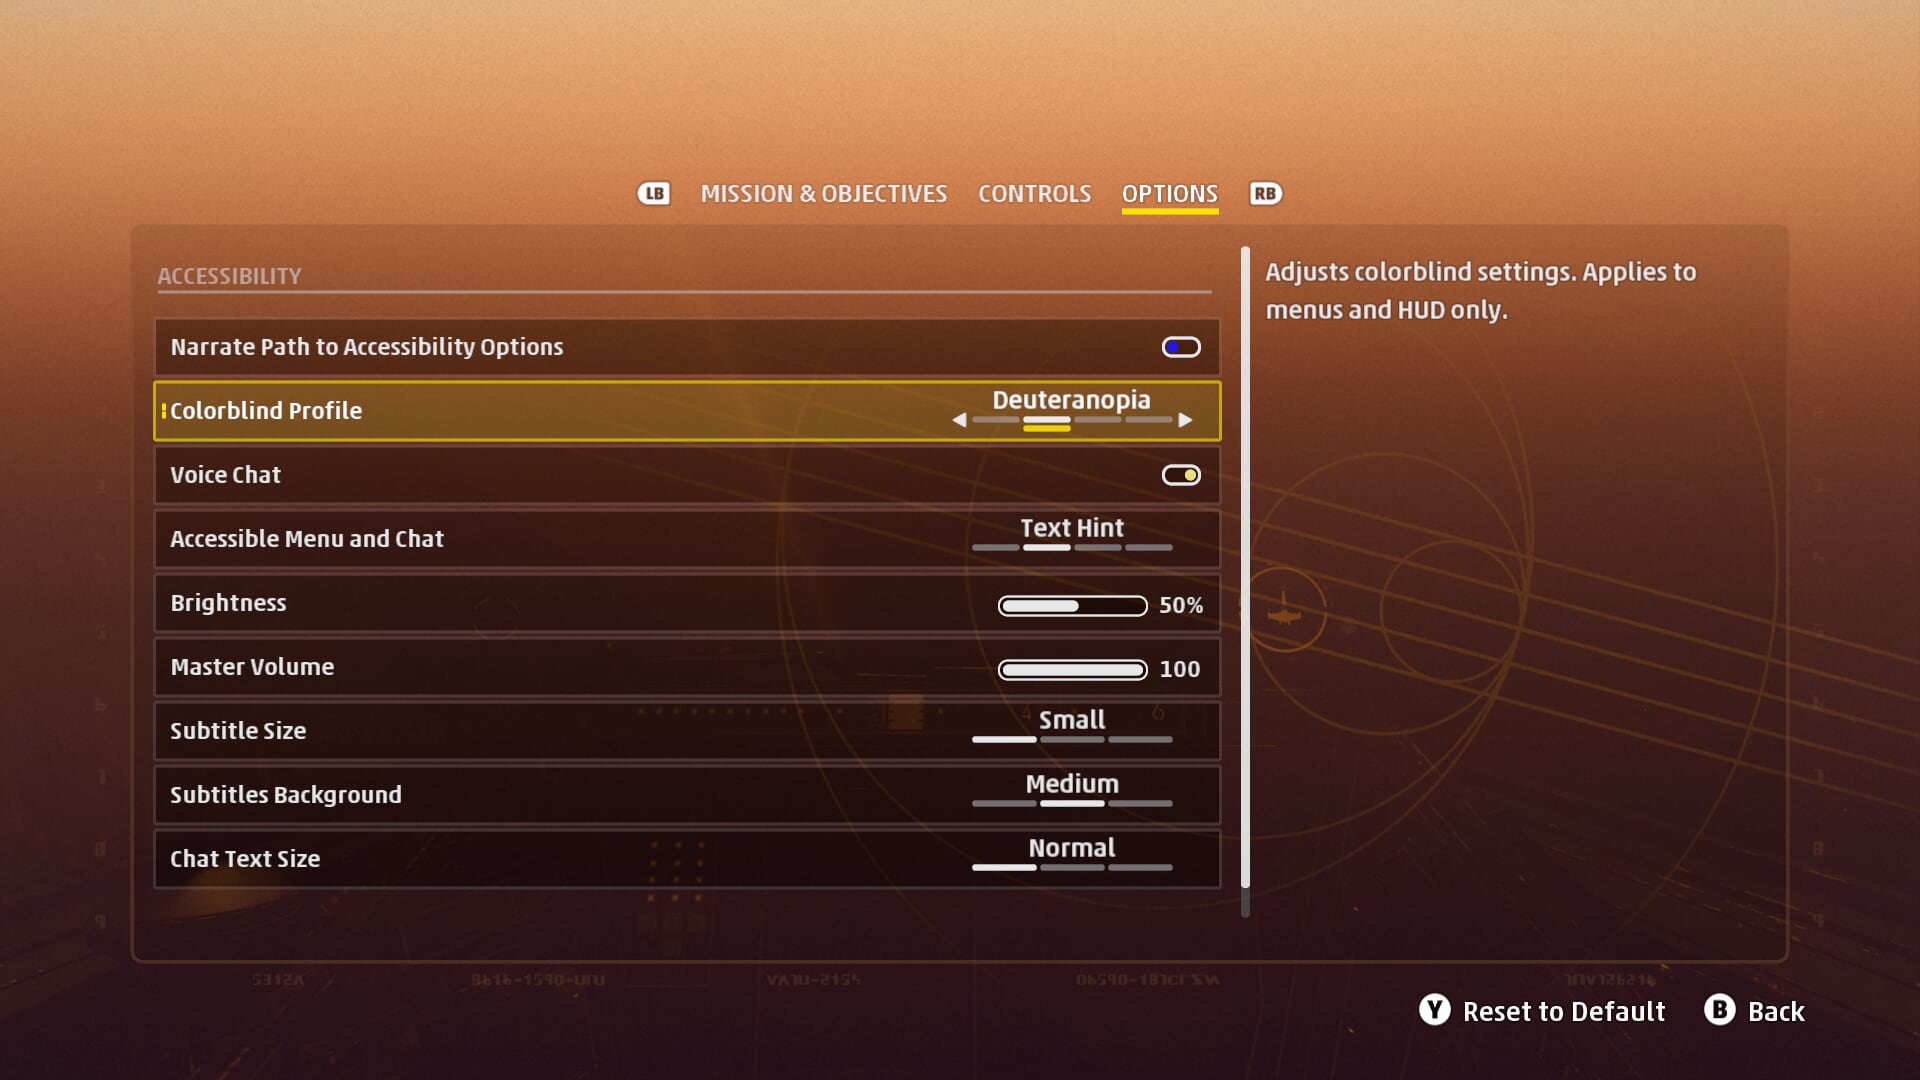
I recently played Star Wars: Squadrons and was pleased to see the accessibility (a11y) options available, including support for recoloring the UI to support different vision. As someone who implemented several accessibility options in StarCraft II and Heroes of the Storm, I thought it’d be helpful to cover how to talk about how you could use post processing effects to simulate what your game would look like for different folks. The color filtering doesn’t by itself solve accessibility challenges - but it at least helps you as a developer understand where folks with different sight might otherwise have difficulty trying to make sense of colors outside of their range of vision. Toggling the different filters on should help you understand where the colors you’ve chosen might be too limiting by themselves. A great option is to use color and pattern where you can to help ensure that important gameplay elements are visually distinct from each other.
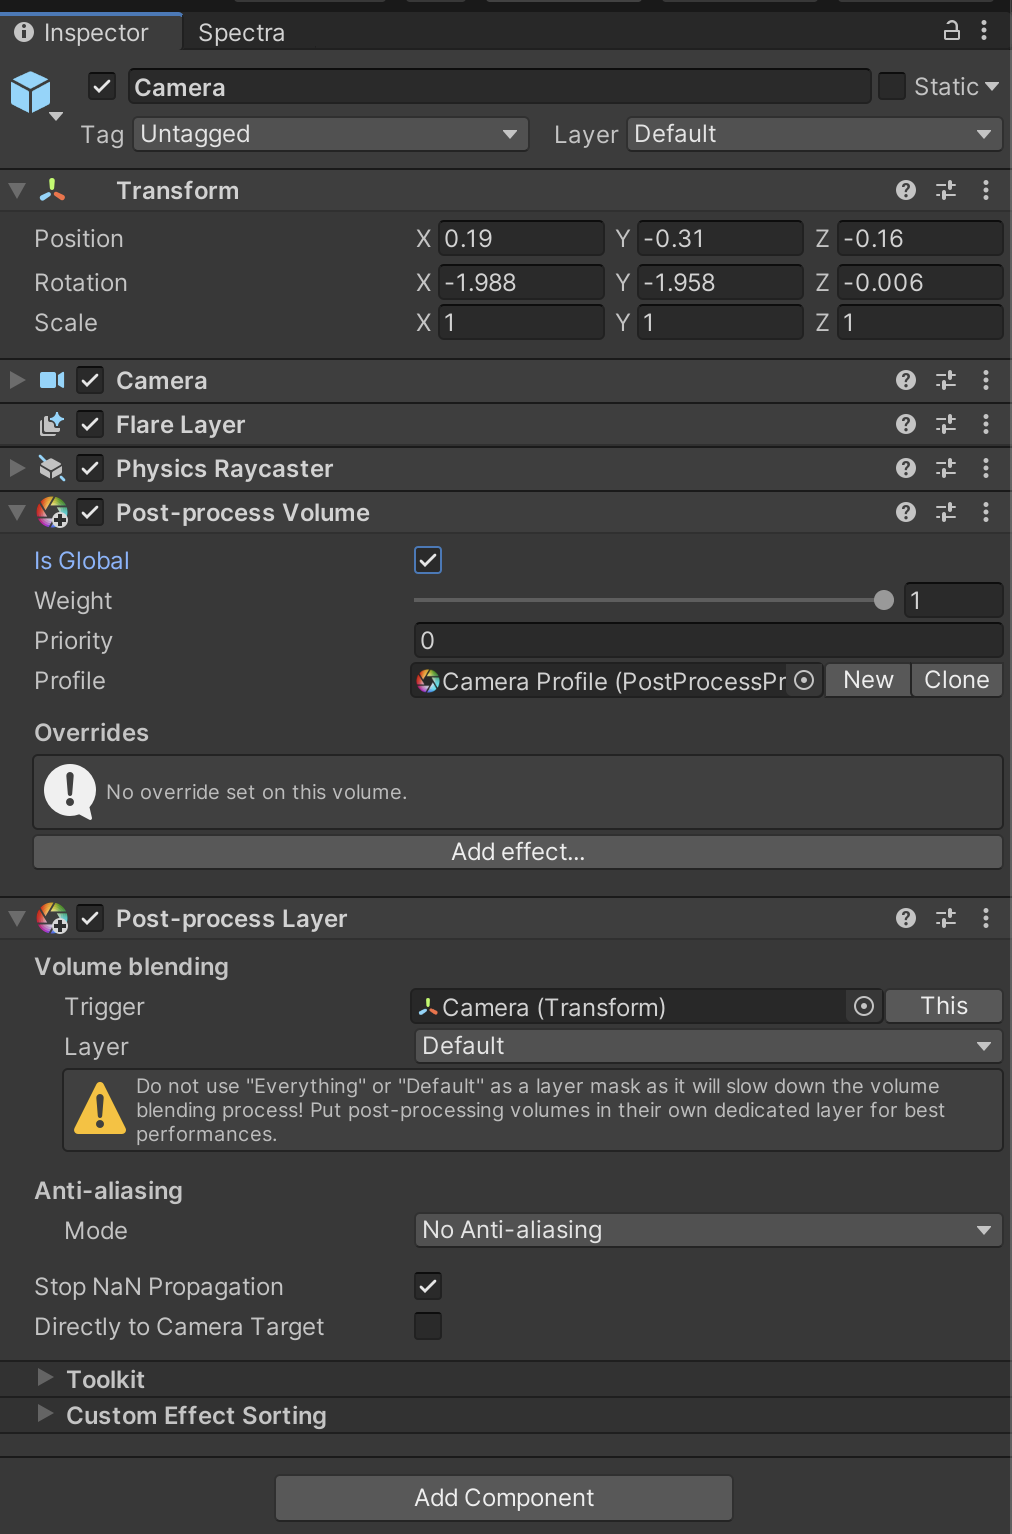
The post processing package has a great (but brief) summary of how to extend the package with your own effects and that’s what I’ve done here. If you read my first post, you may recall that the post processing system uses volumes to control how the post processing affects the camera. Each volume contains a set of effects that are mixed and attenuated based on range from any camera with a compatible post processing layer mask. For simplicity I’m just going to be configuring the effects directly on a global volume attached to the camera, but you can attach them to independent game objects if you wish. As you can see in the screenshot below, Unity helpfully warns on the Post-process Layer component that you should not be using the Default layer for post processing volumes since it increases the performance cost but since I just had a small throwaway scene I left it there.
Enter The Matrix
The first effect that we’re going to work on will be support to remap color values into a different range. This will support different vision types and can also be used for grayscale, monochrome, and sepia tones. How does this work, exactly? Well, if you’ve worked with shaders before you may have realized that shaders effectively boil down to a series of mathematical equations to determine the color of each pixel on screen.
In order to remap into a different color range, we’ll be multiplying the input color (the result of the previous post processing effect or the camera output if there is none) by a 3x3 matrix. If that sounds scary or your only reference is the 1999 Wachowski film, don’t worry, the matrix multiplication is just a shortcut for a series of multiplications and additions. In this case, each row of the matrix is used to convert the 3-channel input color (Red, Green, and Blue) into one channel of a 3-channel output color. If you only have one row set, then your output will just be Red, Green, or Blue.
1
2
3
4
5
6
7
8
9
10
11
12
13
14
15
16
17
18
19
20
21
22
23
24
25
26
    half3 red = half3(1, 0, 0);
    half3 green = half3(0, 1, 0);
    half3 blue = half3(0, 0, 1);
    half3 white = half3(1, 1, 1);
    half3 black = half3(0, 0, 0);

    half3x3 greenMatrix = half3x3(half3(0, 0, 0), half3(1, 1, 1), half3(0, 0, 0));

    // Convert the color to green.
    half3 redResult = mul(greenMatrix, red);
    half3 greenResult = mul(greenMatrix, green);
    half3 blueResult = mul(greenMatrix, blue);
    half3 whiteResult = mul(greenMatrix, white);
    half3 blackResult = mul(greenMatrix, black);

    // redResult is now 0, 1, 0
    // greenResult is now 0, 1, 0
    // blueResult is now 0, 1, 0
    // whiteResult is now 0, 3, 0
    // blackResult is now 0, 0, 0

    // mul(greenMatrix, red) is equivalent to
    redResult = half3(
        greenMatrix[0].x * red.x + greenMatrix[0].y * red.y + greenMatrix[0].z * red.z,
        greenMatrix[1].x * red.x + greenMatrix[1].y * red.y + greenMatrix[1].z * red.z,
        greenMatrix[2].x * red.x + greenMatrix[2].y * red.y + greenMatrix[2].z * red.z);
Since the value for each component of the output is based on the sum of multiplications, you may need to adjust the values in the matrix to avoid over-saturation. For example, white ends up being 3x brighter since it’s adding the full red, green, and blue components of white together and then putting the result in the green component. A good rule of thumb is to pick matrix values such that the sum of values in each row does not exceed 1. By the way, you may have also recognized that the formula to evaluate each row is the dot product (the sum of a component-wise multiplication). This can be used as a shortcut to avoid creating a full matrix when you just want one component (i.e. to calculate the luminance). Using vector swizzling to repeat/rearrange the components you can convert it back to a color.
1
2
3
4
5
6
7
8
9
10
11
12
13
14
    half3 luminance = half3(0.213, 0.715, 0.072);

    // Convert the color to grayscale with vector swizzling.
    half3 redResult = dot(luminance, red).rrr;
    half3 greenResult = dot(luminance, green).rrr;
    half3 blueResult = dot(luminance, blue).rrr;
    half3 whiteResult = dot(luminance, white).rrr;
    half3 blackResult = dot(luminance, black).rrr;

    // redResult is now 0.213, 0.213, 0.213
    // greenResult is now 0.715, 0.715, 0.715
    // blueResult is now 0.072, 0.072, 0.072
    // whiteResult is now 1, 1, 1
    // blackResult is now 0, 0, 0
Not to go too deep into RGB color theory but since the luminance contribution from 100% blue is much smaller than it is for green or red, the grayscale value for 100% blue is intentionally closer to black.
A Horse of a Different Color
There are many alternate forms of vision which can’t perceive the full range of possible colors including both “normal” and “anomalous” segments (at least that’s how wikipedia refers to them). While some are more common than others (deuteranomaly for example affects 6% of men), if you’re able to add support for at least one form I’d encourage you to use the filters to simulate the others and see if you can accommodate them, too. 1% of your players can still end up being many players who will appreciate your diligence. As I mentioned above, unique patterns and shapes can help differentiate things when colors alone may not.
Here’s the shader responsible for converting input color (from the implicitly provided main texture - either the output of the previous post processing effect or the camera output) into the desired output color. As you can see, it includes the matrix multiplication we saw above while it also uses a lerp (short for linear interpolation) to blend between the input color and the converted color using the _Blend property. Otherwise pretty simple; the Post Processing Pack’s VertDefault does the heavy lifting to get the VaryingsDefault input parameter setup. Since Unity doesn’t support a Matrix property type, I’ve specified each row as its own Vector property. Technically the Vector property is a 4-component vector but we’ll just ignore the last component. It’s also worth noting that it doesn’t really make sense to turn culling, depth writing, and depth testing on for a post processing effect because it’s expected to be used to output a render texture without blending with anything. If you want to reuse the color filtering in other shaders, make sure that you configure the Cull, ZWrite, and ZTest values as appropriate.
1
2
3
4
5
6
7
8
9
10
11
12
13
14
15
16
17
18
19
20
21
22
23
24
25
26
27
28
29
30
31
32
33
34
35
36
37
38
39
40
41
Shader "Spectra/Postprocess/Color Filter"
{
    Properties
    {
        _Blend ("Filter Intensity", Range(0, 1)) = 1.0
        _RedMix ("Red Mix", Vector) = (1, 0, 0, 1)
        _GreenMix ("Green Mix", Vector) = (0, 1, 0, 1)
        _BlueMix ("Blue Mix", Vector) = (0, 0, 1, 1)
    }

    HLSLINCLUDE
        #include "../StdLib.hlsl"

        TEXTURE2D_SAMPLER2D(_MainTex, sampler_MainTex);
        float4 _MainTex_ST;
        half _Blend;
        half4 _RedMix;
        half4 _GreenMix;
        half4 _BlueMix;

        half4 Frag (VaryingsDefault input) : SV_Target {
            float4 color = SAMPLE_TEXTURE2D(_MainTex, sampler_MainTex, input.texcoord);
            float4 filteredColor = mul(half3x3(_RedMix.rgb, _GreenMix.rgb, _BlueMix.rgb), color.rgb);
            color.rgb = lerp(color.rgb, filteredColor, _Blend.xxx);
            return color;
        }
    ENDHLSL

    SubShader {
        Cull Off
        ZWrite Off
        ZTest Always

        Pass {
            HLSLPROGRAM
                #pragma vertex VertDefault
                #pragma fragment Frag
            ENDHLSL
        }
    }
}
The code for the effect itself is also very similar to the example Grayscale effect from Unity’s Post Processing Package site, but in this case I’ve added additional properties for each mixing row.
1
2
3
4
5
6
7
8
9
10
11
12
13
14
15
16
17
18
19
20
21
22
23
24
25
26
27
28
29
30
31
32
33
34
35
36
37
38
39
using System;
using UnityEngine;
using UnityEngine.Rendering.PostProcessing;

namespace Spectra.Runtime.Effects
{
    [Serializable]
    [PostProcess(renderer: typeof(ColorFilterRenderer),
        eventType: PostProcessEvent.AfterStack,
        menuItem: "Spectra/Color Filter")]
    public class ColorFilterEffect : PostProcessEffectSettings
    {
        #region Fields
        [Range(min: 0f, max: 1f), Tooltip(tooltip: "Filter intensity.")]
        public FloatParameter Blend = new FloatParameter { value = 1.0f };

        public ColorParameter RedMix = new ColorParameter { value = Color.red };
        public ColorParameter GreenMix = new ColorParameter { value = Color.green };
        public ColorParameter BlueMix = new ColorParameter { value = Color.blue };
        #endregion
    }

    public class ColorFilterRenderer : PostProcessEffectRenderer<ColorFilterEffect>
    {
        public override void Render(PostProcessRenderContext context)
        {
            var sheet = context.propertySheets.Get(
                shader: Shader.Find(name: "Spectra/Postprocess/Color Filter"));
            sheet.properties.SetFloat(name: "_Blend", value: settings.Blend);
            sheet.properties.SetColor(name: "_RedMix", value: settings.RedMix);
            sheet.properties.SetColor(name: "_GreenMix", value: settings.GreenMix);
            sheet.properties.SetColor(name: "_BlueMix", value: settings.BlueMix);
            context.command.BlitFullscreenTriangle(source: context.source,
                destination: context.destination,
                propertySheet: sheet,
                pass: 0);
        }
    }
}

Finally, I also created a custom editor for the ColorFilterEffect which lets you apply a set of pre-configured mix values including all of the alternative vision colors I’m aware of along with grayscale, sepia, amber monochrome, and green monochrome. I also added options to visualize the redness, greenness, and blueness of the input as luminance and to isolate the colors into only red, green, or blue as well. When you initially add it, it should default to having all the options unchecked which makes it seem like nothing is working, but you can quickly enable them all by clicking the small ‘All’ button just under the component header.

1
2
3
4
5
6
7
8
9
10
11
12
13
14
15
16
17
18
19
20
21
22
23
24
25
26
27
28
29
30
31
32
33
34
35
36
37
38
39
40
41
42
43
44
45
46
47
48
49
50
51
52
53
54
55
56
57
58
59
60
61
62
63
64
65
66
67
68
69
70
71
72
73
74
75
76
77
78
79
80
81
82
83
84
85
86
87
88
89
90
91
92
93
94
95
96
97
98
99
100
101
102
103
104
105
106
107
108
109
110
111
112
113
114
115
116
117
118
119
120
121
122
123
124
125
126
127
128
129
130
131
132
133
134
135
136
137
138
139
140
141
142
143
144
145
146
147
148
149
150
151
152
153
154
155
156
157
158
159
160
161
162
163
164
165
166
167
168
169
170
171
172
173
174
175
176
177
178
using System.Collections.Generic;
using System.Linq;
using Spectra.Runtime.Effects;
using UnityEditor;
using UnityEditor.Rendering.PostProcessing;
using UnityEngine;

namespace Spectra.Editor
{
    [PostProcessEditor(typeof(ColorFilterEffect))]
    public sealed class ColorFilterEffectEditor : PostProcessEffectEditor<ColorFilterEffect>
    {
        #region Types
        private struct NamedMix
        {
            public Color RedMix;
            public Color GreenMix;
            public Color BlueMix;
        }
        #endregion

        #region Constants
        private static readonly SortedDictionary<string, NamedMix> sMixesByName =
            new SortedDictionary<string, NamedMix>
            {
                {
                    "Achromatomaly",
                    new NamedMix
                    {
                        RedMix = new Color(0.618f, 0.320f, 0.062f),
                        GreenMix = new Color(0.163f, 0.775f, 0.062f),
                        BlueMix = new Color(0.163f, 0.320f, 0.516f),
                    }
                },
                {
                    "Achromatopsia",
                    new NamedMix
                    {
                        RedMix = new Color(0.299f, 0.587f, 0.114f),
                        GreenMix = new Color(0.299f, 0.587f, 0.114f),
                        BlueMix = new Color(0.299f, 0.587f, 0.114f),
                    }
                },
                {
                    "Amber Monochrome",
                    new NamedMix
                    {
                        RedMix = new Color(0.213f, 0.715f, 0.072f),
                        GreenMix = new Color(0.213f, 0.715f, 0.072f),
                        BlueMix = new Color(0.000f, 0.000f, 0.000f),
                    }
                },
                {
                    "Deuteranomaly",
                    new NamedMix
                    {
                        RedMix = new Color(0.800f, 0.200f, 0.000f),
                        GreenMix = new Color(0.258f, 0.742f, 0.000f),
                        BlueMix = new Color(0.000f, 0.142f, 0.858f),
                    }
                },
                {
                    "Deuteranopia",
                    new NamedMix
                    {
                        RedMix = new Color(0.625f, 0.375f, 0.000f),
                        GreenMix = new Color(0.700f, 0.300f, 0.000f),
                        BlueMix = new Color(0.000f, 0.300f, 0.700f),
                    }
                },
                {
                    "Grayscale",
                    new NamedMix
                    {
                        RedMix = new Color(0.213f, 0.715f, 0.072f),
                        GreenMix = new Color(0.213f, 0.715f, 0.072f),
                        BlueMix = new Color(0.213f, 0.715f, 0.072f),
                    }
                },
                {
                    "Green Monochrome",
                    new NamedMix
                    {
                        RedMix = new Color(0.000f, 0.000f, 0.000f),
                        GreenMix = new Color(0.213f, 0.715f, 0.072f),
                        BlueMix = new Color(0.000f, 0.000f, 0.000f),
                    }
                },
                {
                    "Protanomaly",
                    new NamedMix
                    {
                        RedMix = new Color(0.817f, 0.183f, 0.000f),
                        GreenMix = new Color(0.333f, 0.667f, 0.000f),
                        BlueMix = new Color(0.000f, 0.125f, 0.875f),
                    }
                },
                {
                    "Protanopia",
                    new NamedMix
                    {
                        RedMix = new Color(0.567f, 0.433f, 0.0f),
                        GreenMix = new Color(0.558f, 0.442f, 0.000f),
                        BlueMix = new Color(0.000f, 0.242f, 0.758f),
                    }
                },
                {
                    "Sepia",
                    new NamedMix
                    {
                        RedMix = new Color(0.393f, 0.769f, 0.189f),
                        GreenMix = new Color(0.349f, 0.686f, 0.168f),
                        BlueMix = new Color(0.272f, 0.534f, 0.131f),
                    }
                },
                {
                    "Tritanomaly",
                    new NamedMix
                    {
                        RedMix = new Color(0.967f, 0.033f, 0.000f),
                        GreenMix = new Color(0.000f, 0.733f, 0.267f),
                        BlueMix = new Color(0.000f, 0.183f, 0.817f),
                    }
                },
                {
                    "Tritanopia",
                    new NamedMix
                    {
                        RedMix = new Color(0.950f, 0.050f, 0.00f),
                        GreenMix = new Color(0.000f, 0.433f, 0.567f),
                        BlueMix = new Color(0.000f, 0.475f, 0.525f),
                    }
                },
            };
        private static readonly string[] sMixNames = sMixesByName.Keys.ToArray();
        #endregion

        #region Fields
        private SerializedParameterOverride _Blend;
        private SerializedParameterOverride _RedMix;
        private SerializedParameterOverride _GreenMix;
        private SerializedParameterOverride _BlueMix;
        private int _SelectedMixIndex = -1;
        #endregion

        public override void OnEnable()
        {
            _Blend = FindParameterOverride(expr: x => x.Blend);
            _RedMix = FindParameterOverride(expr: x => x.RedMix);
            _GreenMix = FindParameterOverride(expr: x => x.GreenMix);
            _BlueMix = FindParameterOverride(expr: x => x.BlueMix);
        }

        public override void OnInspectorGUI()
        {
            PropertyField(property: _Blend);
            PropertyField(property: _RedMix);
            PropertyField(property: _GreenMix);
            PropertyField(property: _BlueMix);

            _SelectedMixIndex = EditorGUILayout.Popup(
                selectedIndex: _SelectedMixIndex,
                displayedOptions: sMixNames,
                label: "Built-in Mix");
            using (new EditorGUI.DisabledScope(
                disabled: _SelectedMixIndex < 0 || _SelectedMixIndex >= sMixNames.Length))
            {
                if (GUILayout.Button("Apply Mix"))
                {
                    NamedMix namedMix = sMixesByName[key: sMixNames[_SelectedMixIndex]];
                    _RedMix.value.colorValue = namedMix.RedMix;
                    _GreenMix.value.colorValue = namedMix.GreenMix;
                    _BlueMix.value.colorValue = namedMix.BlueMix;
                }
            }
        }
    }
}
Note Some of the color filter values were obtained from this github repo which is MIT-licensed.
Seeing Is Believing
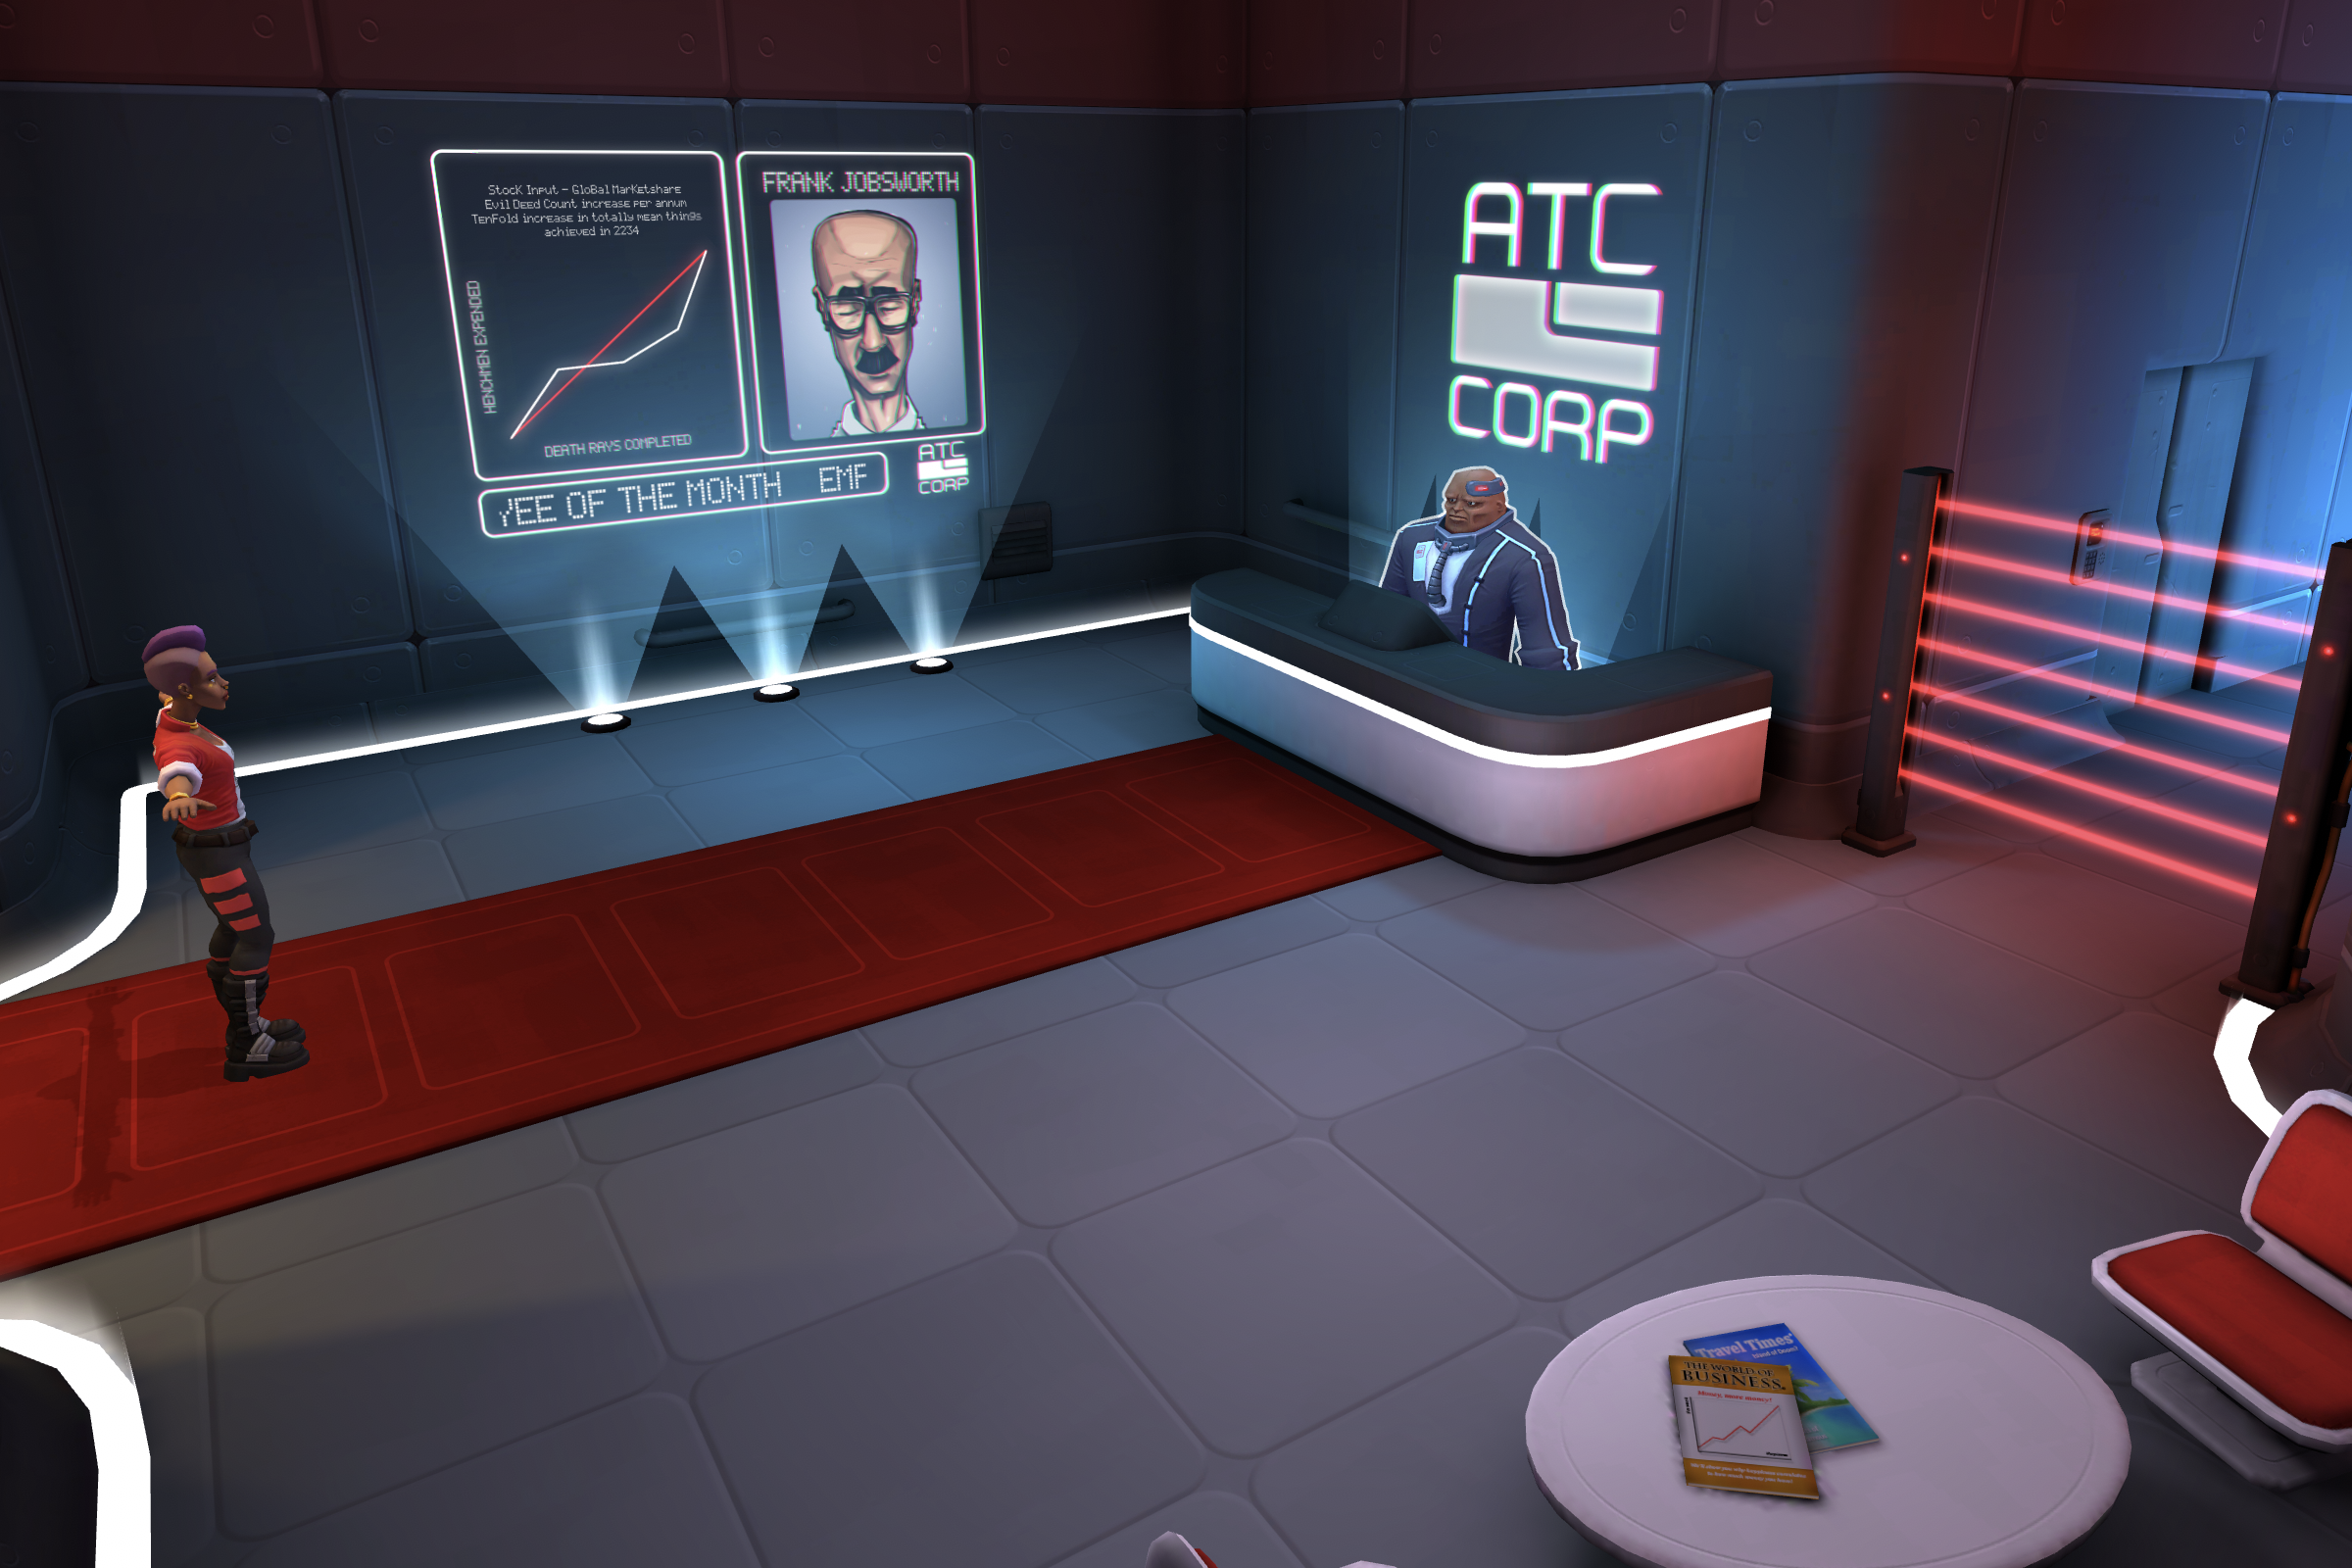
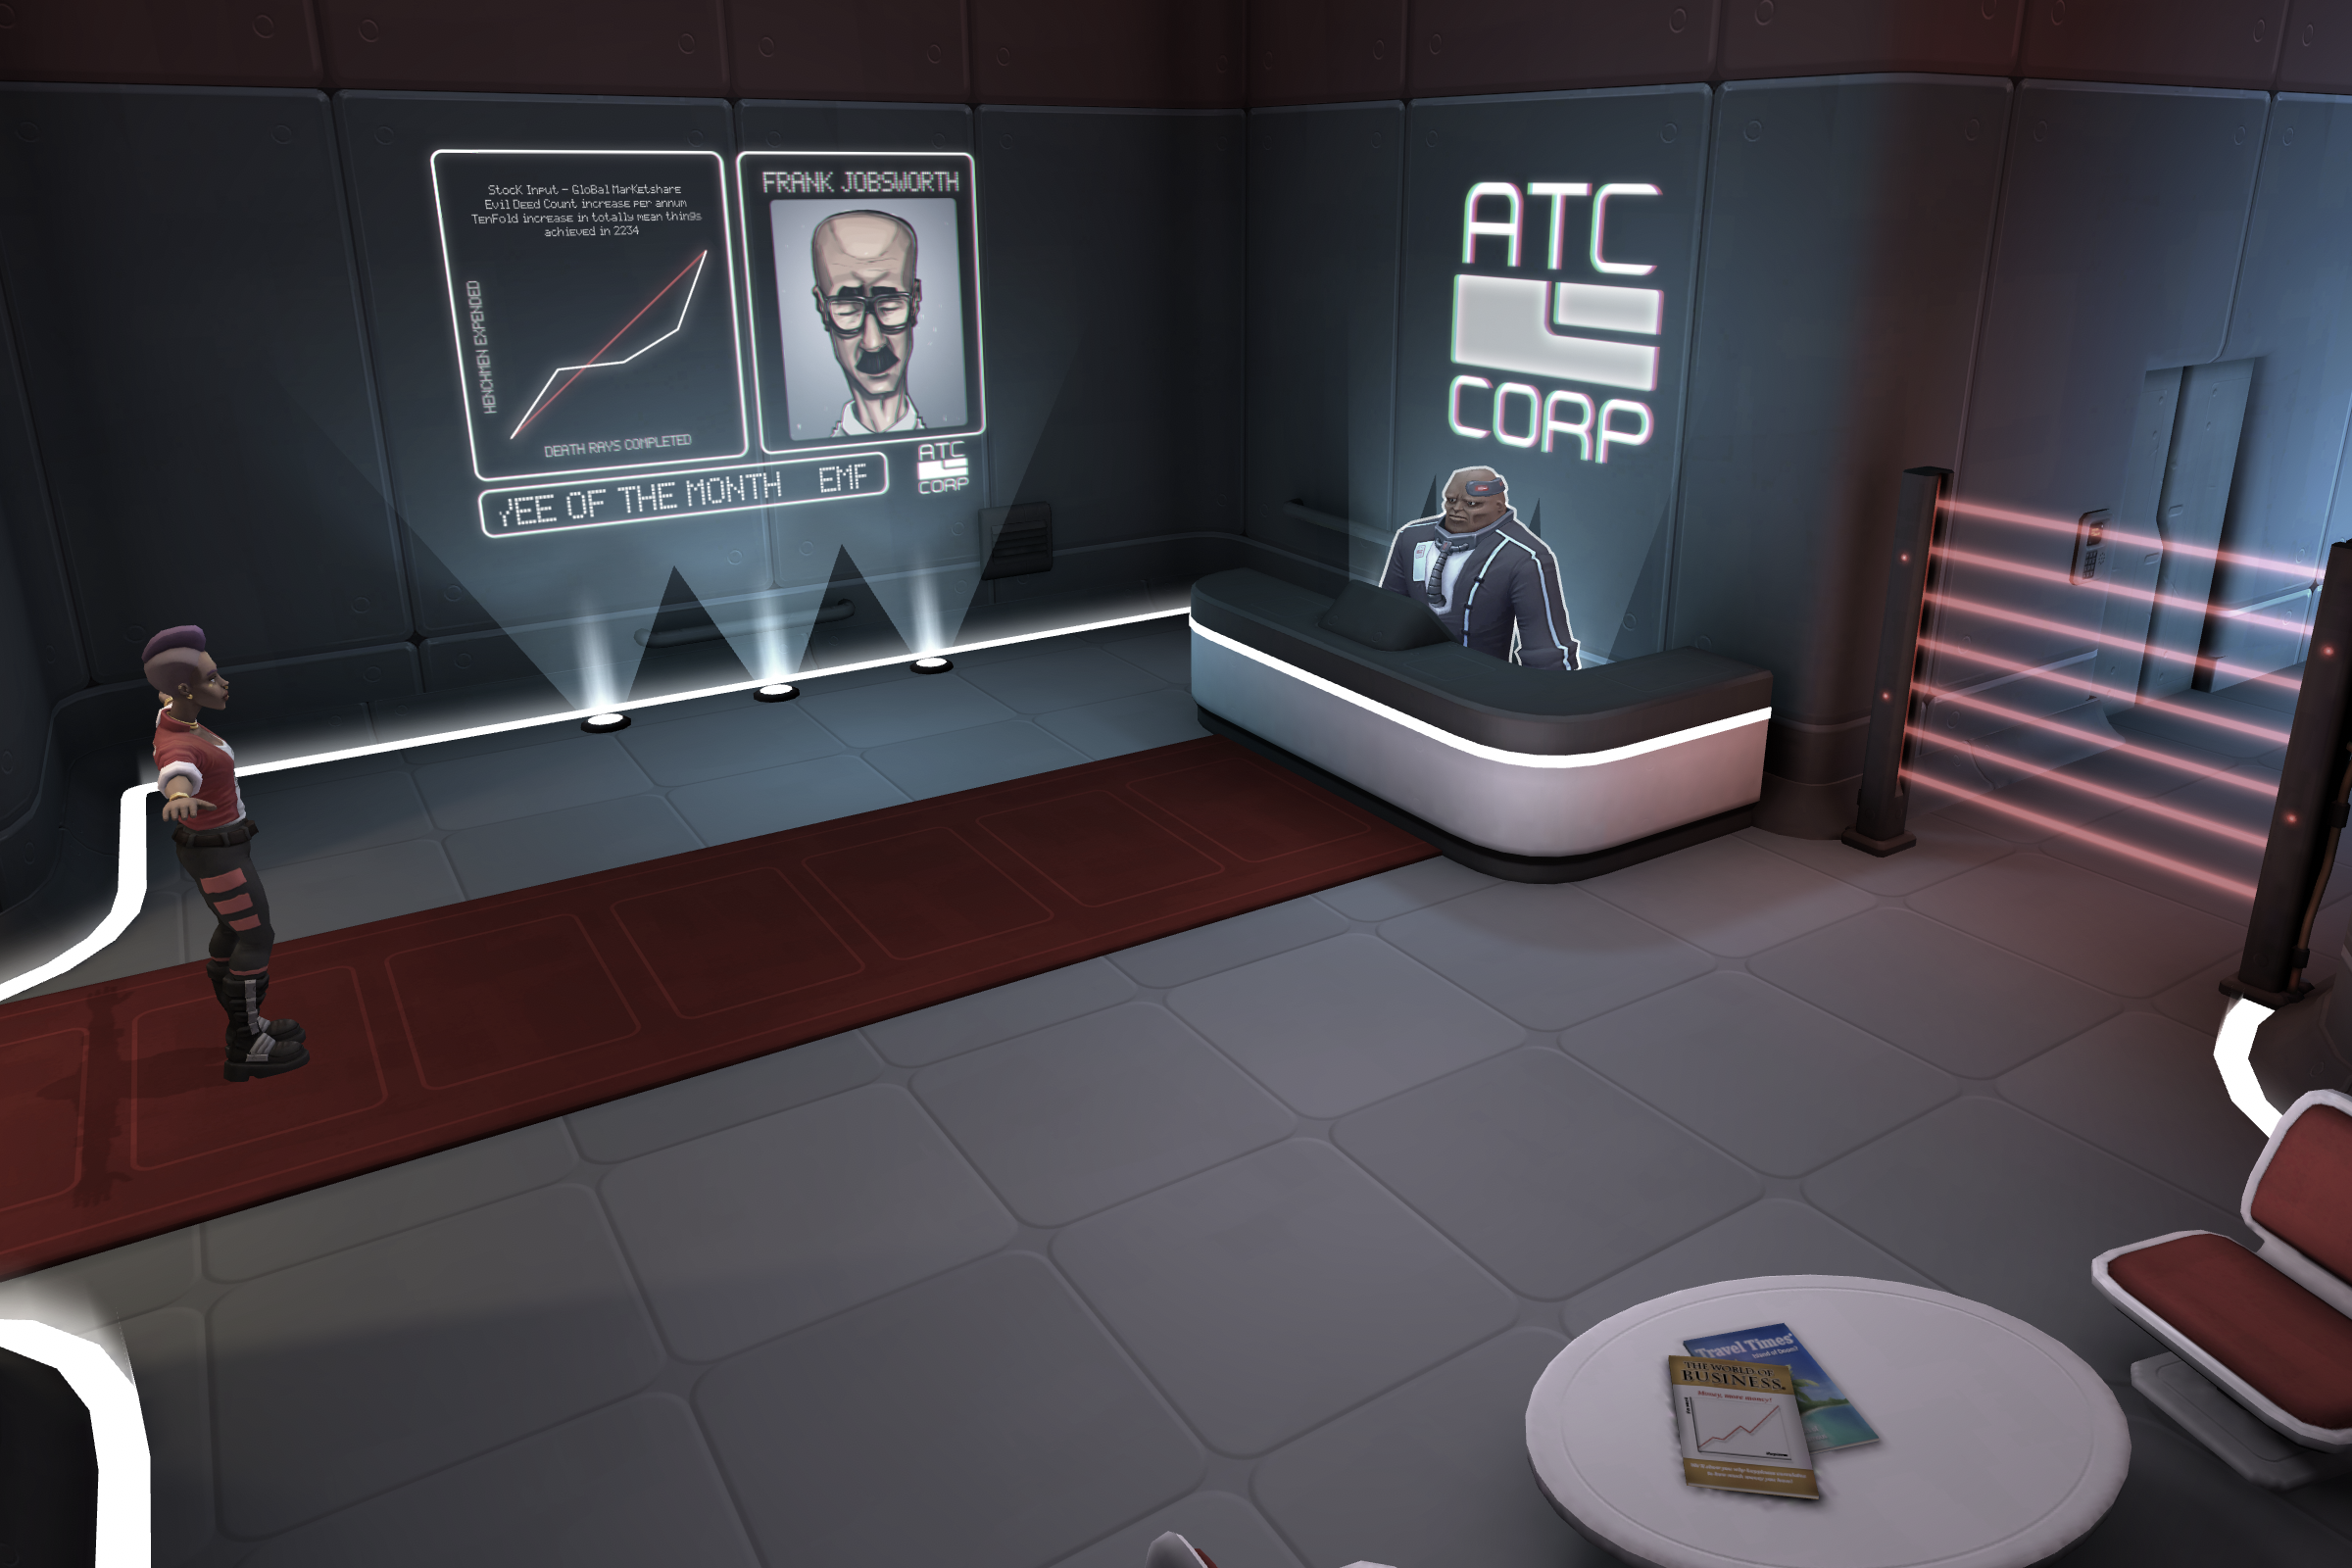
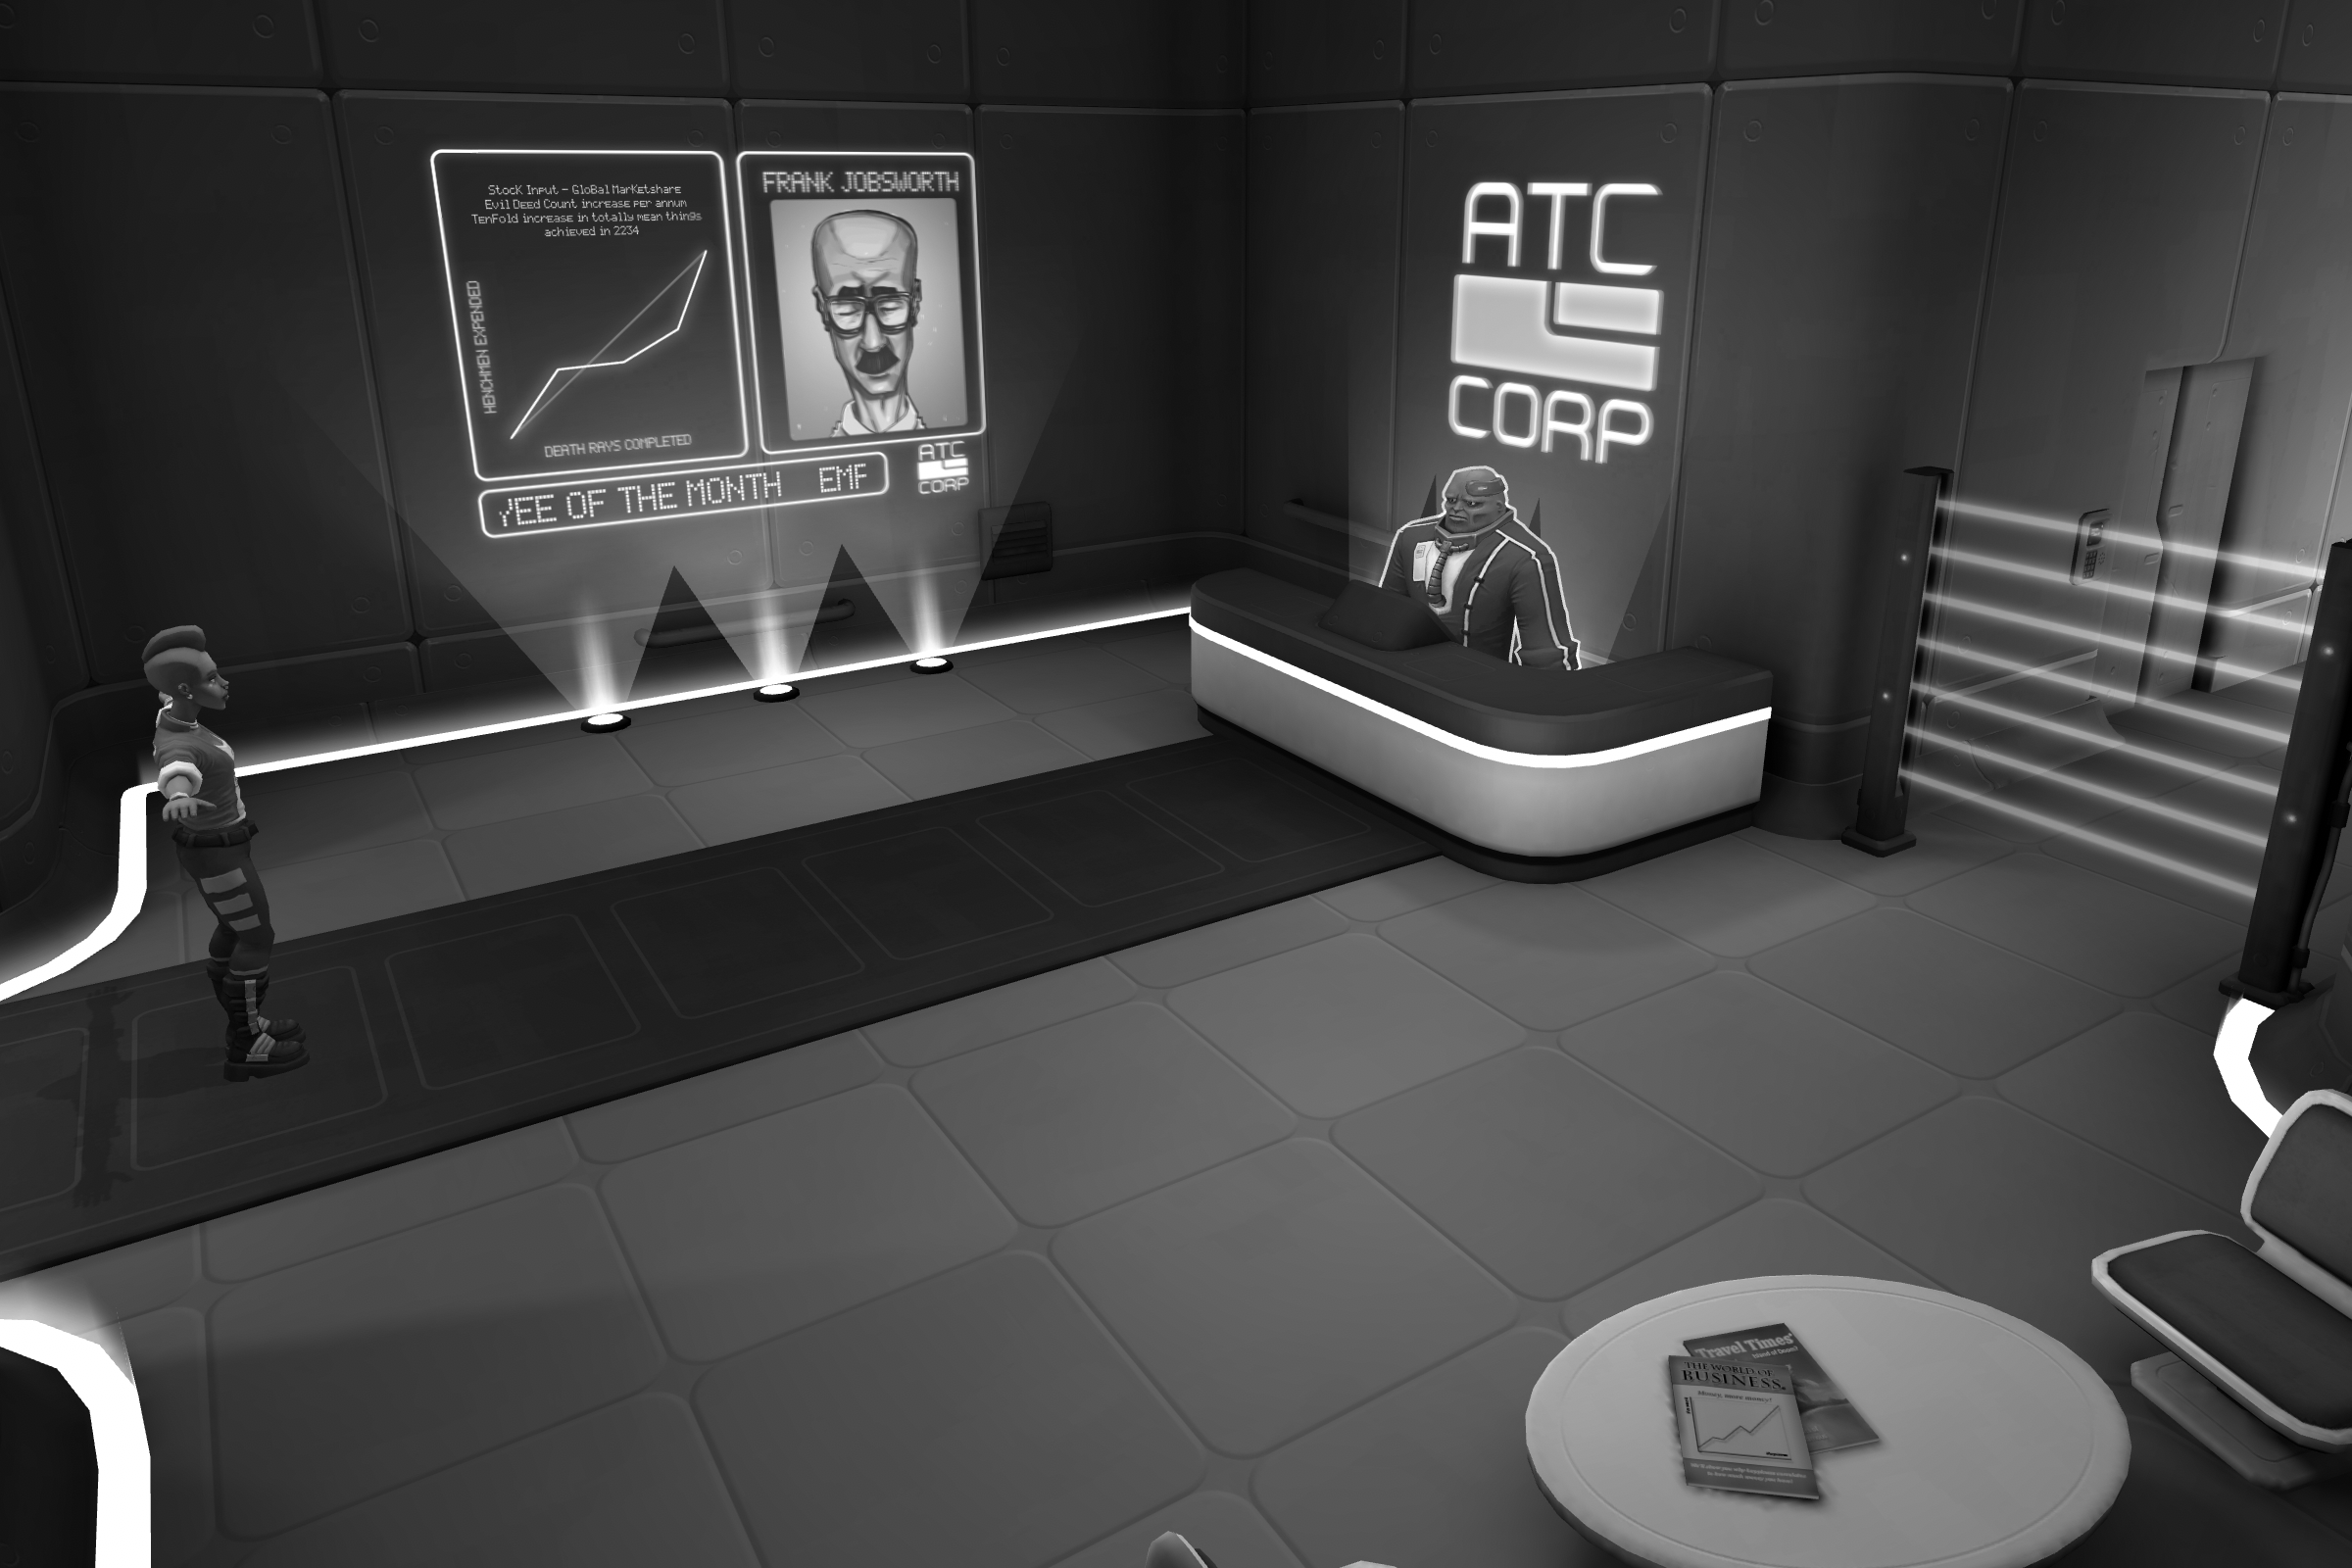
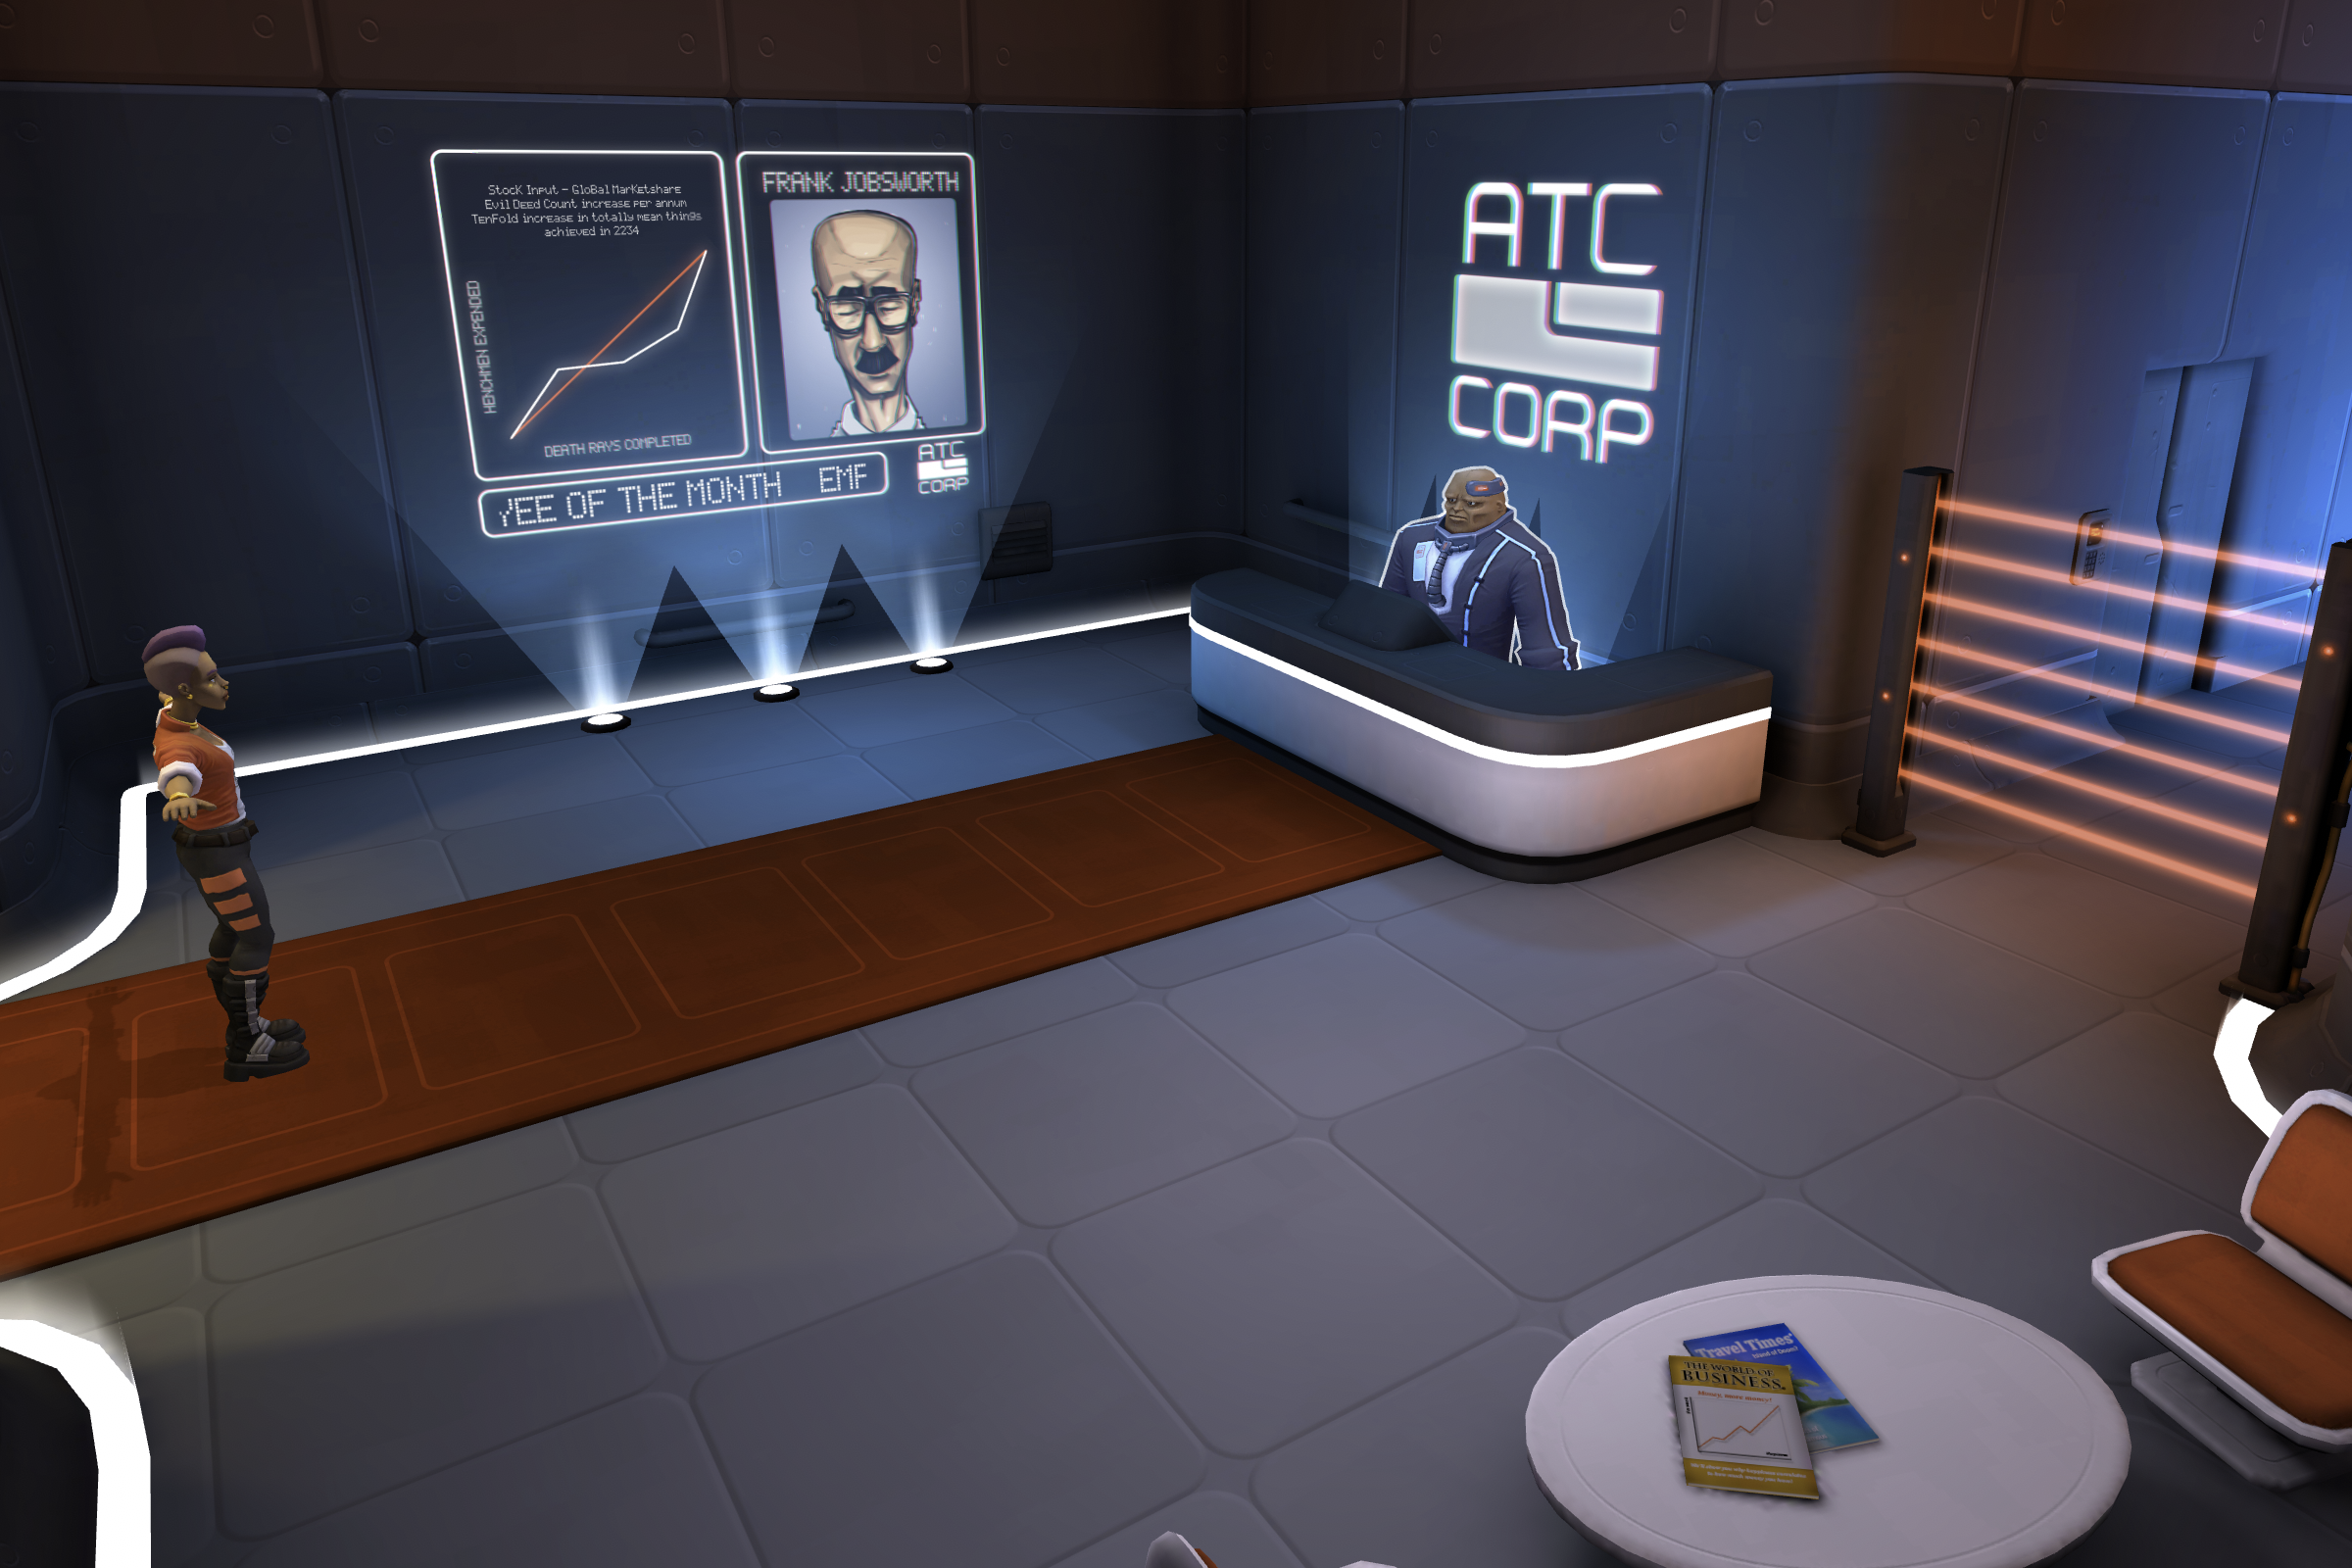
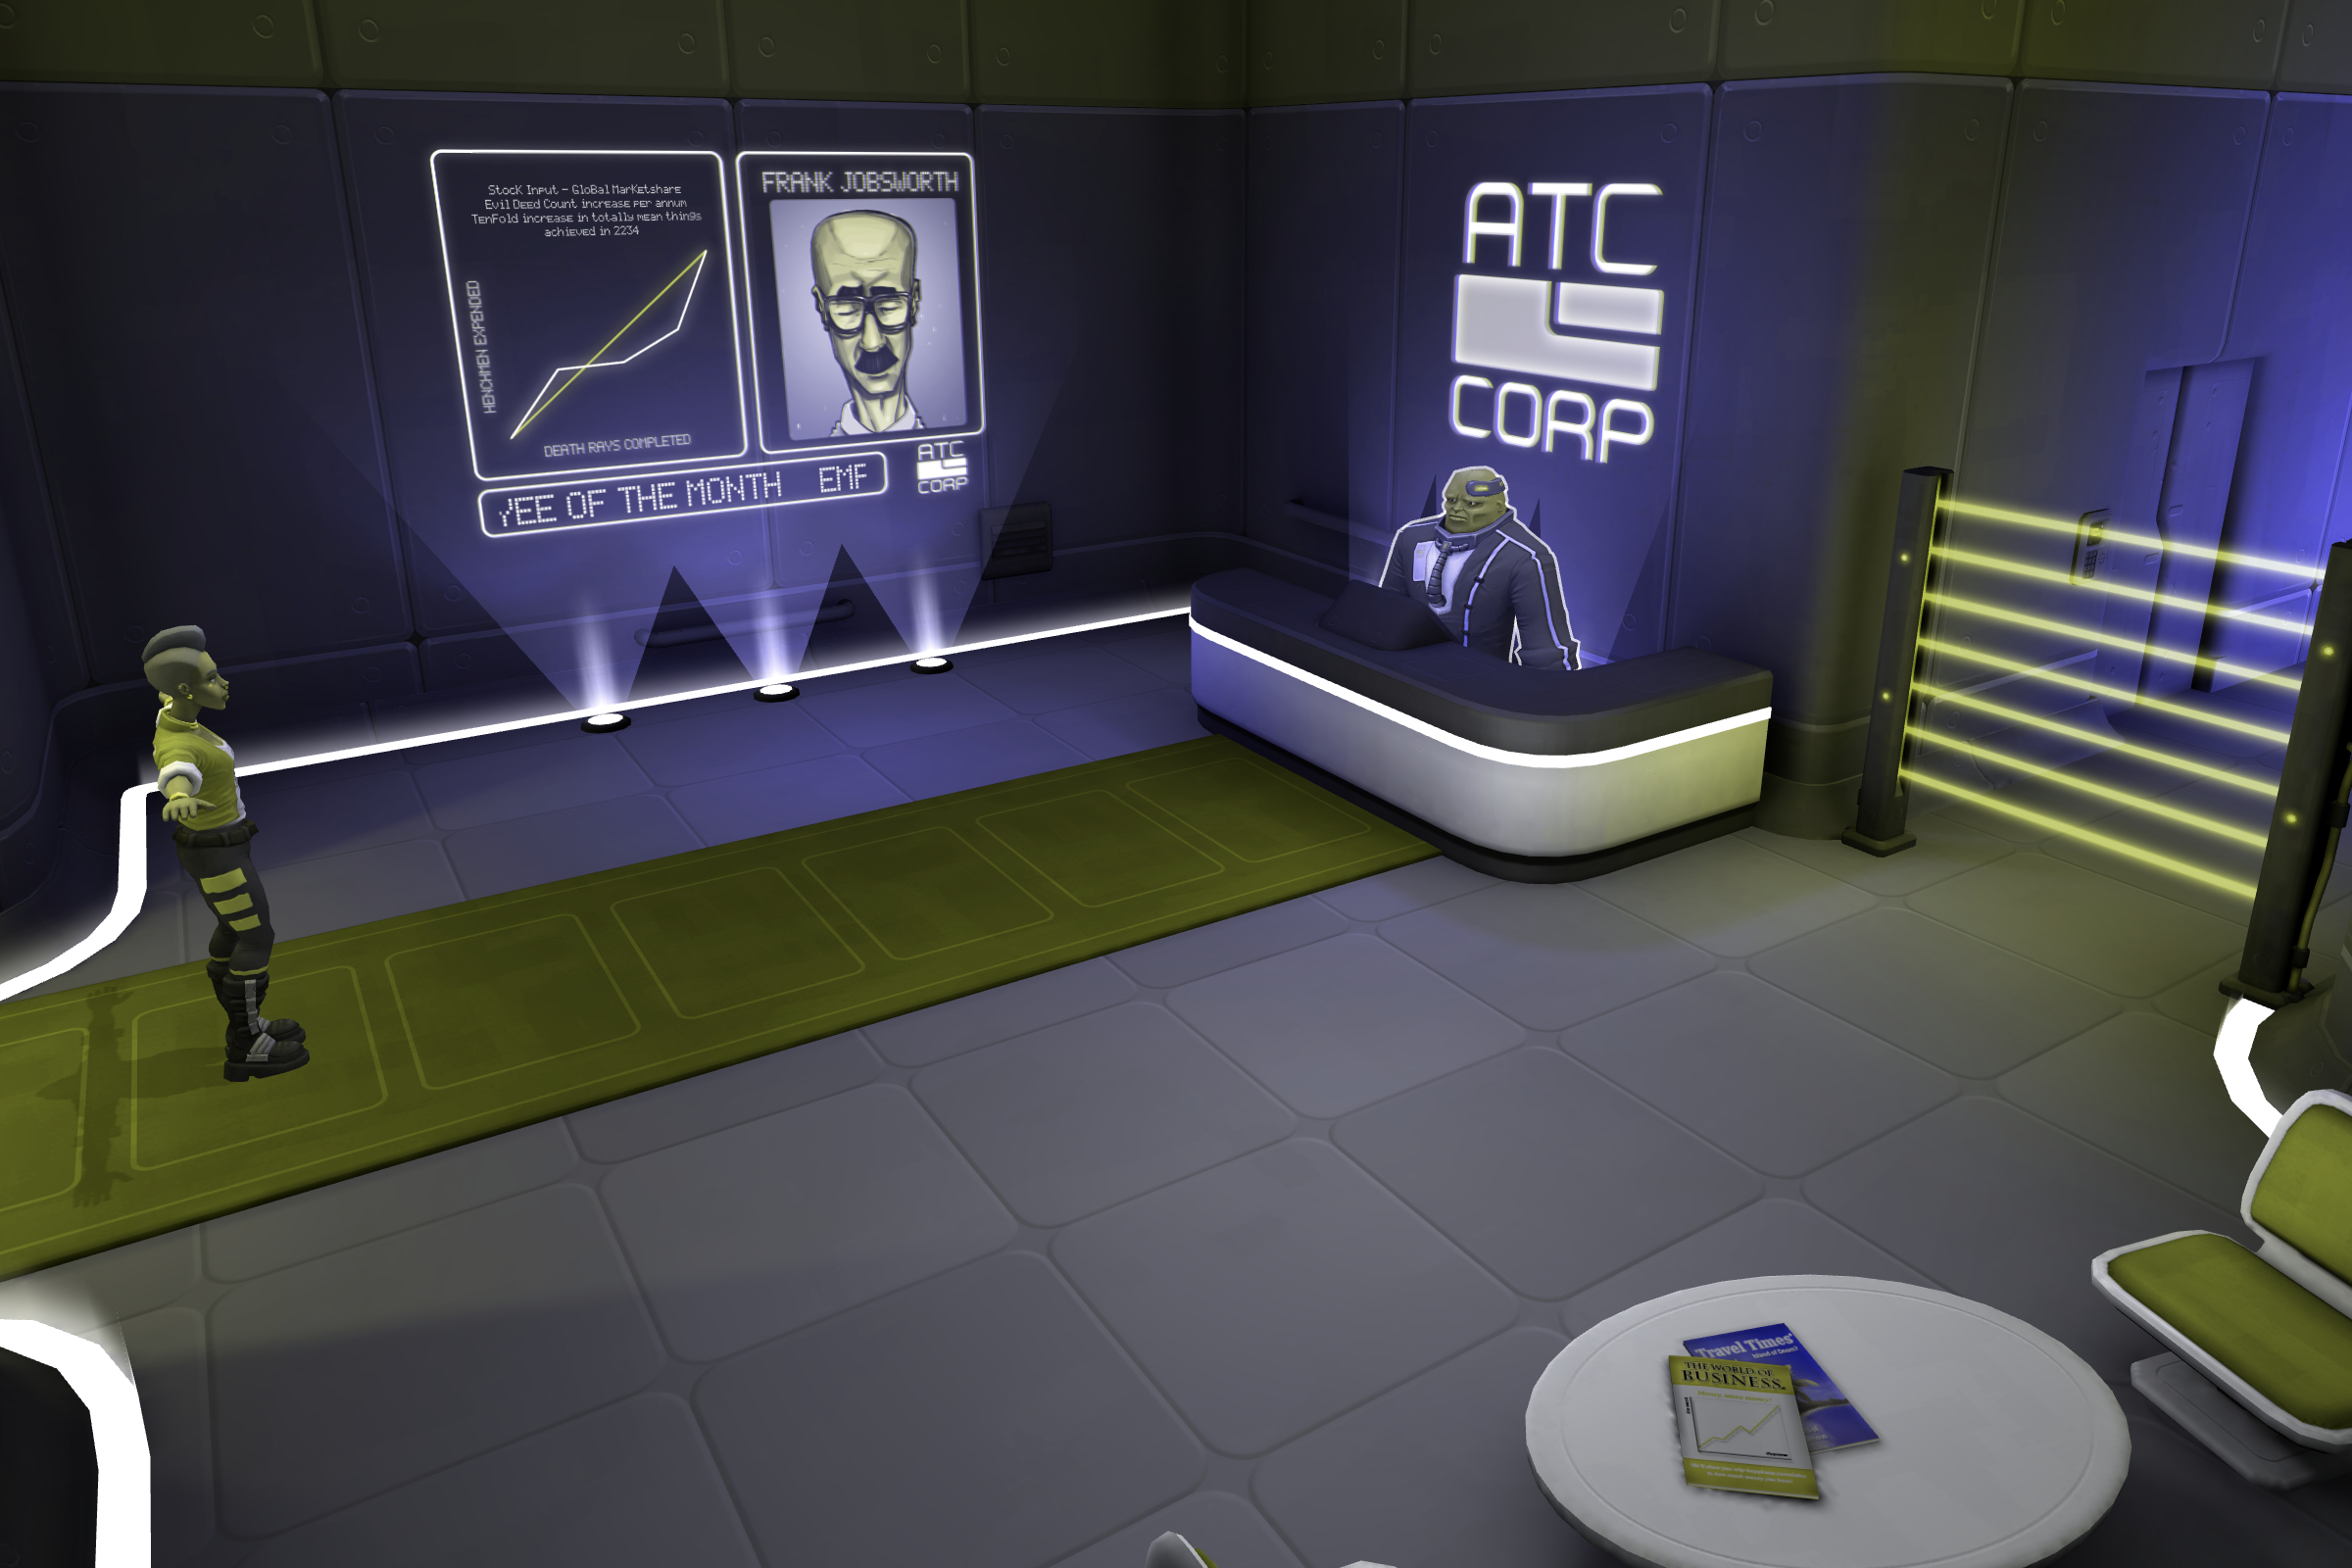
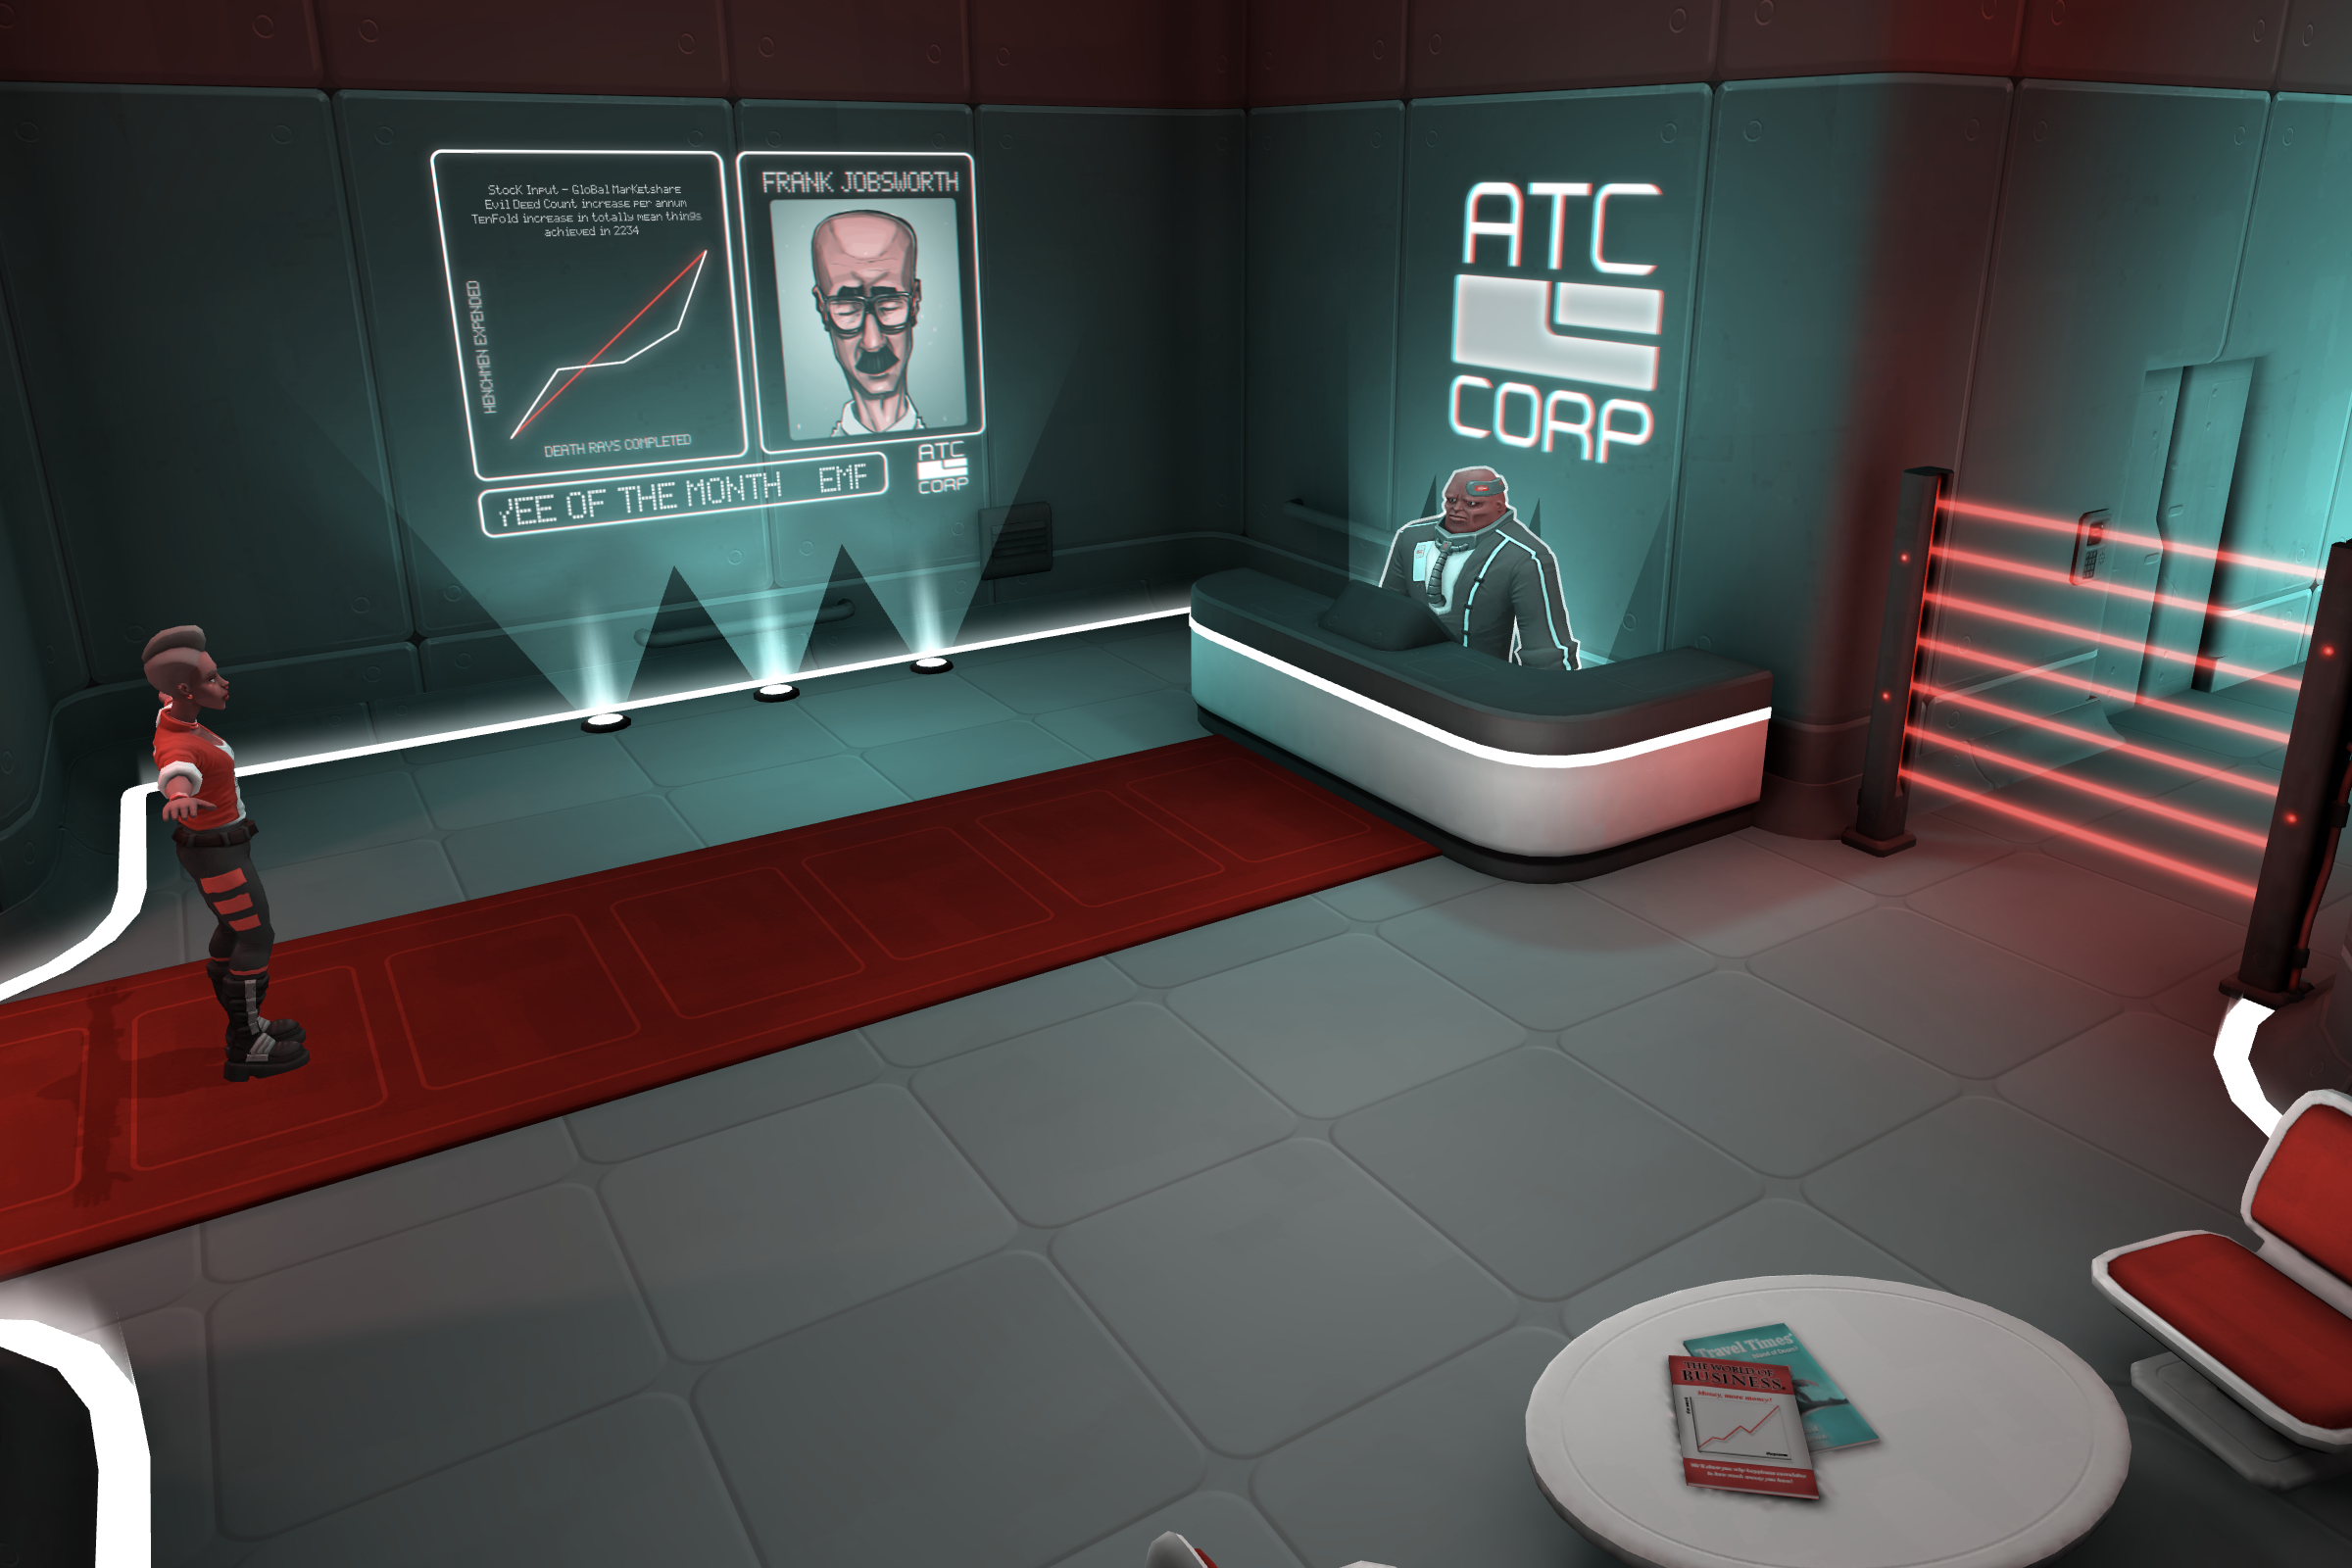
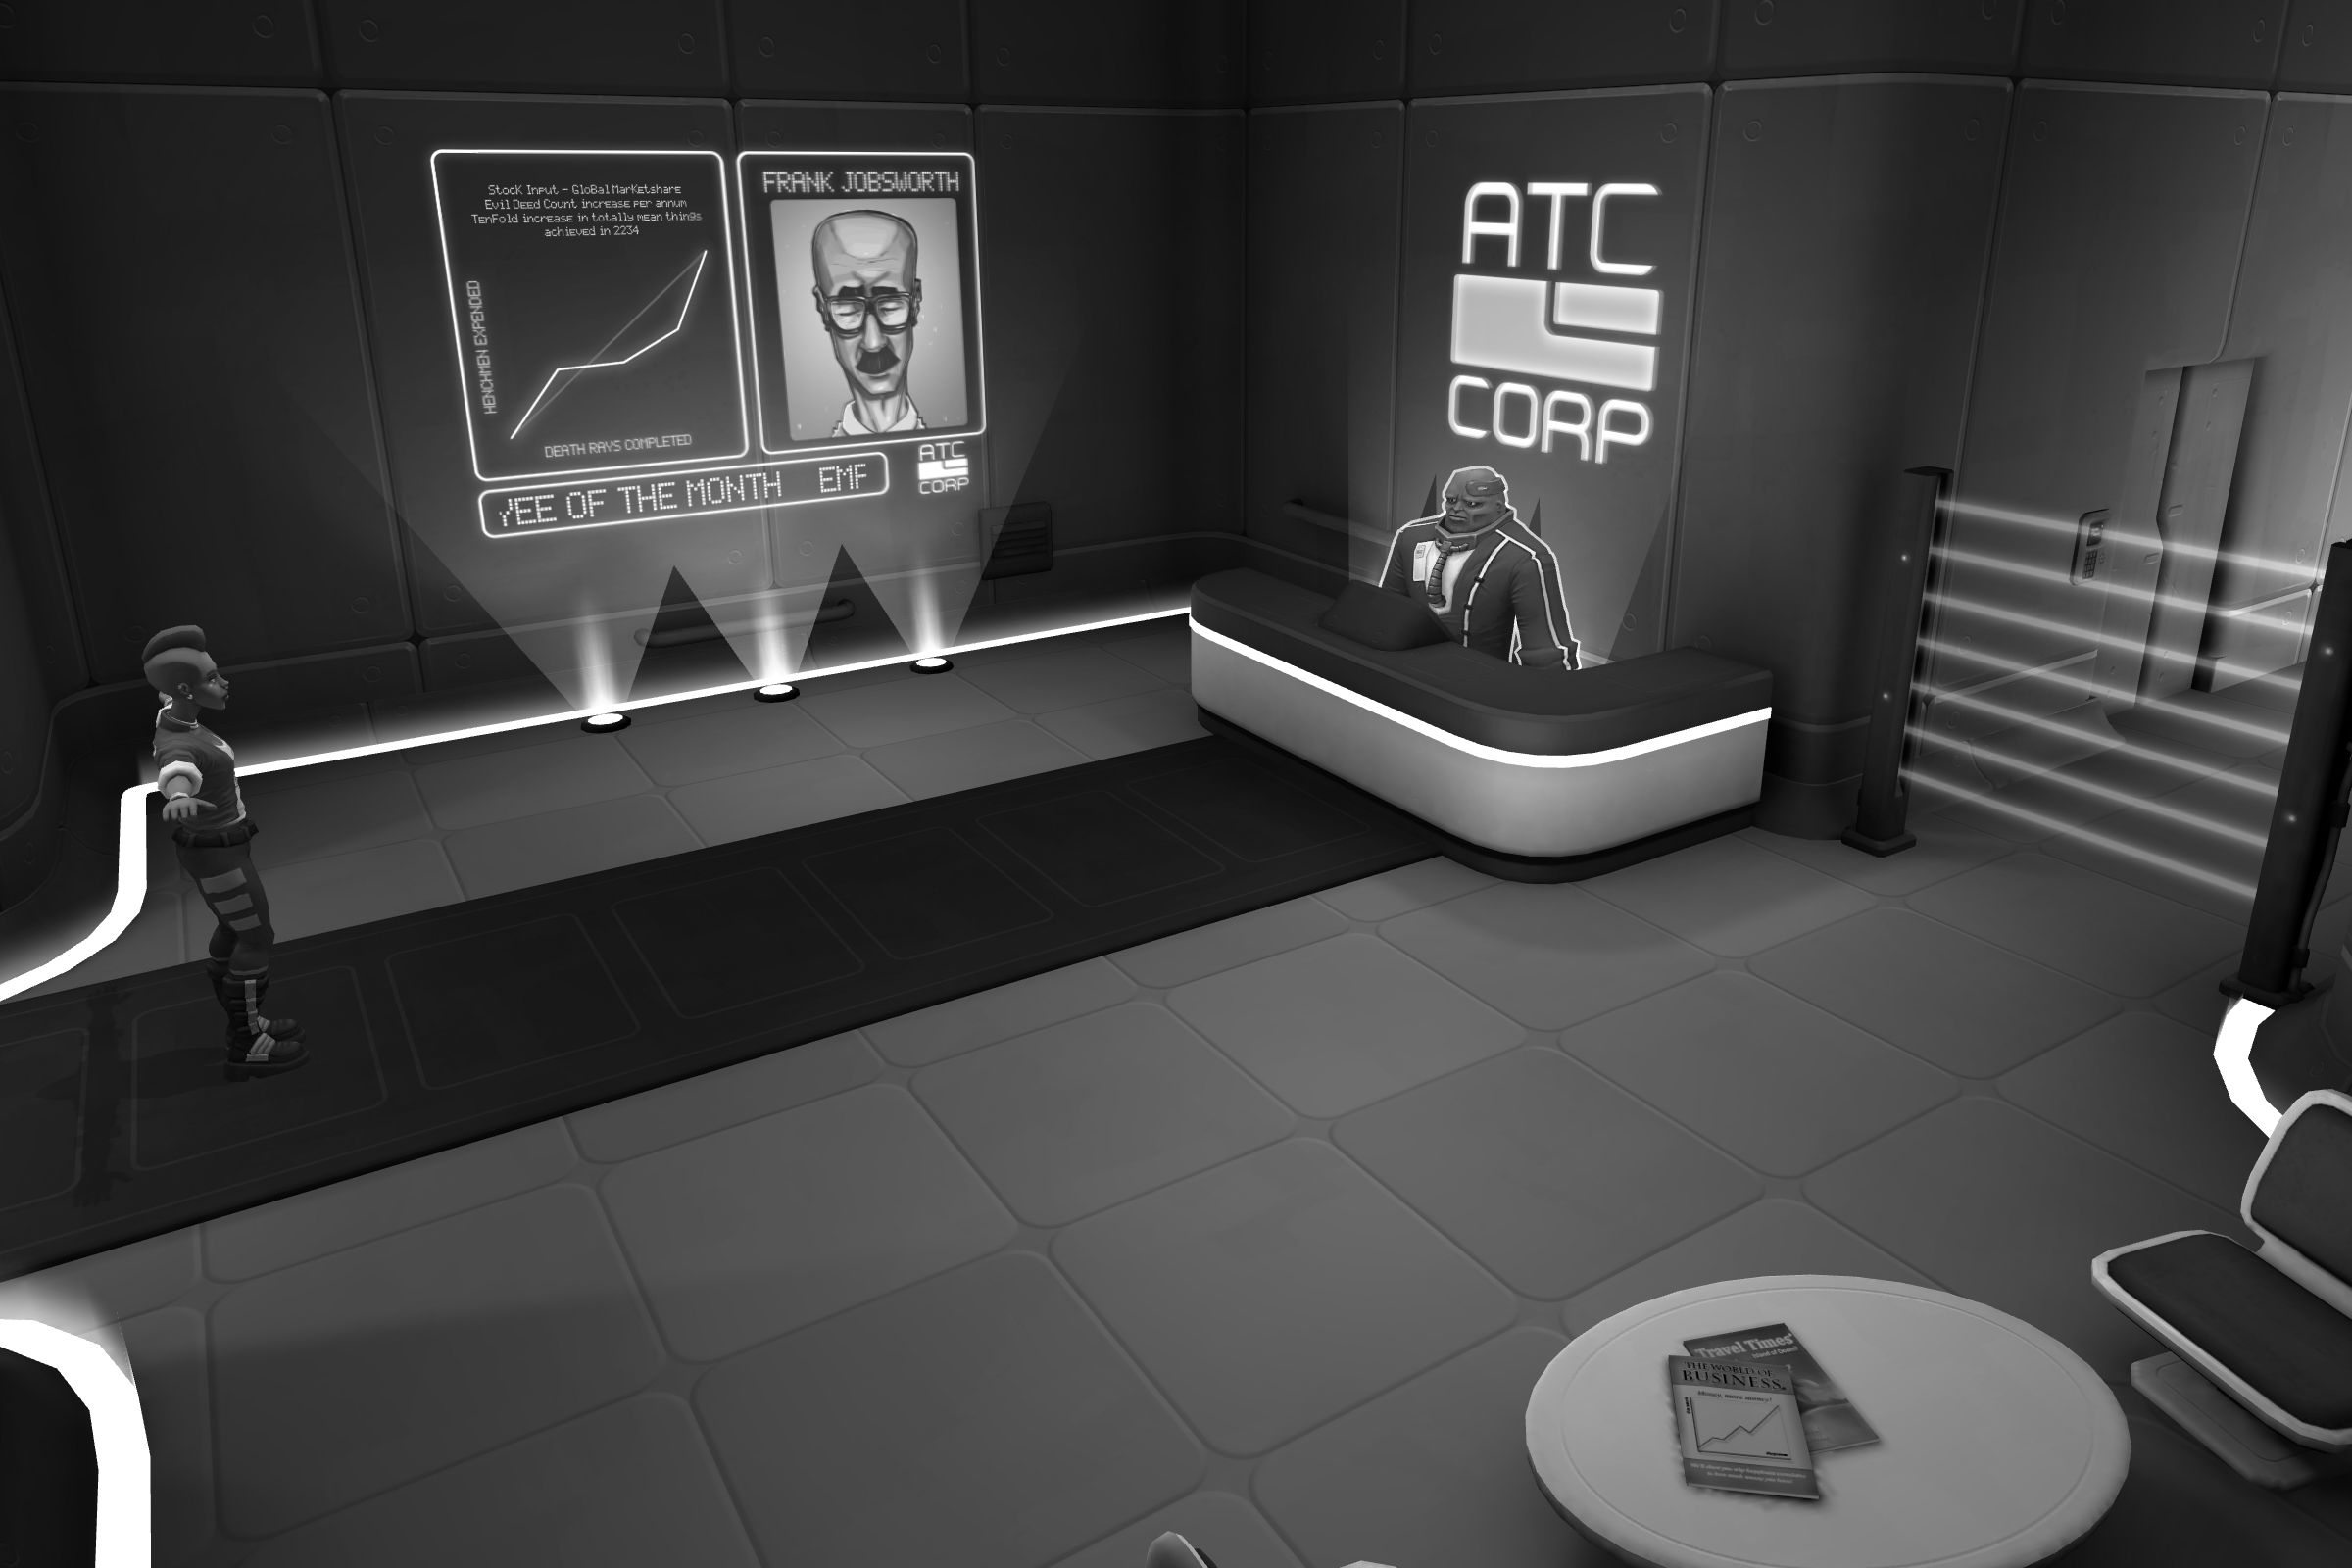
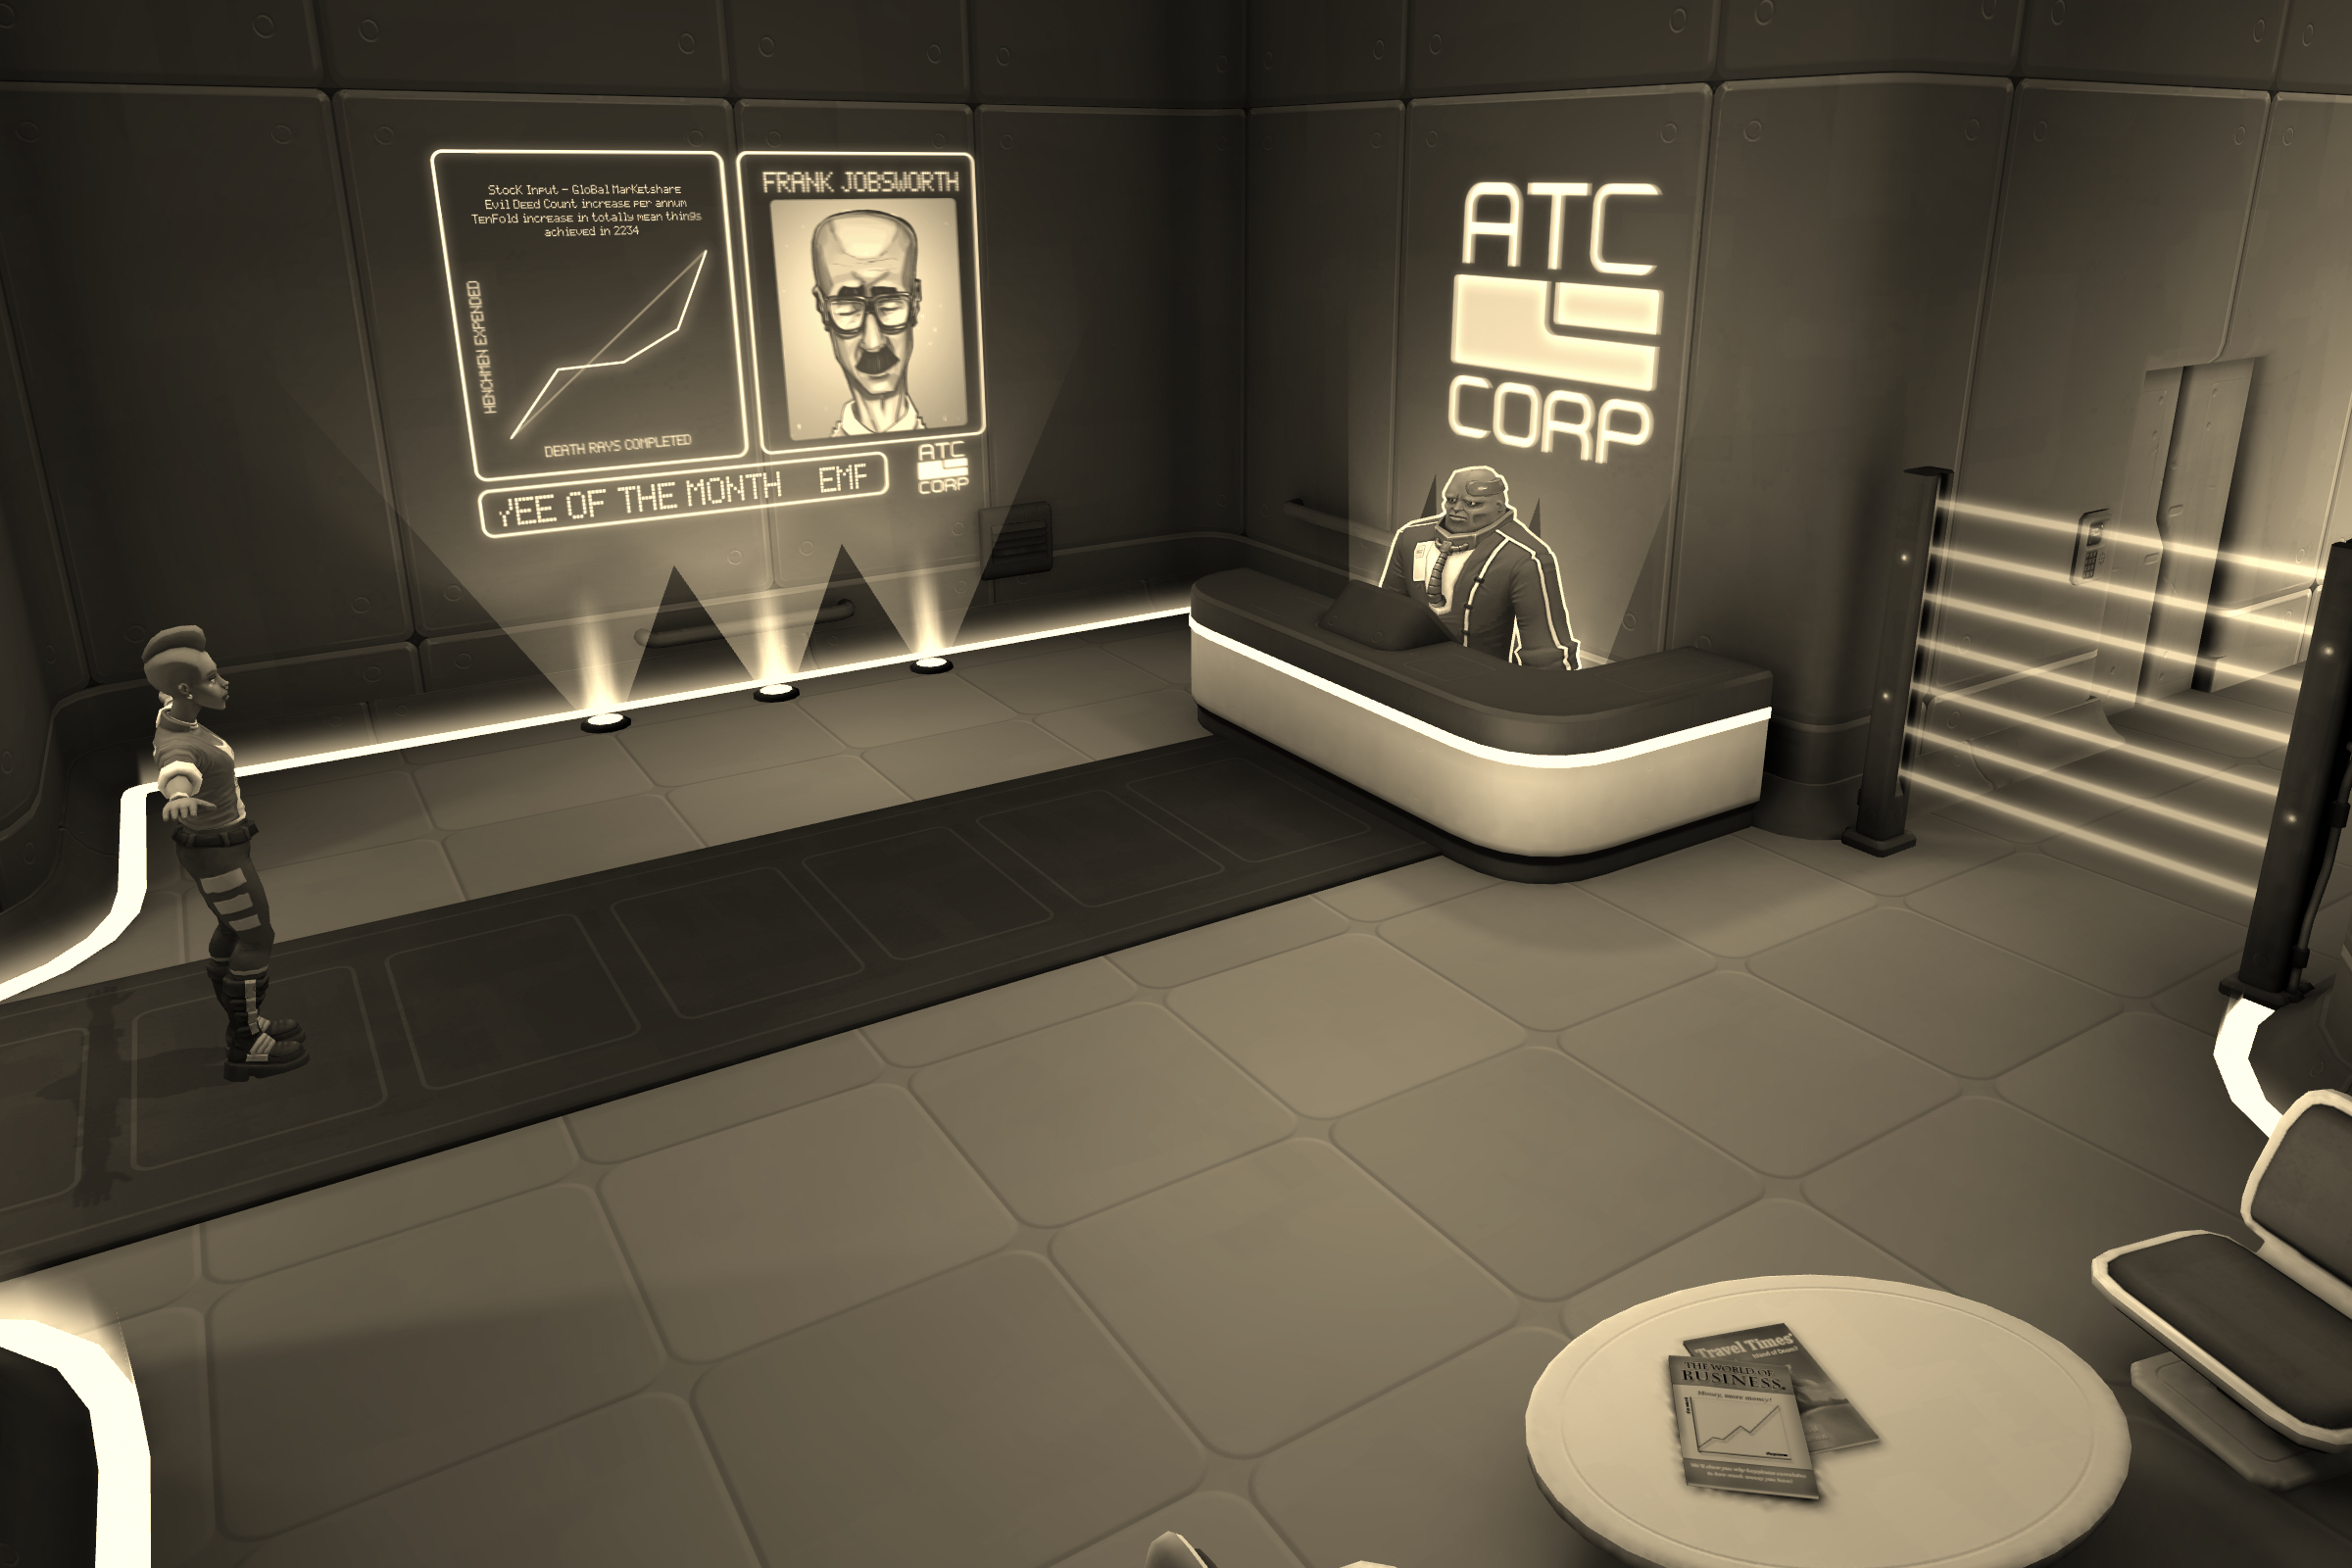
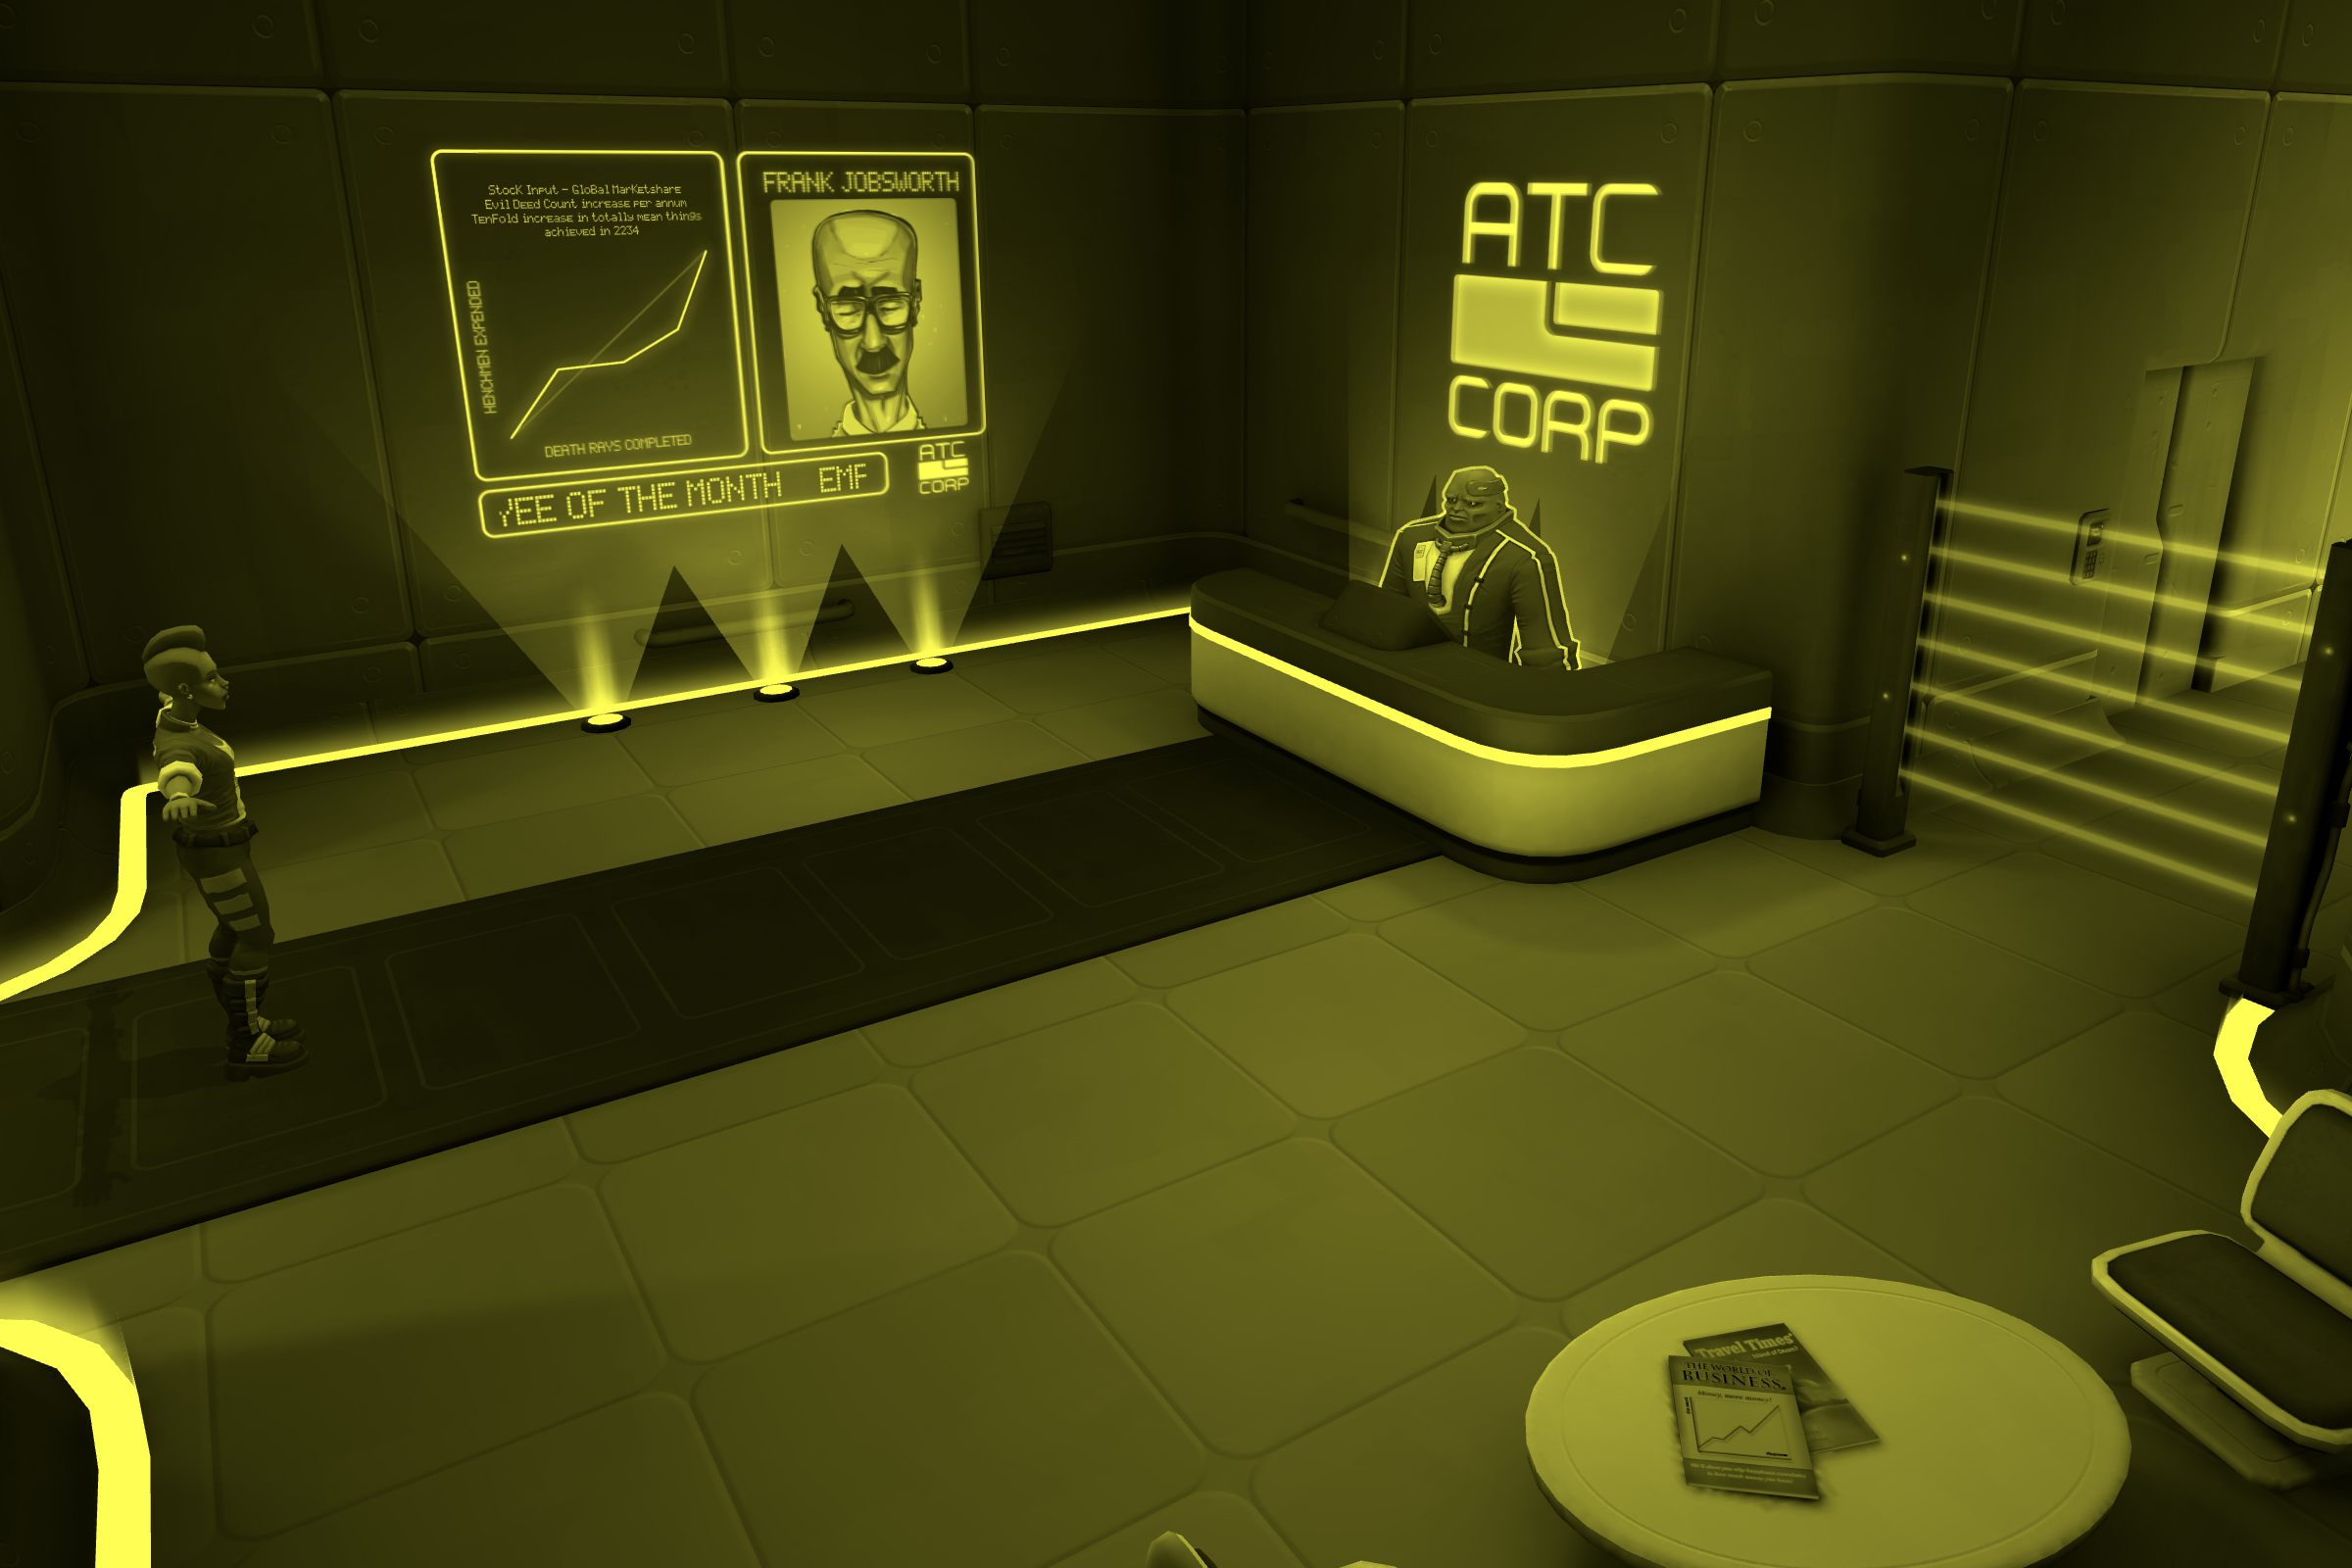
Now that we have all the components and shader created, we just need to add it to a post processing volume. Remember to customize the mix values depending on your project needs, or pick from one of the provided values. You’ll probably want to toggle on post processing effects on the scene view settings, too, especially if you want to see things outside of the main camera view in edit mode. I’ve included an screenshot of each filter applied to the same scene so that you can see what it looks like when selected. I’ll dig into additional post processing effects included in my Spectra package in a future post.

Note whenever Unity adds support for custom effects to the Scriptable Render Pipeline, you should be able to use the shader as-is, but the effect & renderer components and the editor may not be applicable. You can use the Channel Mixer effect in the Universal Render Pipeline to achieve the same effect.