Being Resourceful
Introduction
If you’ve spent much time in the Unity editor, you may have noticed it utilizes a wide variety of icons for various windows and actions. Many of these icons support both the dark and light editor skins (generally by utilizing a contrasting color scheme - darker icons for the light skin and lighter icons for the dark skin). Some of them support higher resolution versions when they’re expected to be used in places other than toolbars (since those are generally pretty narrow). Can we utilize these icons for our own needs?
While Unity’s object picker window does display many built-in resources (like fonts, materials, meshes, etc), unfortunately none of the editor icon textures appear there. Unity ships with two built-in tools to inspect UI - the undocumented IMGUI Debugger (available via Window->Analysis->IMGUI Debugger) reports information about the composition of IMGUI-based windows and the UIElements Debugger (available via Window->Analysis->UIElements Debugger) does the same for any windows using Unity’s newer UIElements API.
In 2019.4, all Editor windows support both systems and many windows actually have a mix of both types since the UIElements API doesn’t yet have equivalents for everything the IMGUI API provides. Keep that in mind as you use one debugger - there may be valuable information in the other, too. I wish they’d unify the two!
Trying the Debuggers
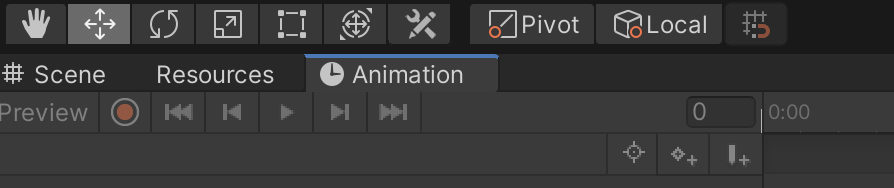
I used the IMGUI Debugger to take a closer look at Unity’s Animation window since it has a row of icons used for standard media controls (first/last key, step back, step forward, and play). Although the window isn’t documented, it works pretty similarly to the Frame Debugger - once you select the window you want to inspect via the popup in the top left of the window (in this case Animation), it displays a list of the IMGUI calls that determine the window contents using the name of the method that made the API call.
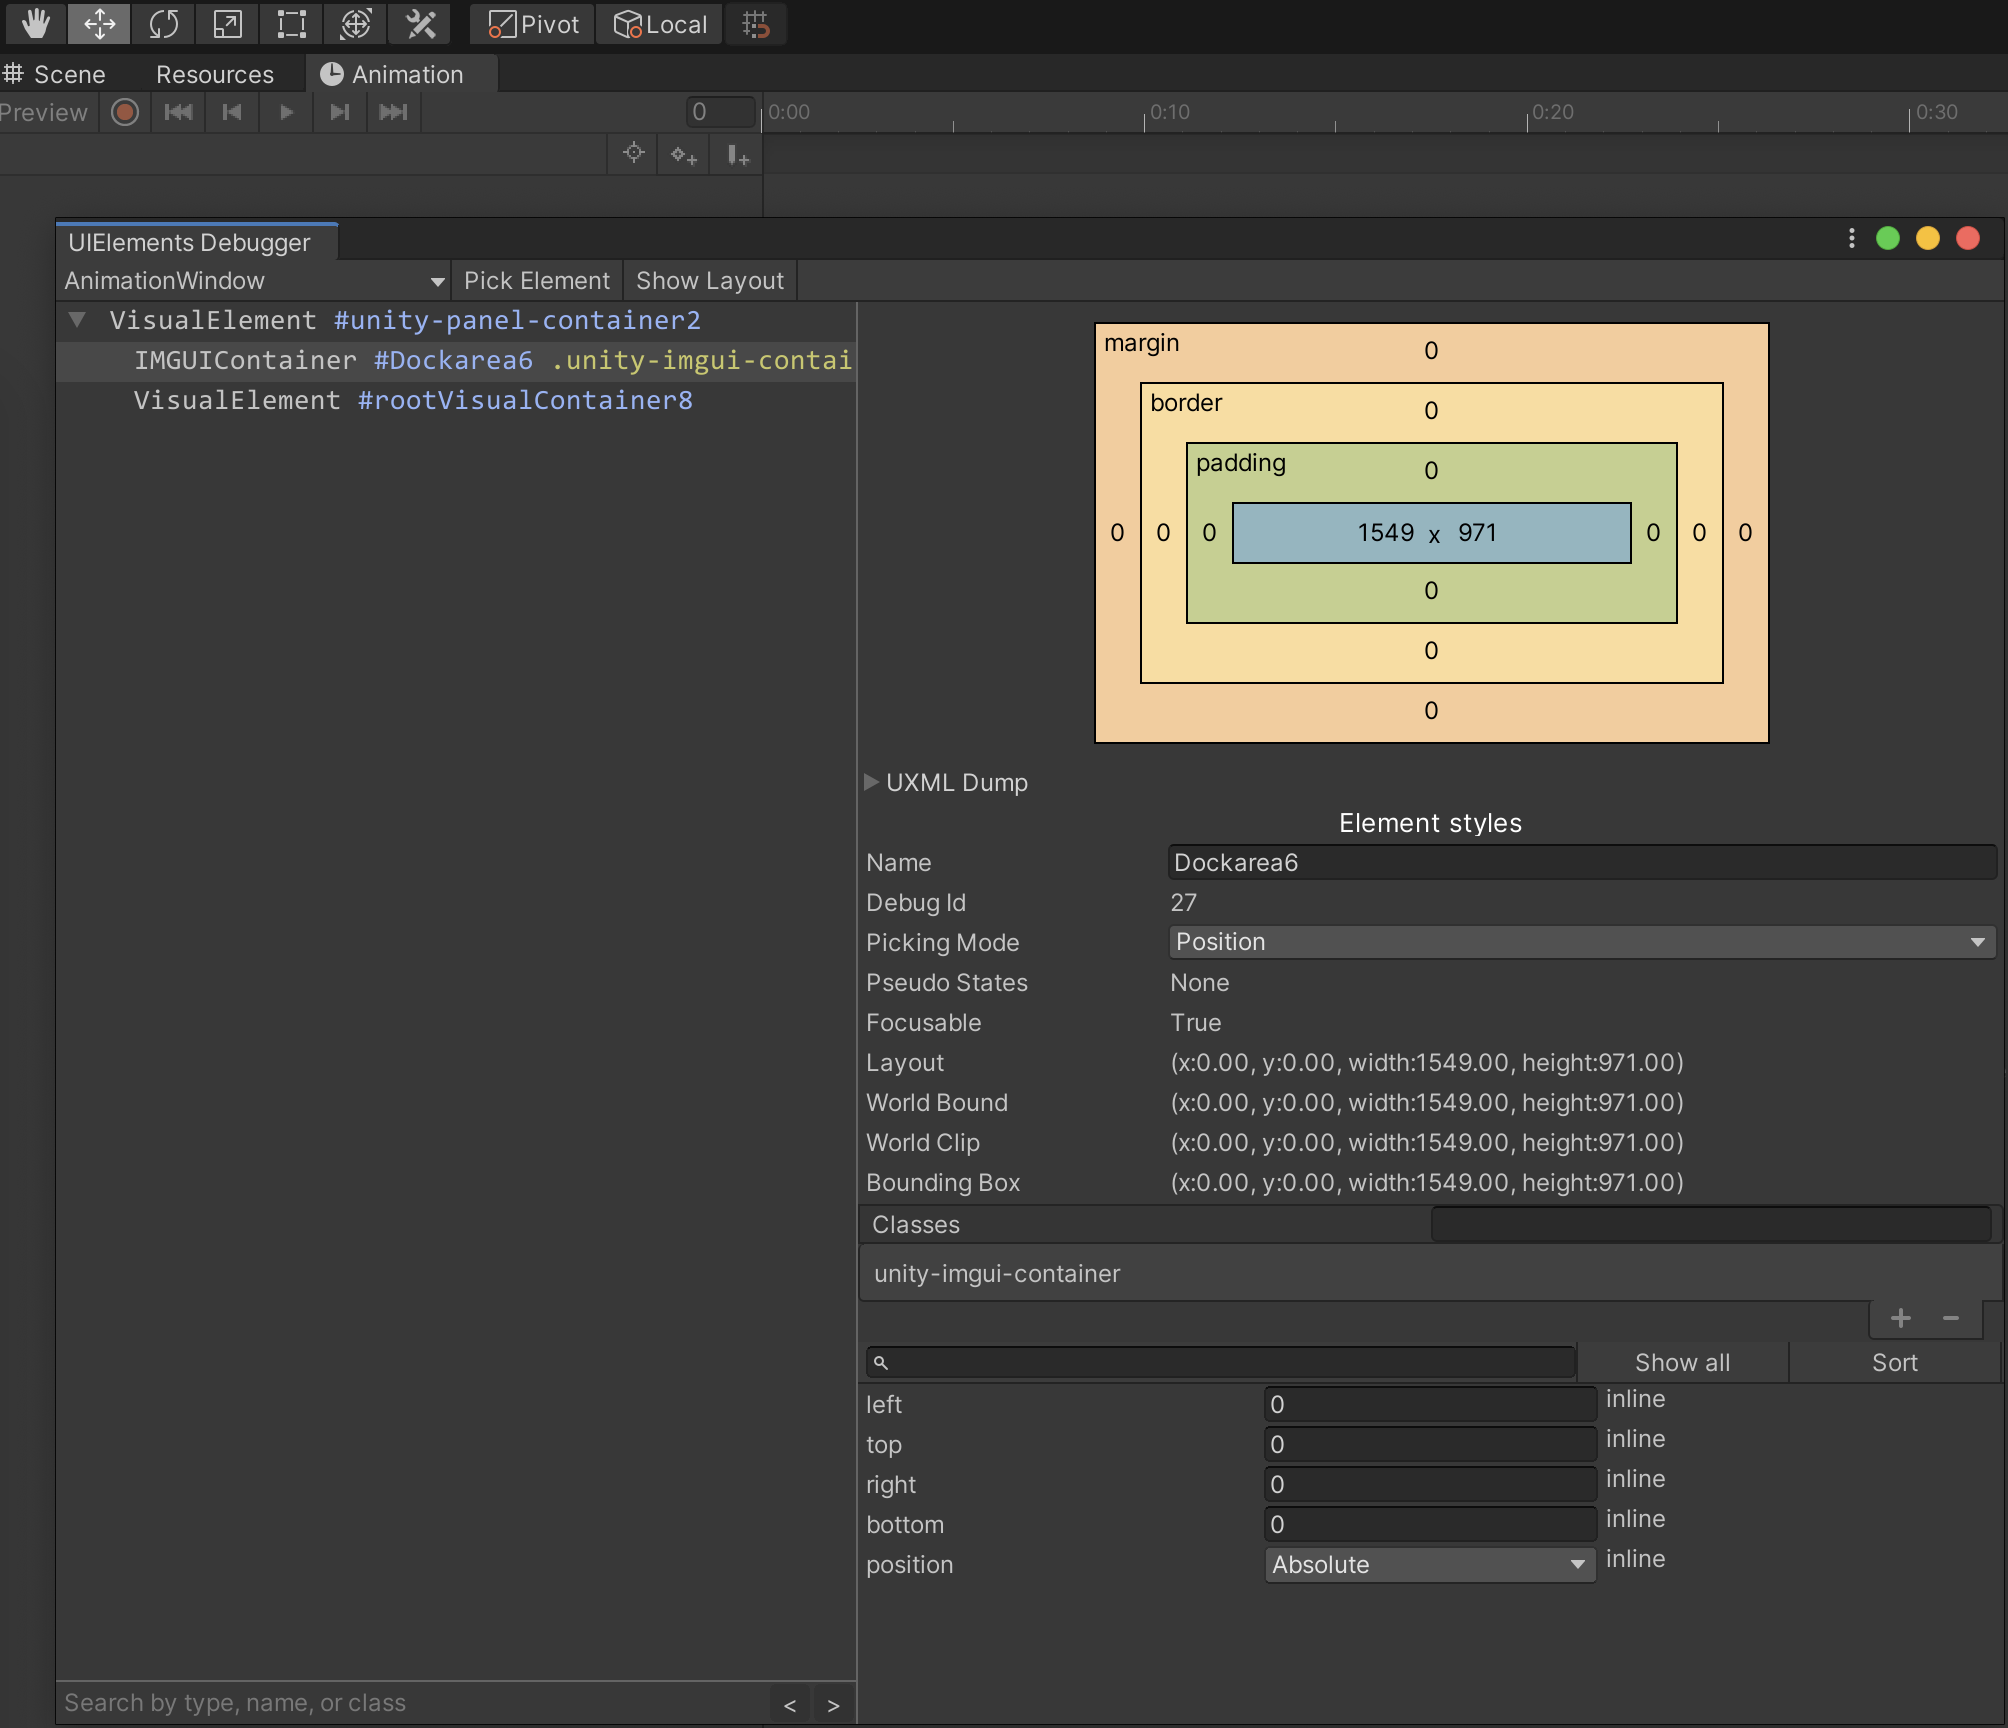
(Left) The UIElements Debugger window with the Animation window selected. It's an old window so it just contains an IMGUIContainer. We'll need to look at the IMGUI Debugger for its contents.
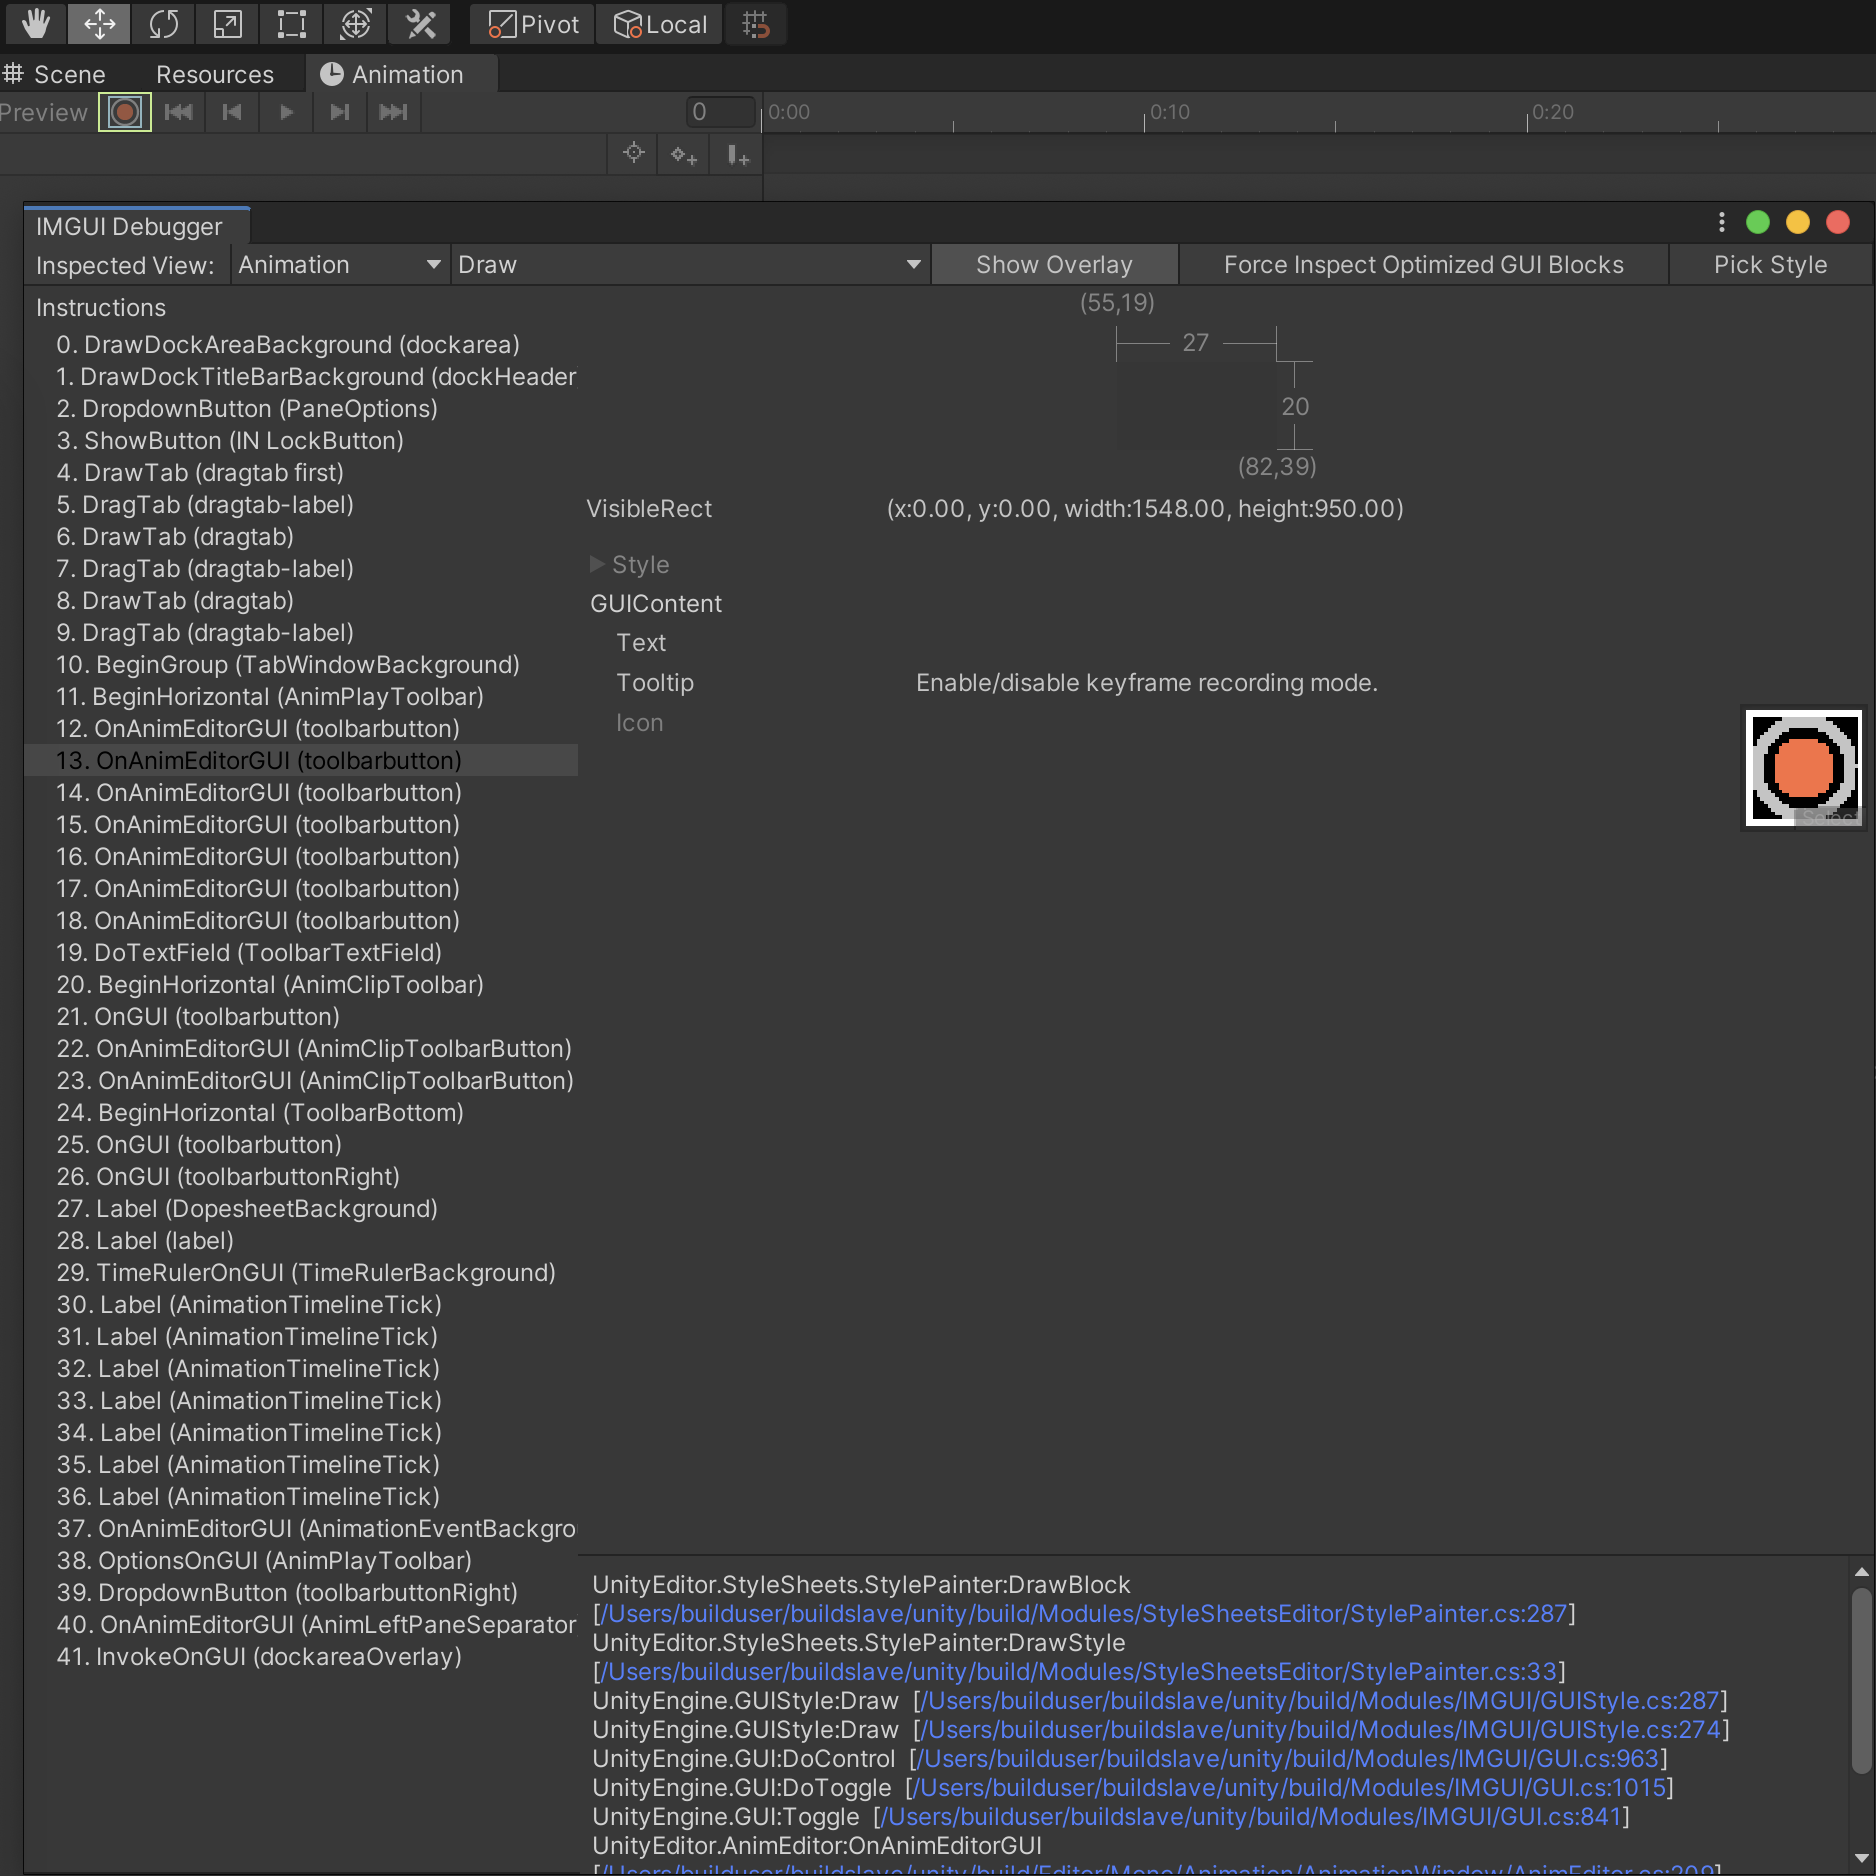
(Right) The IMGUI Debugger window with the Animation window selected. All of the individual UI pieces are represented here by the calls made to display them.
By default the calls shown are Draw phase so all controls have resolved dimensions. If windows use the EditorGUILayout API you’ll need to change the phase via the second popup in the top left from Draw to Layout or Unified to see the requested dimensions.
When you select a list item (in this case, let’s pick the first call to OnAnimEditorGUI (toolbarbutton)). When doing so, a faint highlight appears on the window around the control and we can see from the debugger itself that this corresponds to the Preview toggle button in the top left of the Animation window. Since that one doesn’t have an icon, we’ll select the next one down and see that as you might have guessed from the order of the buttons this corresponds to the red record button. As with the preview button, the debugger highlights the rect in the window and displays the rect dimensions along with the style, text, tooltip, and icon that are used. We can see that the icon does match the one shown in the UI and that there’s a very hard to read Select label on top of the image that indicates what will happen when clicking on the icon. If you click on this one, you can see that unfortunately it just pings the root of the Assets folder in the Project window, which seems to be a fallback location when the resource you’re looking for is hidden. It’s also unfortunate that the Debugger doesn’t name the icon although since not every icon will have a name I suppose it’s understandable.
Going to the Source
Although the debugger didn’t turn up the location or name of the icon, we have another option. I turned as I often do to Unity’s open source C# source reference for the Editor. If browser bookmarks were physical objects, the one I have to this repository would be in tatters from overuse. Using GitHub’s Go to file search, I typed in “AnimationWindow” and found many matches. Unfortunately no icon references appeared in AnimationWindow.cs; although it is responsible for managing the window, it’s pretty high level since it’s a pretty complex window. However, I did find references in AnimationWindowStyles.cs to the aforementioned media controls.
Note that when viewing Unity’s various GitHub repositories, it defaults to master which may diverge quite a bit from the last Long Term Support branch. Built-in icons could be added, removed, or renamed between versions.
The icons are acquired in the AnimationWindowStyles type using an undocumented method, EditorGUIUtility.TrIconContent. This is essentially just an Editor localization-aware wrapper around a documented method, EditorGUIUtility.IconContent. Presumably the Tr prefix stands for Translate. As the IconContent docs indicate, this method can be used to convert a texture name into a GUIContent instance. In this case, the GUIContent instance you get back from IconContent will just have the icon and tooltip (if specified), no text. Also, unless you want to utilize Unity’s localizations verbatim, you can just use the documented method EditorGUIUtility.IconContent. If you want to look at how Unity’s implemented the UI for something, searching in the source for GUIContent usage is usually a good start.
If you haven’t done any IMGUI scripting before, GUIContent is an aggregate of text, an icon, and a tooltip used by the IMGUI APIs to populate buttons, images, and labels.
Looking the Part
The IconContent method is also responsible for handling skin-swapping (using dark icons for the light skin and light icons for the dark skin) as well as loading higher resolution versions of the icon when the EditorGUIUtility.pixelsPerPoint value is higher than 1.0 (i.e. on retina displays). If you browse the source in the GitHub repository, you can see that there are a variety of internal methods responsible for handling the fallbacks that either prepend d_ for the dark skin or @2x for higher resolution versions. If you dig far enough through the calls, eventually they all call EditorGUIUtility.Load which in turn calls EditorResources.Load and unfortunately that’s where the trail ends since at this point it calls into native code.
At this point I was about to give up since I don’t have a native source license. However, the EditorGUIUtility class did include a warning referencing EditorResources.editorDefaultResourcesPath. There are also references elsewhere in the StyleDebugger element used by the UIElements debugger to a file called Library/unity editor resources when listing the location of an asset. I tried searching for unity editor resources in the Project window and that didn’t turn up any results either, either because the AssetDatabase.FindAssets method isn’t setup to search the location those files are in or because the assets have hideFlags with HideInInspector toggled on.
Unpacking Fundamentals
Eventually I looked at the content installed with the editor. As it happens, there are two undocumented files inside the Contents/Resources folder in the installation - unity default resources and unity editor resources. If you’re using a Mac, you’ll need to right click on the Unity.app file for the version you’re using and pick Show Package Contents to be able to see them inside the folder. Both files are binary blobs but I’m not going to dwell on the format since they can be opened via AssetDatabase.LoadAllAssetsAtPath. It provides access to all the sub-assets when using the previous file path - Library/unity editor resources It works the same for Library/unity default resources, too.
If you want your own icons to be skin- or resolution-aware, you can provide alternate versions with the d_ prefix or @2x suffix as noted above. Any icons placed in the Assets/Unity Editor Resources/Icons folder will also be loadable with EditorGUIUtility.IconContent.
While you can use sub-assets from both parent assets in the editor, you will get a build error if you try to reference the Library/unity editor resources asset or its sub-assets in a built player since it won’t be included at build time. If you still want to use them at runtime, I’d recommend building a tool to copy individual sub-assets into your project rather than copying the whole asset.

Visualizing the Goal
In order to provide quicker access to this content across multiple projects, I threw together a simple UIElements-based Resources window to visualize the content inside both built in resource packs. Although the window is simple enough that IMGUI would also have worked, I chose the newer UIElements API to provide better performance given the sheer number of elements I’d need to manage - almost 5000. An IMGUI-based list using either TreeView or the undocumented ReorderableList would require a call per list element each frame no matter how many are on screen which would slow to a crawl the more complex the individual element UI becomes. On the other hand, the UIElements ListView only binds UI for elements that are visible.
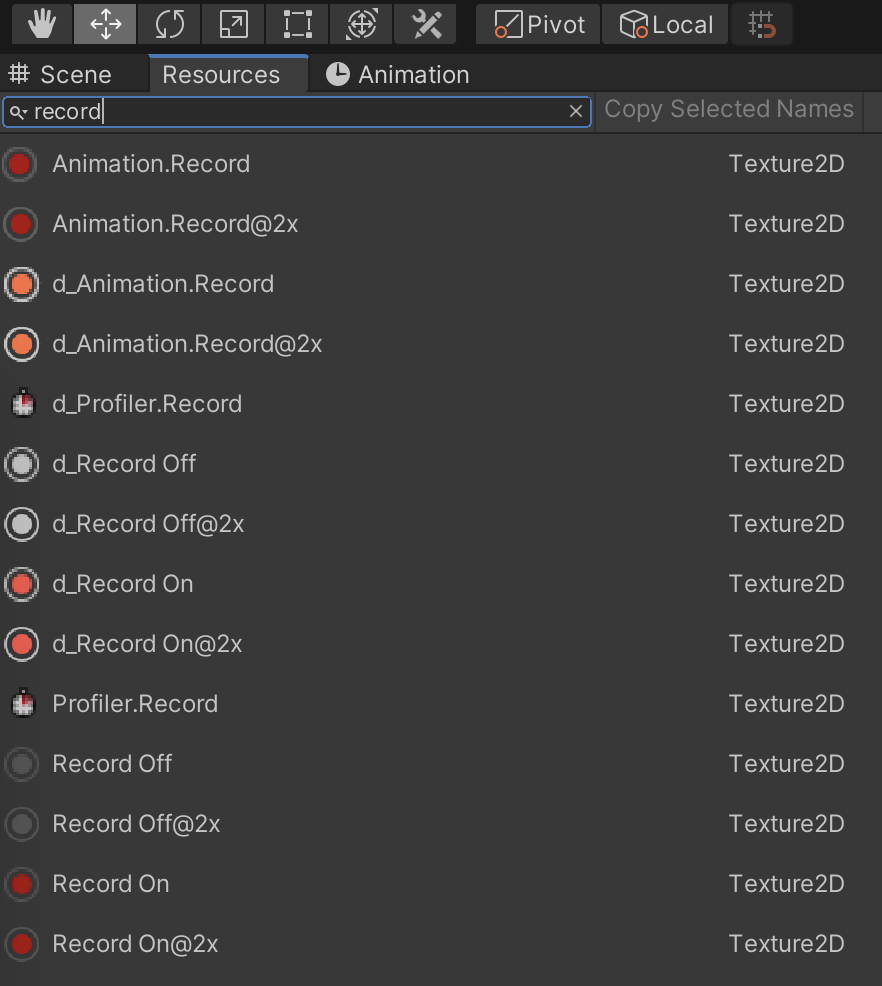
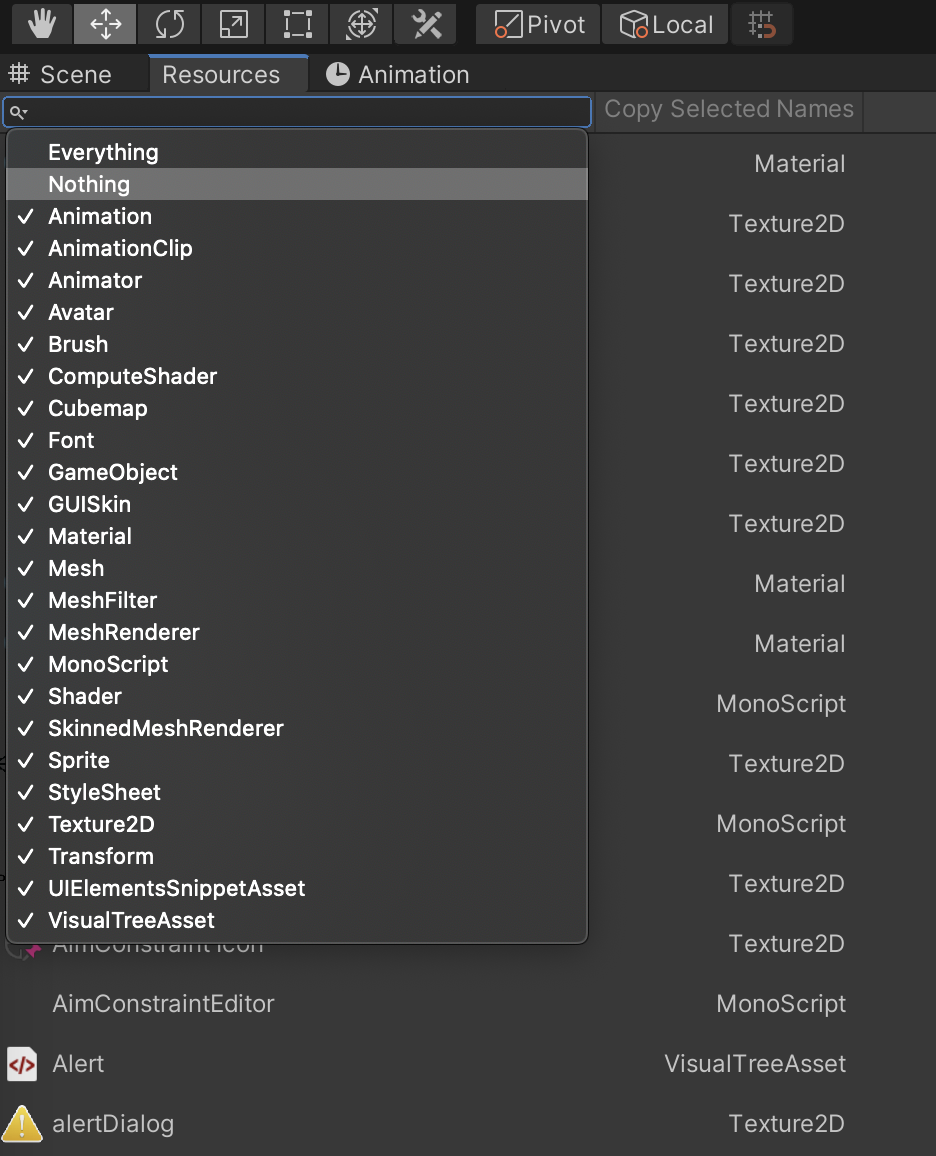
For each element in the list, the UI shows the texture itself (or the texture of the asset type), the name of the asset, the type of the asset, and the location of the asset. For efficiency I’m acquiring the set of assets once and then filtering a separate copy of the asset list based on a search field in the top left of the window. Since there are about a dozen different types of assets including textures, the search also contains a dropdown to filter the types shown in the list so you can easily limit the results to just textures. It supports a simple case insensitive search of the asset list, too. For simplicity I decided not to try and consolidate “duplicate” textures either, so you’ll see individual entries for each skin- or resolution-based variant.
Although a lot of Unity’s UIElements examples include heavy use of .uss stylesheet files to describe the element layout, I generally prefer to just specify everything in code to make it easier for other engineers to follow. It’s more pedantic but more discoverable, too.
Packaging It Up
If you want to add this window to your project, you’ll need to install it as a git-based package via Unity’s Package Manager window (Window->Package Manager) using the Source Code link at the bottom of this post. As a caveat, it does utilize reflection to call an internal EditorGUIUtility.LoadIcon method since IconContent always logs a warning when asked to load an icon that doesn’t exist, so this may not work in future versions of the editor if they change/rename that method. This was necessary to avoid warnings when trying to find icons for asset types that don’t have one. You can just use the normal EditorGUIUtility.IconContent method for accessing resources if this isn’t something you don’t care about that warning.
Once the package has been installed, you can open the Resources window using the Window->General->Resources menu.